Documentation:Open Badges/Create/Wordpress/Create Badge
Creating a Badge
Before you can issue a badge to your student, you need to create one! This guide will show you how to upload an image that will become your badge, and how to set the requirements for earning it.
|
Step by Step
Step 1 - Dashboard
Go to Dashboard > Badge OS > Badges

On the top of the page, click Add New.
Step 2 - Name Your Badge and its Requirements
Write the name of your badge in the title space. In the main window, outline the requirements for earning the badge. For example: "This badge is earned by writing three blog posts."
If you are planning to allow earners to share their badges using a Mozilla Backpack, the information here will be displayed as the criteria for earning the badge. Consider what information will be useful to badge earners learning about the badge as well as what added context might be useful to external viewers.

Step 3 - Add an image
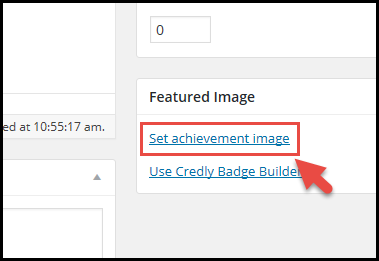
To give your badge an image, click Set Achievement Image on the sidebar.

Navigate to an image on your computer and upload it. Enter the title and description, and click Set Achievement Image.
Make Badges Visible to Students
You may have implemented a pop-up notification that alerts students to their newly earned badge. But once that pop-up goes away, your students could lose track of what they have earned. To avoid this scenario, it is a good idea to ensure their earned badges are visible. This section will show you how to do this.

Step 1 - Dashboard
Go to Dashboard > Appearance > Widgets

Step 2 - Select a Screen Location
Under the Available Widgets section, click and hold the rectangle containing Badge OS Earned User Achievement. Drag it across the screen, and drop it onto one of the boxes indicating a screen location. Next, click Save.

Your students should now be able to see their earned achievements.

