Documentation:WordPress/Plugins/BadgeOS
Overview
BadgeOS is a plugin that enables badging feature to your CMS (Wordpress) website. There are several steps needed to integrate badging into your website. The process is as follows:
- Step 1: Access BadgeOS and additional Plugins
- Step 2: Set-up Login Links
- Step 3: Creating Badges
- Step 4: Develop Badge Issuing Triggers
- Step 5: Integrate with Credly (Note: This step is only require if you want badge earners to share their badges through social networks)
Step 1: Access BadgeOS and Additional Plugins
In order to add badge functionality to the site, you will need to activate BadgeOs Plugin. The plugins are currently only available to Open Badges UBC pilot projects. If you are interested in being a part of the pilot, submit your request through the "Apply to the Pilot" form.
If you have obtained permission to use the BadgeOS Plugins through the Open Badges UBC project, follow these instructions:
- Go to support.cms.ubc.ca
- Click on 'Submit Questions'
- Select your Unit
- Fill in the form. Beside Title, type Request for activation of the plugin
- Beside Your Question, indicate that you want to activate the BadgeOs Plugin.
Adding additional functionality (Optional)
There are multiple Add-on Plugins available to enhance the badge functionality on your site. Such as:
- LearnDash LMS and BadgeOS LearnDash Add-On: You may want to activate this plugin if you want to add quizzes to your website, and reward users with badges once they complete the quiz.
- BadgeOS Notifications Add-On : Activate this plugin if you want notification to pop up when a user earn a badge. It helps users to be aware of the badge that they earn.
- BadgeOS Triggers Add-On : If you want to add custom AND/OR step logic and the ability to restrict badges to certain roles, activate this plugin.
Step 2: Set-up Login Links
In order for participants to earn a badge, they will need to be logged in to UBC CMS or UBC Blogs first. The most convenient way is to add a login link to your CMS site:
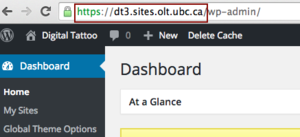
- Create your login URL. Your login URL for your website will be:https://cas.id.ubc.ca/ubc-cas/login?service=https%3A%2F%2Fsites.olt.ubc.ca%2Fwp-login.php%3Fredirect_to%3Dhttp%3A%2F%2FYour Site URL%2F?badgelogin=1. For example, if your website is dt1.sites.olt.ubc.ca, your login URL will be: https://cas.id.ubc.ca/ubc-cas/login?service=https%3A%2F%2Fsites.olt.ubc.ca%2Fwp-login.php%3Fredirect_to%3Dhttp%3A%2F%2Fds1.sites.olt.ubc.ca%2F?badgelogin=1. You can find your website's URL form Dashboard.

You can find out the URL of your website from Dashbaord. - Add this link to a page or a post or a widget. When a badge earner click on this link, they will be able to start earning badges
Step 3: Creating Badges
- Go to Dashboard> Badge OS > Badges
- Click on Add New
- You are now able to create a badge. Enter title to add a name to your badge. For example, "Contributor"
- Use the visual editor to add the description of the badge. For example "Earn a contributor badge by submitting 2 comments on any of the blog post"
- On the right side menu, under Achievement Image, click on set achievement image to add an image to your badge. On best practices on how to create a badge image, see Badge Icon Design.
- Under Achievement Data, set a congratulation text. For example "Congratulations! You have earned contributor badge!!"
Step 4: Set a trigger(or steps) for Badges
Trigger is an essential component for badges. Trigger allows you to set the condition for badges. There are many options for triggers:
- Login to the site
- Commenting on a post or page
- Creating a new page or post
- Completing a quiz
- Earning any or a specific badge
Step 5: Credly Integration
If you want your badges to be portable to social network sites, you will need to set-up a Credly account.
- In order to integrate Badge OS with Credly, you will need to create an account in Credly, follow the instruction below to [Create a Credly account. If you already have an account in Credly, skip to next step.
- Go to your CMS site
- Go to Dashboard>BadgeOS>Credly Integration
- Select yes for Enable Badge Sharing via Credly.
- Under Get Credly API Key, enter your username and password of your Credly Account.
- Click on Save Setting.
- A section called Credly Field Mapping will appear. This option allows you to control the type of information you want to send it out to Credly. You can set it to default.
- Click on Save Settings
- Go back to Dashboard> Badge OS > Badges to edit your badge. Under Badge Sharing Option, select Yes for Send to Credly when earned option.
Video Resources
You can also watch the video tutorial to help you with setting up Credly Integration.
FAQ
See the FAQ page to solve common questions in BadgeOS and LearnDash.
