Documentation:Open Badges/Create/LearnDash/Create Quiz


This toolkit will show you how to create a quiz in WordPress using the LearnDash plugin. There are three stages to creating a quiz. In the first stage, you will specify quiz implementation rules using the Advanced Quiz Menu. Next, you will write the questions and answers for your quiz. And finally, you will publish the quiz so that it is accessible to your students.
|
Rules for Quiz Implementation
Before you create the questions and answers for your quiz, you'll need to specify the rules that determine the way the quiz is implemented. For example, you may want to specify a time limit for answering questions. Here's how to create these rules,:
Step 1 - Setting up
Go to Dashboard > Advanced Quiz > Add Quiz

Input a name into the Quiz Title box.
Step 2 - Implementation Options
You'll notice many self-explanatory options for determining the implementation of your quiz. The following tips may be helpful:
- Under Options, select Hide Quiz Title. Check this option. Otherwise, the title will appear twice to your students - once as a page title, and once as a quiz title.
- Under Options, select Activate for Statistics. Checking this option will generate statistics on your quizzes, such as the number of passes, fails, and points earned. (Note: You can obtain these statistics via Dashboard > Advanced Quiz > Hover on the quiz title > Statistics).
- Under Question Options, select Force user to answer each question. This means users will not be able to skip a question.
Step 3 - Writing Instructions to Quiz-takers
If you want a message to appear before the start of the quiz, input this message into the Quiz Description box. (Note: WordPress will not permit the creation of a quiz without text in this box.)
Step 4 - Saving Your Quiz Implementation Rules
Save your quiz implementation rules by clicking the Save button in the bottom left.

When you want to find your quiz again, click Dashboard > Advanced Quiz
Step 5 - Reusing your Quiz Implementation Rules
You may want to reuse these implementation rules for other quizzes. To do this, you need to save the quiz as a template.
At the bottom of the page, enter a template name and press Save as Template.

To load the template, first create a new quiz. Next, go to the top right of the screen and click the dropdown menu. Once you have selected your template, click Load Template.

Write the Questions and Answers for your Quiz
Step 1 - Getting to the "Questions" Window
Go to Dashboard > Advanced Quiz > Hover on the quiz title > Questions
Step 2 - Adding a Question
On the new page, select Add Question.

- On the question page, you have several options. You can add a title, as well as the number of points to be awarded for each question.
- In the box titled Questions, type the question you would like to appear on your quiz. For example: "Who painted the Mona Lisa?"
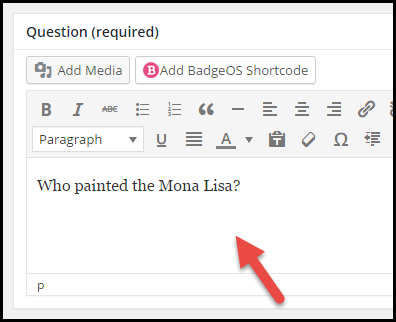
box for typing badge quiz question

Step 3 - Adding an Answer
Under Answer Type, select the answer type you prefer.

Under Answers add choices and answers for the quiz questions.

To save your question, click Save.
Step 4 - Adding More Questions
To add more questions to the quiz, click Back to Overview (at the top of the page) and repeat the above steps.
Make your Quiz Accessible to your Students
To make your quiz accessible to your students, you must create a "Quiz" (which looks like a WordPress Page) and attach the quiz questions to this "Quiz."
Step 1 - Setting up
Go to Dashboard > Quizzes > Add New

Step 2 - Add a Title
Enter the title of the quiz. If you have already added the description of the quiz when you created the quiz questions, you do not need to add a quiz description.
Step 3 - Add Passing Rules
If you scroll down the page you'll see several self-explanatory options for determining the passing criteria. For example, you can specify the passing percentage.

Step 4 - Attach your Questions and Answers
Next, attach your quiz question and answers to the "Quiz" page. In the box titled Quizzes, click Advanced Quiz. Press the dropdown menu and select the quiz you have created.

Click Publish. Your quiz should now be accessible to your students.