Documentation:UBC Content Management System/CLF Theme/How to insert a Spotlight Rotation in a Page
| UBC CMS Codex | |
|---|---|
| Welcome to the support documentation for the UBC CMS Service. | |
| Contents | |
| UBC Collab Theme | |
|
UBC Collab Theme Overview | |
The CLF Advanced WordPress theme allows you to create a Spotlight Rotation feature that could be placed on the Frontpage of your site (by default) or on any page of your site (using a specific shortcode).
Spotlight Rotation Styles
The CLF theme offers you 5 possible styles for the Spotlight Rotation: UBC.ca Standard Spotlight, Horizontally Sliding Gallery, Blank Sliding, Transparent Sliding, and Multi post Sliding.

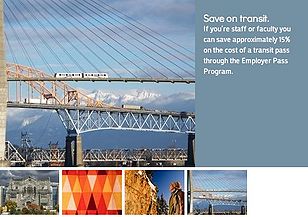
UBC.ca Standard Spotlight

Horizontally Sliding Gallery

Blank Sliding

Transparent Sliding
Multi post Sliding


Spotlight Rotation Set Up

(numbers on image correspond steps)
- Go to Appearance > Theme Options > Frontpage and scroll down to Spotlight Rotation Options section.
- Choose the look and feel of the Spotlight Rotation by selecting your spotlight rotation style.
- Specify the category of posts you wish to see in your spotlight rotation. The spotlight rotation draws its content from the posts grouped in a specific category. Specify the category you want it to draw from. Generally it is a good idea to create a category like "Spotlight" or "Featured" that makes it easy to identify posts which you want to feature on your spotlight. You can add a category by clicking on the Add Category link.
- Optional: You can also set the number of slides shown in the spotlight rotation. NOTE: the spotlight rotation will display the latest posts from the specified category, up to the number of slides you set here.
- Optional: The "Read More Button" checkbox enables a "Read More" button to appear on each slide which will take the user to the post that the slide is tied to. You may also enter custom text in the text field to replace the default "Read More" label.
- Optional: The image height of the slides can also be adjusted. This, however, is not recommended unless absolutely necessary.
- When you are done, click on the Save Changes button found at the top or bottom of the page.
Adding Content to the Spotlight Rotation
- Edit or create a Post for the Spotlight content
- Make sure you have a short summary of your post under "Excerpt"
- You also need an image for the spotlight. To upload an image:
- Click on "Add an Image" button
- Select the file either from your computer or from the Media Gallery
- Click on Use as featured image link (this will ensure that the image will appear as a Spotlight Rotation)
IMPORTANT: Make sure that the post is associated with Spotlight category or whatever category you created to pull the content from into the Spotlight rotation.


Inserting Spotlight Rotation on Other Pages
By default Spotlight Rotation is set to appear on the Frontpage, however you can insert Spotlight Rotation on any page by using the slideshow shortcode: [slideshow width="560" height="300"].
NOTE: Width and height parameters correspond to image width and height.

Changing the order of the slideshow
The slideshow display follows the order chronological by the date of the post. For example, if Post #1 is published on March 15th, 2012 and Post #2 is published on March 16th 2012, then the slideshow will display Post #2 first and then Post #1. The published date can be modified in the Edit Post page. To change the order of the slideshow simply change the published date of post #2 to March 14th (or any date before the published date of post #1).
See Also
- Removing the slideshow from the front page
- Front page options
- Portfolio slideshow Plugin to create a slideshow using all images uploaded to the page.