Documentation:Research Commons/Thesis Formatting/Templates and Guides/PC/Word 2003/Basic Guide
| Research Commons UBC | |
|---|---|

| |
| UBC Library | |
| Welcome to the wiki for the Research Commons. This wiki is a space for research commons staff and graduate students to contribute resources. | |
| Associated Pages | |
Introductory Pages
To begin formatting your thesis document, create a Title Page, Abstract Page and any other pages that you may need later to create your Introductory Pages. These pages can simply be blank placeholders, but are important to include from the outset as they impact the page numbering and table of contents set up in the steps below. The second section you will create by making a Section Break will be called the Body of the Thesis.
Page Numbering
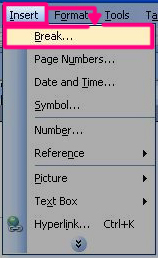
Step 1: Move the cursor to the end of your Introductory Pages, Insert -> Break...
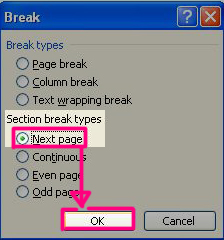
Step 2: Select "Next Page" under 'Section Break Types' -> OK
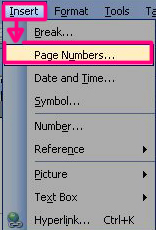
Step 3: Select any page in your Introductory Section, Insert -> Page Numbers...
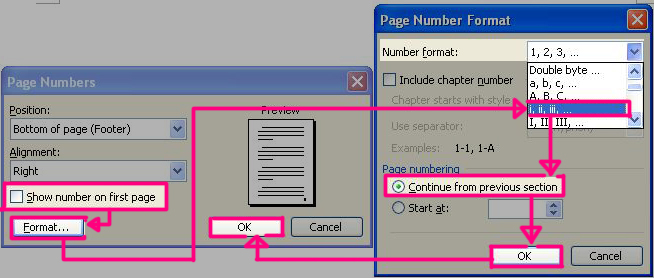
Step 4: Uncheck "Show number on first page -> Format -> select Roman Numerals "i, ii, iii..." for Number Format -> Choose "Continue from previous section -> OK -> OK
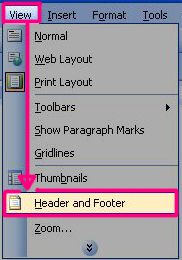
Step 5: Go to View -> Header and Footer
Step 6: Click on the Footer or Header of your Body Section -> Uncheck "Link to Previous"
Step 7: Notice the "Same as Previous" tag should be removed
Step 8: For separate Numbering required for Body of essay, Go to Insert -> Page Numbers...
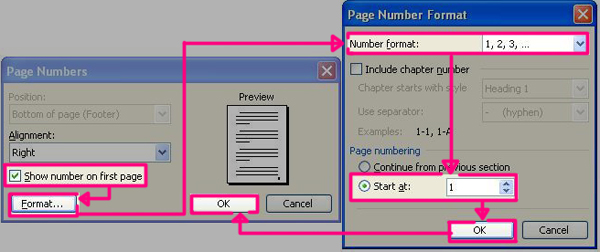
Step 9: Make sure "Show number on First Page" is checked Format -> select "1, 2, 3..." for Number Format -> Choose "Start at..." and enter '1' -> OK -> OK
Table of Contents
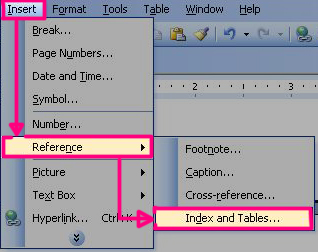
Step 1: Go to Insert -> Reference -> Index and Tables...
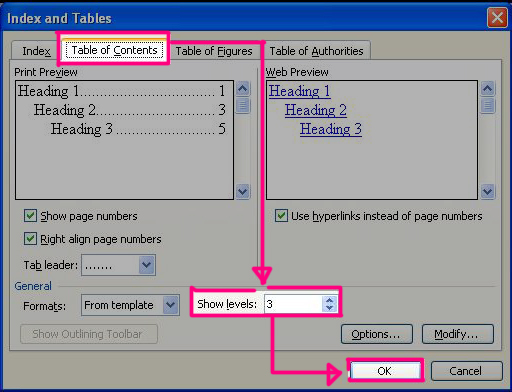
Step 2: Go to Table of Contents -> Determine the levels you have -> OK
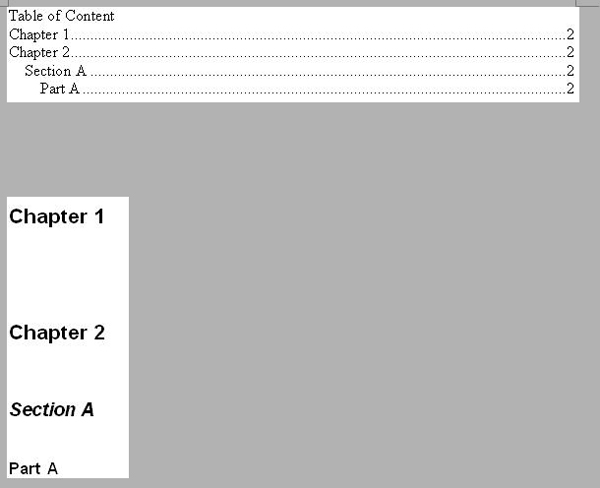
Step 3: This is what you should see
Step 4: Highlight your title and choose the heading style for it (Heading 1 will be the Top Level, e.g. Abstract, List of Tables, Chapter Title. Heading 2 will indent once, Heading 3 will indent more...etc)
Step 5: Right Click the Table of Contents -> Update Fields...
Step 6: Voila, Now we have every title updated! No more manual Table of Contents!
List of Tables/Figures
Step 1: Go to Insert -> Reference -> Index and Tables...
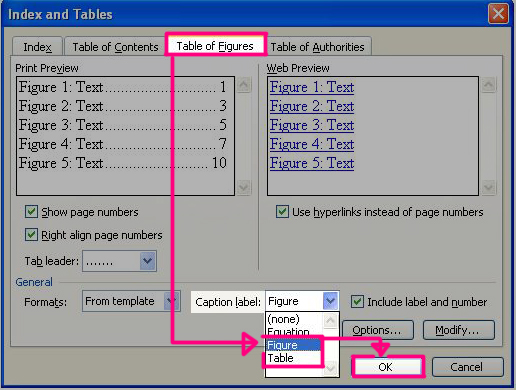
Step 2: Go to Table of Figures -> Choose Table for creating a "List of Tables", Figure for "List of Figures" -> OK
Step 3: This is what you should see
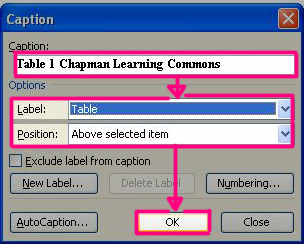
Step 4: Select your Table/Figure Insert -> Caption...
Step 5: Select the type of label (Table or Figure), and you can choose where the caption should appear; then type in the caption you want -> OK
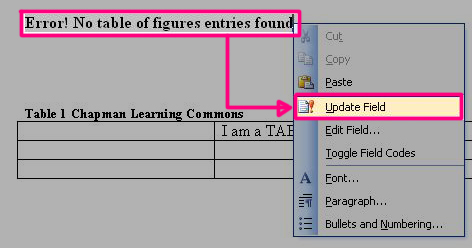
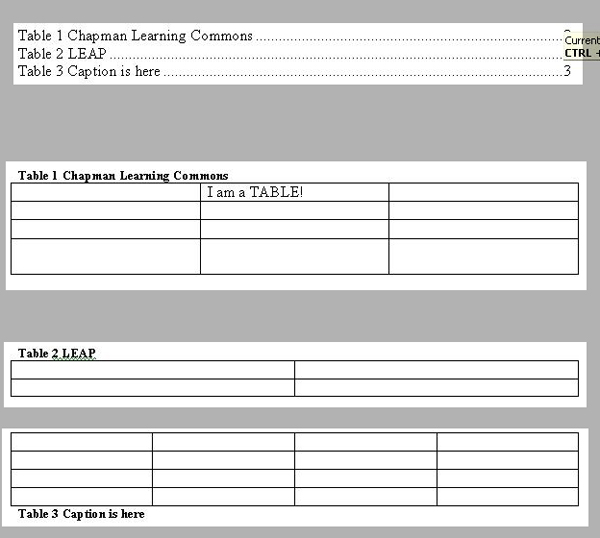
Step 6: Right Click on the List of Tables/Figures -> Update Field
Step 7: Now you should have your tables or figures updated here! (The example shown is a List of Tables.)
