Documentation:WeBWorK/How to upload sections using VLOOKUP
In some cases, you may want to update a field for many/all students into WeBWork. Information from Canvas cannot simply be copy/pasted into a spreadsheet and uploaded to WeBWorK, therefore an Excel function called VLOOKUP is required.
Below are instructions on how instructors can import course sections or a class list from their Canvas course to their WeBWorK course roster. This will require working with two Excel spreadsheets at the same time (WeBWorK and Canvas course CSV files).
Updating the class list and sections in WeBWorK
Once your WeBWorK course is created through Canvas (see WeBWorK/Canvas integration for instructions), you will have your class list synchronized automatically. In some cases, you may want to update a field for many/all students, e.g. section information. Please note that only certain fields can be updated this way, those fields are:
- Section
- Recitation
- Comment
The rest of the fields are synchronized with Canvas. If you change them, they will be overwritten by the next update. If a student needs to change the name or email address, they need to do it in SIS/SSC. Then those changes will be carried over to Canvas/WeBWorK automatically. If you would like to turn off the automatic classlist sync, please see this page.
Downloading the WeBWorK class list
- Access your WeBWorK course site via Canvas.
- Click Classlist Editor.
- Click Export.
- Select the options in the fields as follow:
- Export which users?- "all users."
- Export to what kind of file?- "Enter filename below."
- Filename- Enter a name for the class list export file (ex: “Myclasslist”).
- Click Export
- Click File Manager.
- Select the .lst file you exported in step 4 above, and click Rename. Change .lst to .csv (ex. If your file is named "Myclasslist.lst", change to "Myclasslist.csv"). Click Rename.
- Select the file again, and click Download.


Downloading the Canvas class list
- Log into your Canvas course.
- Click Grades.
- Click Actions, and select Export. The export file may take some time to generate depending on the class size.
- Once Canvas finished generating the Excel spreadsheet export file, save the file to your computer.
Using VLOOKUP to fill in the section column in WeBWorK
Data from the Canvas class list can be filled into the WeBWorK class list using the VLOOKUP function in Excel.
- Open both the Canvas and WeBWorK CSV class list spreadsheet.

Open two spreadsheet side by side - In order for the VLOOKUP formula to work properly, the SIS Login ID column in the Canvas spreadsheet must be to the left of the Section column. If this is not the case, you will need to create a new column to the right of the SIS Login ID column and copy/paste the Section information into it.
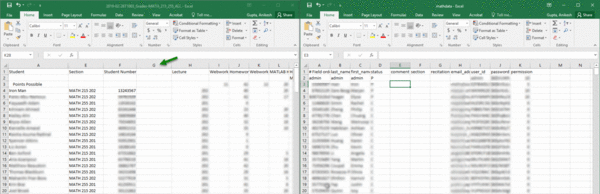
Add another section column to the right of student number column - Once the columns are in the correct order in the Canvas spreadsheet, go to the WeBWorK spreadsheet.
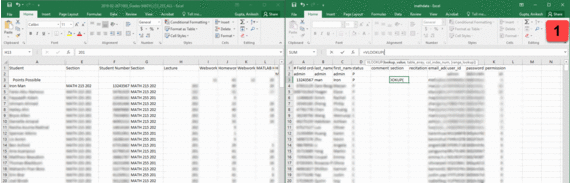
- Select the first cell under the Section column that corresponds with the first student number.
- Enter "=VLOOKUP(" .
- Select the first user_id, and enter a comma "," after the first parameter value.
- Go to the Canvas spreadsheet, and select the two columns, SIS Login ID and Section all the way to the bottom (last entry in the spreadsheet).
- In the WeBWorK spreadsheet, add a comma "," after the second parameter value.
- Enter the value "2" followed by another comma ",".
- Enter or select "FALSE" from the drop-down menu to find the exact match.
- Close the bracket of the formula, and press Enter.
- Drag the fill handle all the way to the bottom of the class list.
- In the WeBWorK spreadsheet, go to File and click Save.
How to use VLOOKUP


Upload class list spreadsheet back to WeBWorK
- Access your WeBWorK course site via Canvas.
- Go to File Manager.
- Click Choose File.
- Select the file you have processed (you may overwrite the exported file) and click Upload.
- Select the file you uploaded, and click Rename. Change .csv to .lst (ex. If your file is named "Myclasslist.csv", change to "Myclasslist.lst"). Click Rename.
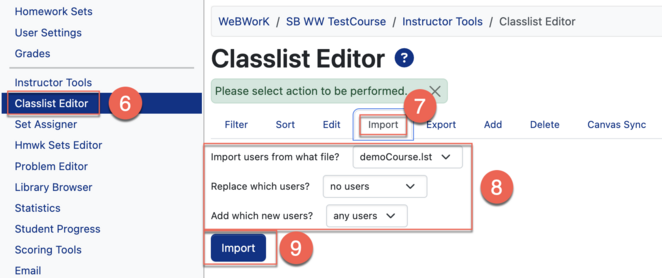
- Go to Classlist Editor.
- Click Import.
- Select the options in the fields as follow:
- Import users from what file?- Select your file (ex: Myclasslist.lst).
- Replace which users?- "any users."
- Add which new users?- "any users."
- Click on Import.

For further details about the class list file format: http://webwork.maa.org/wiki/Classlist_Files#.UNDeDWp2HGs