Documentation:UBC iClicker User Guide (Windows)/iClicker Interface, Settings and Preferences
Now that I have opened "Your Settings and Preferences", what do these settings mean?
For a description of each setting, click on the circular question-mark "Help" button ![]() beside each field.
beside each field.
- Please note that you will have to change these settings for every class, but not for every lecture.
1. In the General tab:
- Instructor's Remote ID: Enter the ID of your blue iClicker here to control your presentation software from anywhere in the lecture hall. If your blue iClicker came with a post-it go HERE for information on how to find out which iClicker ID to use.
- Frequency Code: The default frequency channel is set to AA. If you are the only instructor using iClickers in the vicinity, you may leave the frequency code unchanged. Otherwise, you or the other instructor will need to change the frequency.
- If you are in a classroom with a permanently affixed iClicker receiver hub, the frequency is fixed and will override any frequency change made in this feature.
- The freqency may need to be changed
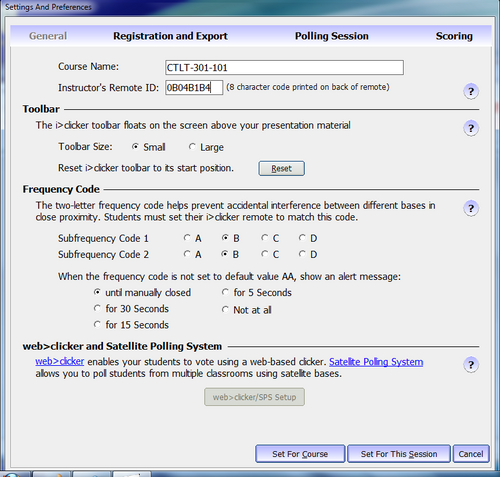
- Frequency Change Alert: When you change your frequency from the default, a popup will appear to tell students how to change their clicker frequency.

- The frequency in this alert will be set to the frequency in iClicker. If a permanently affixed iClicker receiver hub is in use, it will not be displayed properly here.
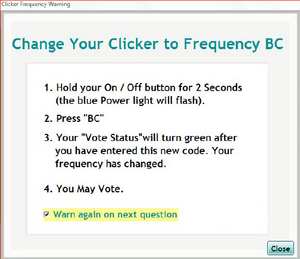
- NOTE: To change frequencies on the iClickers (This is also on the back of the iClickers):
- Press the On/Off button until the blue Power light flashes
- Enter the new frequency until a GREEN Vote Status light appears
- Redo this for every session since the frequency will revert back to AA every time the clicker turns off.

2. In the Registration and Export tab:
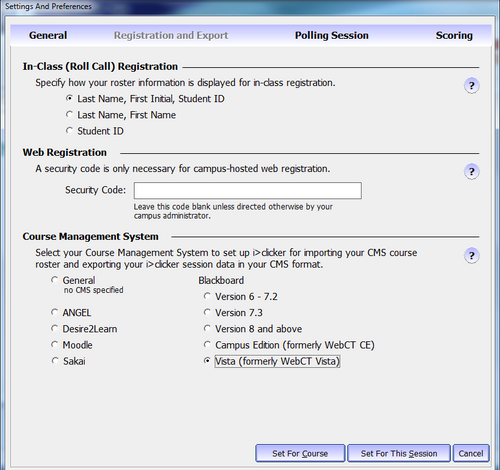
- Web Registration: You don’t need to enter a security code in this section. Leave this section blank.
- Course Management System: By default, the CMS option is set to "General". You MUST change this to "Vista" for ALL your classes .

3. In the Polling Session tab:

- Question Information: By default, iClicker names the questions in your clicker session as "Question 1, 2, ....". If you prefer to name your question AND add an answer (without showing your students), select "Show question information before each question."
- Polling Timer: You can chose whether or not to set a limit on how long your students have in order to answer a question by selecting "Count down from ___".
4. In the Scoring tab
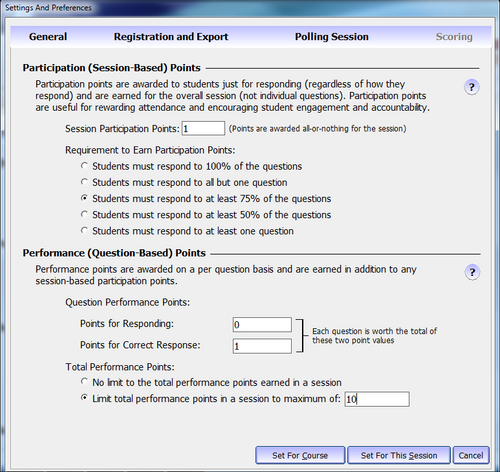
- Participation/Attendance Points: If students answer any questions in the session, they get participation points even if their answer for the question(s) is/are wrong.
- Performance Points: These points are awarded by question for specific answer(s); therefore, if the student gets a correct answer, they would be awarded the points.

5. Now press the "Set For Course" button.