Library:Circle/Statistics Module
cIRcle Wiki Template
This page is currently under development.
Welcome to the cIRcle library wiki template. This template was designed to provide a common look and feel to all cIRcle wiki pages with common elements ready for usage. It is also intended to provide a structure to allow wiki content to be transfered to Wordpress pages.
Usage
I have tried to capture tips and tricks about wikis to make them easy to use. When you look at this page in the editing view, you will see comments that are not visible on the standard page. Comments look like this: <!-- this is a comment -->. There are comments on how to control the number of items in your table of contents, page breaks, and other helpful tricks.
When using this template for an active page, please remember to remove the Usage and cIRcle Wiki Template sections before release.
Before creating new pages, refer to UBC Wiki guidelines for creating wikis and remember to locate other cIRcle pages.
You may want to consult the About cIRcle Editing Guide or the UBC WordPress and Wiki Tutorial for an overview of wiki editing basics. The Reference and Footnotes section is also quite helpful.
If you are creating this page from a MS Word document, copy and paste the text into Notepad first to remove hidden formatting.
WHEN YOU HAVE FINISHED YOUR PAGE, DELETE THE TEXT FROM HERE TO THE TOP
NEW PAGE TITLE
Summary
A two to three sentence summary of what this guide will describe for the user. Please try to include who the intended audience is, ie students or Library staff and/or why you would need to use this guide
Related Articles
Please add links to any related articles.
Step 1
Describe the steps. This is where you add your lovely prose.
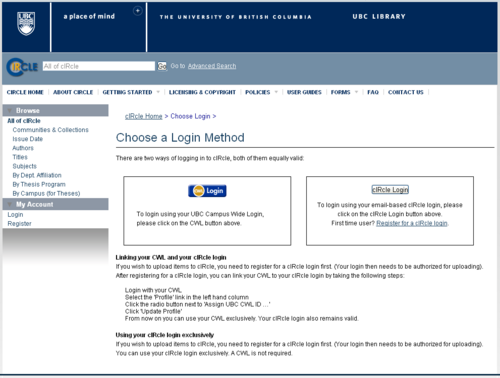
Images. As many of the cIRcle wiki pages utilize similar screen captures, but will often have to draw attention to different parts of them, utilizing a standard naming convention will help us from creating too much redundant content. The following steps will allow you to create a well-structured title.
- Date - use yyyy-mm-dd, by adding the date we can quickly see when a age was captured, ie. 2012-01-04 (2012 Jan 4th)
- URL title - try to use the title of the page you have captured, ie. cIRcle home
- Wiki page or element to highlight - identify how you are altering this edition from the basic structure. If you are focusing on the login section of the homepage then you would note ie. login
These three elements should be separated by a dash.
By using the first two elements, you can create a standard image to use, such as the main homepage as of January 2012, Home-01 12. Then you can add the third element of what you are highlighting for your particular use. So, if you are taking the basic screenshot of the cIRcle homepage and showing the login area, you would first check to see if there is a homepage picture and its date, Home-01 12. Highlight the section you want, ie login, and save the new picture as Home-01 12-login.jpg.
You may use whatever program you like, but Jing, http://www.techsmith.com/jing.html#, is an excellent and quick tool. It will add the date at the start of the file name for you (a big plus!), and then you can add the rest of your information. It also has helpful tools to let you draw a box or add an arrow.
It is best if you take a picture of a webpage and then save it as a template file - ie don't do any markups. Once you have the template picture, you can then add a markup for one specific task and save it as a new file.
After you have saved the file to the wiki, you should add one additional piece of metadata: a category. Categorizing files in a wiki allows them to be found easily during searches. While adding categories is important for wiki pages, it is especially important for pictures as they are much harder to find later on. After you have uploaded your image you should select edit and add . After you have saved the file you will always be able to find it by checking http://wiki.ubc.ca/Category:Circle
For help with images, see http://www.mediawiki.org/wiki/Help:Images
The image below provides a nice simple structure for use. The "500px" element restricts the image to a set width so your images' size don't run amok on the page.

Step 2
Describe the steps. This is where you add your lovely prose.
Images.
Tip Suggestions for handling a form or procedures efficiently.[1]
|
|
Step 2 Sub-Step
This is a substep. It will look the same, but will appear indented in the table of contents.
Describe the steps. This is where you add your lovely prose.
Images.
|
|
|
|
Step 3
Describe the steps. This is where you add your lovely prose.
Describe the steps. This is where you add your lovely prose.
Images.
Tip Suggestions for handling a form or procedures efficiently.[1]
|
|
Step 4
Logout Any questions or feedback? Please contact us