Library:CIRcle/OneDrive File Transfers
Summary
This is a brief guide for using Microsoft (MS) OneDrive to transfer files from UBC students, faculty, and staff to the cIRcle Office.
| If you have not yet contacted the cIRcle Office regarding your submission, please contact us before you attempt to transfer content. |
OneDrive is a file hosting and synchronization service operated by Microsoft and is offered to all UBC Students, Faculty and Staff at no cost. OneDrive may be used to transfer large batches of files to the cIRcle Office, or files that are too large in size (e.g. over 21MB) to send via e-mail or submit through cIRcle webforms.
There are 4 steps. Depending on upload speeds and size/number of files, it should take approximately 5 minutes to complete a transfer.
Step 1: Login and Select OneDrive
On the OneDrive homepage at https://portal.office.com, enter your UBC email and CWL password.
- For staff and faculty, log in using your firstname.lastname@ubc.ca email. Note: for faculty, your email address must be associated with your FASmail account.
- For students, log in using your cwl@student.ubc.ca email.
Once logged in, select the OneDrive application (found on the left-side menu) to begin utilizing the service.
Step 2: Upload Files
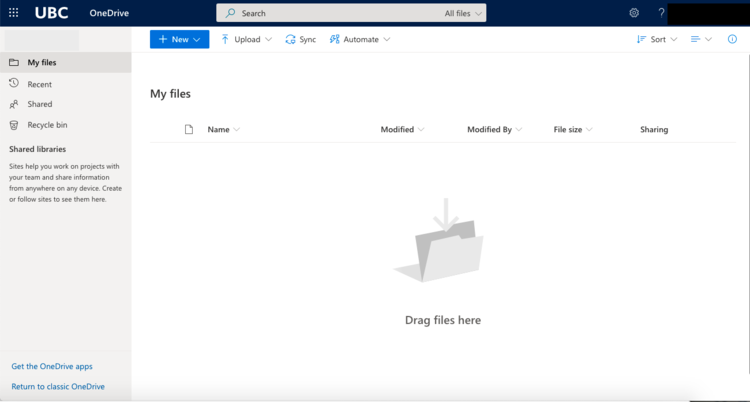
To begin uploading files to OneDrive, you may:
- Drag and drop file(s) from your computer onto the OneDrive window. The file(s) will begin uploading immediately.
- Select the Upload button at the top of the page. From here, you can select the file(s) on your computer and begin the upload.
- As of March 3, 2021, the maximum file upload size in OneDrive is 250GB.
A new OneDrive Dashboard window
Once file(s) are successfully uploaded, you may share them with one or more people.
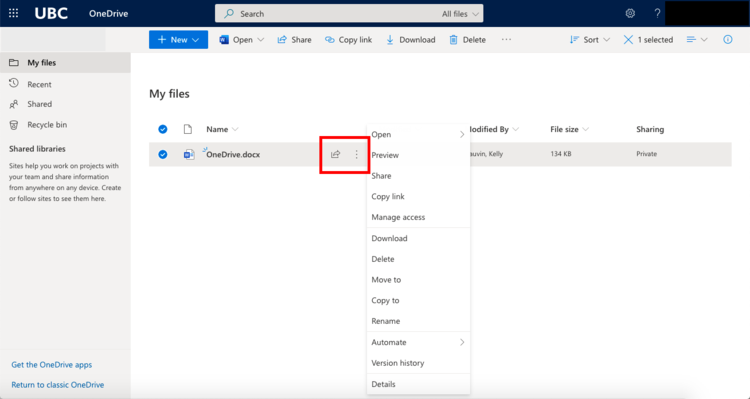
Select the file(s) you would like to share by clicking anywhere in the file information bar. Selected files will show a blue checkmark to the left of the file name.
To share selected file(s), you can use the share file button found at the top of the page or next to the file name, or you can click the three dots to bring up the file options, including share.
Once a file is uploaded, click the Share icon to share your file
Enter Recipient Emails
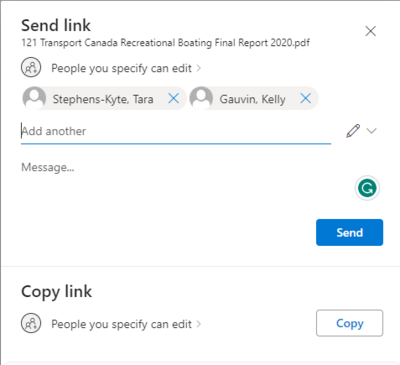
In the "Send Link" window, enter cIRcle Office member email addresses: tara.stephens-kyte@ubc.ca and kelly.gauvin@ubc.ca.
Click "People you specify can edit" to ensure your share settings allow the cIRcle Office to download the files. Select "Apply" to return to the "Send Link" window.
Select 'Send' to complete the file share.
Add recipient email addresses to share files
Step 4: Confirm receipt
Once you have successfully shared your OneDrive files with the cIRcle Office, the cIRcle Office will confirm that the files have been received and downloaded successfully.
If you do not receive confirmation of receipt within 3-5 business days, or if you have any questions or feedback, please contact the cIRcle Office.
References
Microsoft OneDrive FAQ (UBC IT)
Restrictions and Limitations in OneDrive and Sharepoint (Microsoft)


