Help:Adding Media/Images and Pictures in wiki text
Adding a Picture to a UBC Wiki Page using wikitext
Embedding an Image Hosted on Wikimedia Commons
If an image is hosted on Wikimedia Commons, it is very easy to embed an image.
| Formatting | Example of Wiki Code to Use | Display |
|---|---|---|
| Just add the filename to the wiki page | Image from https://commons.wikimedia.org/wiki/Main_Page#/media/File:Nymphenburger_Schloss_at_sunset.JPG will be formatted as [[File:Nymphenburger_Schloss_at_sunset.JPG]] | For example, 
|
| adding attributes to the image | Similarly to an image uploaded in ubcwiki, you can add attributes directly to the image [[File:Nymphenburger_Schloss_at_sunset.jpg|100px]] | For example,
|
External image syntax
You can embed an "external" image by simply typing the full URL of the image. For example:
https://open.ubc.ca/files/2019/09/openubc.jpg
will display the image on screen.
Internal image syntax
After uploading the image, create a link to the image file to embed it on a page. Thus, for the below example, type in the following code into the wiki edit page of the article in which you want the image to be embedded.
| Formatting | Example of Wiki Code to Use | Display |
|---|---|---|
| Adding an image | [[Image:COI_model_adapted.jpg]] |  . .
|
Adding Images via Wikimedia Commons
| Formatting | Example of Wiki Code to Use | Display |
|---|---|---|
| Adding an image | [[File:Bison bonasus bonasus.jpg|Bison bonasus bonasus]] | 
|
Image Options
In addition to embedding an image, you can also give it alternative text, a frame, or make it centered. There are many different options for how images are displayed. The full syntax for displaying an image is:
[[File:file name.extension|options|caption]]
Choose to have none or multiple options from the list below:
- border
- frameless
- frame
- thumb or thumbnail This controls how the rendered image is formatted and embedded in the rest of the page.
These options control how the image is formatted and embedded in the rest of the page. Each option should be separated by pipes (|).
Examples
| Formatting | Example of Wiki Code to use | Display |
|---|---|---|
| Regular Image with a caption | [[File:File:ExampleImage.jpg|Caption text that shows in mouse over and if image does not load.]] | 
|
| Image with Frame | [[File:ExampleImage.jpg|frame|Caption: This is an example image]] | |
| Thumbnail Image | [[File:ExampleImage.jpg|thumb|CCaption: This is an example image]] | |
- Note: Images without a frame automatically align left, while images with a frame automatically align right.
Additional Image Display Options
Resizing option
Change the size of the image using the following parameters:
- {width}px — Resizes the image to fit within the given maximum width in pixels, without restricting its height;
- x{height}px — Resizes the image to fit within the given maximum height in pixels, without restricting its width;
- {width}x{height}px — Resizes the image to fit within the given width and height in pixels;
- upright — Resizes an image to fit within reasonnable dimensions, according to user preferences (suitable for images whose height is larger than width).
- Note that the image will always retain its aspect ratio, and can only be reduced in size if it's not in a scalable media type such as SVG (bitmap images cannot be scaled up). The default maximum size depends on the format and the internal image dimensions (according to its media type).
Examples:
| Width Option | Code to Use | Example Image |
|---|---|---|
| Image 50 pixels wide | [[File:ExampleImage.jpg|50px|This is the caption]] | |
| Image 100 pixels wide | [[File:ExampleImage.jpg|100px|This is the caption]] |
|
| Image 200 pixels tall | [[File:ExampleImage.jpg|x200px|This is the caption]] |
|
Size and Frame
- When the format is not specified, or only bordered, the size can be both reduced and enlarged to any specified size.
- An image with the "frame" attribute always ignores the size specification, the original image will be reduced if it exceeds the maximum size defined in user preferences.
- The size of an image with the "thumb" attribute can be reduced, but can not be enlarged beyond the original size of the image.
Horizontal alignment option
one of left, right, center, none; This controls the horizontal alignment (and inline/block or floating styles) of the image within a text (no default value).
Examples:
| Format Option | Code to Use | Example Image |
|---|---|---|
| Left Aligned Image (sized to be 50 pixels wide) | [[File:ExampleImage.jpg|50px|left|This is the caption]] | |
| Right Alight Image (sized to be 50 pixels) | [[File:ExampleImage.jpg|50px|right|This is the caption]] | |
Vertical alignment option
one of baseline, sub, super, top, text-top, middle, bottom, text-bottom; ThisControls the vertical alignment of a non-floatting inline image with the text before or after the image, and in the same block (the default vertical alignment is middle).
Examples:
| Format Option | Code to Use | Example Image |
|---|---|---|
| Top Aligned Image (sized to be 100 pixels wide) | [[File:ExampleImage.jpg|100px|top|This is the caption]] | Here is some textHere is some text
|
| Bottom Alight Image (sized to be 100 pixels) | [[File:ExampleImage.jpg|100px|bottom|This is the caption]] | Here is some text Here is some text
|
Link option
- link={target} — Allows to change the target (to an arbitrary page title, or URL) of the generated link, activable on the rendered image surface;
- link= (with an empty value) — Displays an image without any activable link; e.g.
[[File:ExampleImage.jpg|20px|link=]]renders as .
.
- Note that the link option cannot be used in conjunction with thumb or thumbnail, as thumb is always meant to link to the larger version of the image. In addition, link cannot be used with frame.
Other specific options:
- alt={alternative text} — Defines the alternative text (maps to the HTML attribute
alt="..."of the generated<image />element) of an image that will be rendered if either the referenced image cannot be downloaded and embedded, or if the support media must use the alternative description text (e.g. when using a Braille reader or with accessibility options set by the user in its browser). - page={number} — Renders the specified page number (currently only applicable when showing a .djvu or .pdf file).
The options can be given in any order. If the given options conflict each other, the latter is applied, except for the format options, where the options take the priority in the order of: frame; thumb (or thumbnail); frameless and/or border.
If a parameter does not match any of the other possibilities, it is assumed to be the caption text. Caption text shows below the image in thumb and frame formats, or as mouseover text in border, frameless formats or when the format is omitted. Caption text displayed in the thumb and frame formats may contain wiki links and other formatting. In the other options, wiki-formatting will not work though transclusion will.
If no caption text is supplied, a caption is automatically created showing the file name. To completely remove the caption, set it to <span title=""></span>. For example, [[File:ExampleImage.jpg|20px|<span title=""></span>]] renders as ![]()
- The MediaWiki help page on images is a good resource for learning how to format images.
Embedding an Image Hosted on Another Website
If an image is hosted on another website, it can also be displayed on the UBC Wiki:
| Formatting | Example of Wiki Code to Use | Display |
|---|---|---|
| Just add the image URL to the wiki page | http://farm4.static.flickr.com/3220/2882594321_bdaf3dcb3b.jpg | For example, 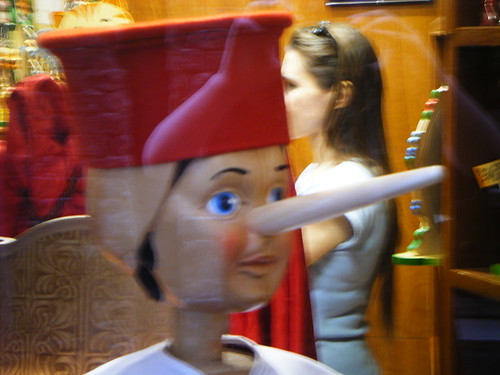 . .
|
| To provide attribution for a photo (for instance if it is a Creative Commons Licensed work on Flickr), upload the photo and put it in a frame with attribution | [[Image:Pinnochio in Urbino.jpg|center|frame|Uploaded to Flickr by [http://www.flickr.com/photos/38795936@N00/2882594321/sizes/m/ Sparklefish]]] |  |
Direct Text Link to a Uploaded File
Instead of displaying a file on a wiki page, it's also possible to create a text link directly to the file itself. There are two options when linking to an uploaded file.
| Formatting | Wiki Code | Display |
|---|---|---|
| Direct Link to Uploaded File | [[Media:file-name.ext]]. For example, [[Media:Filelink-button.png]]. | For example, Media:Filelink-button.png. |
| Link to the Wiki's Uploaded File | [[:File:Filelink-button.png]]. | File:Filelink-button.png. |