Documentation:ZBrush Optimization Workflow
| Emerging Media Lab | |
|---|---|

| |
| About EML | |
| A collaborative space for UBC faculty, students and staff for exploration of emerging technologies and development of innovative tools and solutions. This wiki is for public-facing documentation for our projects and procedures. | |
| Subpages | |
ZBRUSH OPTIMIZATION
Note: If you are using this application because you are having trouble filling holes in Maya or Blender, you can use the ‘Close Holes’ function under Geometry > Modify Topology and then export the tool to be reimported back into Maya or Blender.
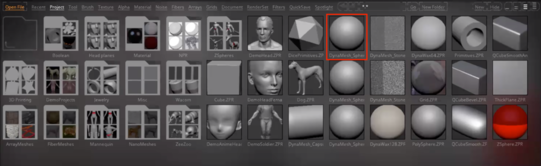
- Go to lightbox > projects and double click DynameshSphere128.zpr. This opens up a preexisting sphere template
- On the right side, load tool and load photoscan model
- If model is loaded without the texture try one of the following:
- Restart ZBrush and repeat steps
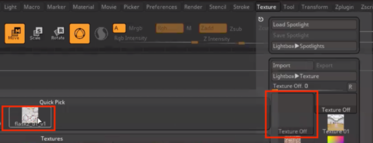
- Import and apply texture
- At the top, go to Texture > Import and locate the texture file
- Then click the large empty box, opening the loaded texture files, and open the texture file you imported.
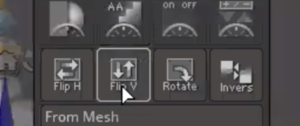
- Underneath,click ‘FlipV’
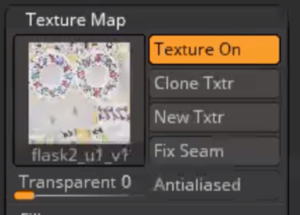
- On the right side, scroll down to Texture Map, and click the empty box to load the texture
- If model is loaded without the texture try one of the following:
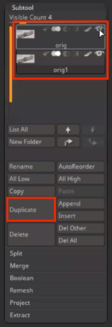
- Go to Subtool and click duplicate. Keeping an original will be handy if there are mistakes
- Hide 1st subtool by clicking the eyeball next to it and then select second subtool
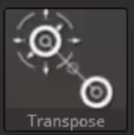
- Use transpose tool to rotate and move model so it is easier to clean
- Use select tools to trim and delete artifacts or unnecessary parts
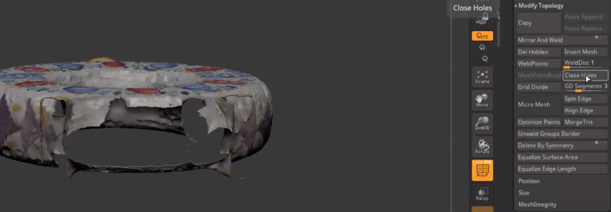
- You can do this by holding CTRL+SHIFT and click dragging over the parts
- The highlighted part will be isolated and surrounding areas will disappear
- Hold CTRL+SHIFT and click drag an area NOT on the model. This will invert the display, hiding the unnecessary part and revealing the model
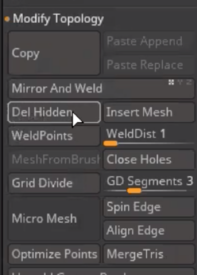
- On the right, go to Geometry > Modify Topology > ‘Del Hidden’
- Continue and repeat to trim the model
- Go to Geometry > Modify Topology and click on ‘Weld Points’ and ‘Close Holes’
- Then open ‘Mesh Integrity’ and click ‘Fix Mesh’ and then ‘Check Mesh Integrity’
- If a window pops up, it will tell you if there are still issues with the model
- If the model is single sided, extrude the model so it has thickness
- You can do this by either by masking the closed hole polygroup and using the transpose tool to move it OR:
- Holding CTRL and painting the ‘outside’ of the model you want to keep and then using the transpose tool to move the unmasked areas ‘in’
- Rename subtool model in the Subtool menu on the right to “O_clean” (‘O’ for original)
- Duplicate subtool
- At the top, go to Zplugin > Decimation Master and click ‘Pre-Process Current’
- When done, change Decimation % to ‘20%’ and hit ‘Decimate Current’
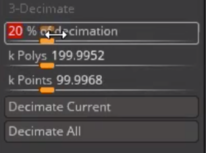
- If after decimation model loses too much detail, Undo and raise the percentage number, and decimate again. Repeat until it reaches lowest polycount while still retaining details
- While your new decimated model is selected in the Subtool menu and “O_clean” is visible, go to Subtool > Project and toggle on Geometry and Color click ‘Project All’
- If after hiding “O_clean” there is a large difference in detail that is loss, Undo and lower ‘PA Blur’ or ‘Mean’
- If polygons are being stretched like shards, lower ‘Dist’
- Export tool as .obj and label as [label]_optimizedModel_[version##]
- Ie. FlaskScan_optimizedModel_01
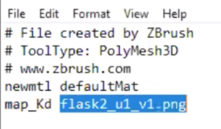
- Now, open your file explorer/finder and open the .mtl file in a word doc or notepad
- Make sure the bottom line is “map_Kd [originalTextureFile+extension]”
- Save doc and upload all materials to the respective folders
- Ie. optimization_output > tests > FlaskScan


Note: You can further optimize the model for use in Unity, however, it is a little bit longer and more complicated process to get it manageable in polycount and will have to adjust/fix your textures by hand
TIPS & TRICKS FOR ZBRUSH
- By default the dynamic perspective camera is toggled on. You can toggle this off for a more accurate view of the model
- If it is annoying for the faces of your model to disappear as you rotate around, on the right go to Display Properties > Double Sided. This will make your normals double sided
- While rotating, you can lock the camera in 90 degree increments by holding shift as you rotate
- If you want certain details to pop, you can use a combination of masking and adjusting the deformation sliders
- I like to use masking by color and then adjust the inflate deformation
- You can also sculpt certain details if you so wish but be careful it doesn’t stray too far from what the client wants