Documentation:WordPress Basics/Basics 2 Guide
WordPress Basics II
Workshop Overview
When you feel comfortable using everything we've done in WordPress Basics I, you are welcome to join the more advanced Basics II - this might be a couple of weeks later, or half a year - it really doesn't matter! This two-hour, hands-on workshop will take a deeper look at effectively using widgets, plugins, comments, categories and tags, defining user roles, and embedding content from external sites.
Training Guide: http://wiki.ubc.ca/Documentation:Wordpress_Basics/Basics_2_Guide
Workshop Agenda (5 min)
- Introduction: You, Us
- zack.lee@ubc.ca - Educational Resources Developer, CTLT
- Session Objectives
- Participants will:
- Identify ways of customizing the look and feel of your webspace using widgets, plugins and menus
- Consider the audience, and purpose of your site and identify relevant architecture and functionality
- Identify ways of customizing the look and feel of your webspace using widgets, plugins and menus
- Participants will:
- Agenda
- Burning Questions: What burning questions do you have about WordPress that you would like to learn the answer to during this session.
- Activity I: Creating a Visual Map or Diagram of your Webspace
- Activity II: Hands-on WP
- Wrap-up, Questions
- Where to get support
- Copyright
- Feedback
- Workshop Material
WordPress Basics II Agenda 2011.pdf
WordPress Basics II: Developing a Wireframe
Recap from Basics I: What was covered in WP Basic I?
- Pages vs Posts
- Tags vs Categories
- Widgets
- Customization
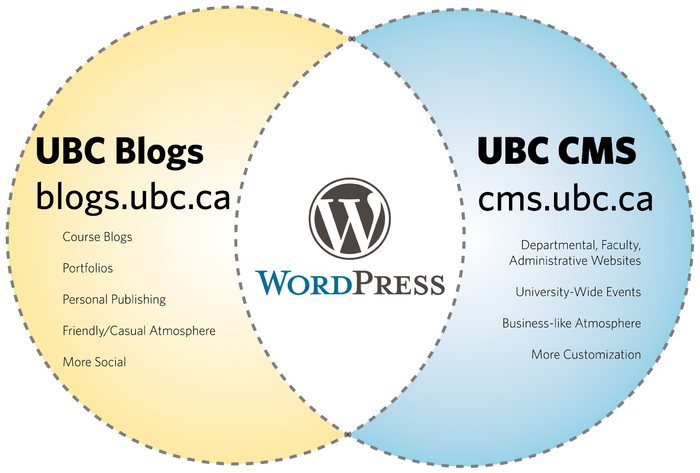
UBC's WordPress Service
Activity 1: Creating a Diagram for your Webspace (15 min)
Learning the how to use WordPress is actually the easy part! The hardest part is organizing the content on your site. A well structured site takes some planning - well a lot of planning! This activity is a followup to the first we activity we had you do in WordPress Basics I - Define the Purpose of Your Webspace, where you answered 3 basic questions. This exercise has you look more closely at the architecture of your webspace and consider in more detail some the components you wish to see on your site.
A simple diagram provides you, your colleagues and stakeholders with a visual representation or big picture of these components (pages, posts, images, media, author roles).
Understanding the structure of an information space or webspace boils down to the following questions:
- What is the information structure?
- How do I visually represent that structure?
- What relationships exist among the web pages?
- How are those page relationships represented?
A site diagrams would be quite helpful in answering these questions.
Step 1: You will be provided a worksheet that has a space to create a simple wireframe as well as to list the webspace's audience, purpose and functionality. Work individually completing the worksheet and then share your responses with a colleague.
Step 2: Begin by listing the audience or potential audience for your webspace EX: The general public, Faculty members, members of the Portfolio Community of Practice
Step 3: According to these purposes develop a simple wire-frame and list some possible functions you would like to have on the site
Step 4: Share your responses with a colleague. Try to identify important functions and areas that we can assist you with during this workshop.
Activity 2: Hands-On
Widgets
WordPress Widgets are designed to provide a simple way to add various elements to your sidebar or footer without changing any code. They can help visitors easily navigate through your site or find the specific information they need.
Take note though that widget areas are theme dependent. Not all themes will have the same places to put widgets in.
Widgets Section
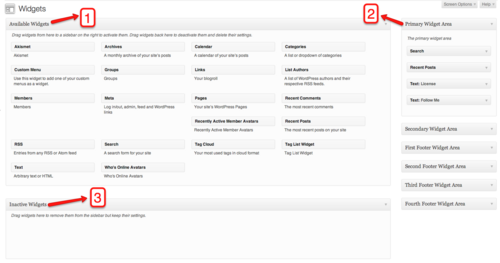
The Widget Section contains three important elements:
- Available Widgets
- This box contains all the available widgets you can use for your blog.
- Widget Areas
- Depending on your blog's theme, you can have different areas to add widgets to. Some areas are for your left sidebar or the right sidebar. There are also themes that allow you to add widgets to your blog's footer.
- Inactive Widgets
- You can archive widgets you have used by placing them in this box. All the widgets placed here will retain all their settings, ready to be used if you choose to do so.
- When you change themes, all of your widgets will not be transferred automatically but placed in the Inactive Widgets area.
How to Add Widgets
You can add widgets by simply dragging a widget from the Available Widgets box and dropping them into any of the Widget Areas.
How to Remove Widgets
Remove widgets by dragging them outside of the Widget Areas or dropping them into the Inactive Widgets box.
You can add widgets that will help visitors navigate around your site. Depending on how your structured your content, you have a number of options at your disposal.
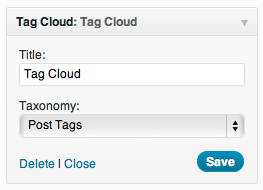
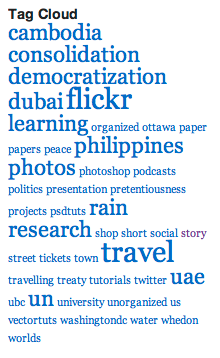
- Tag Cloud Widget: Creates a text cloud based on the tags you have used on your posts. The more a tag is used, the larger it will appear in the tag cloud.
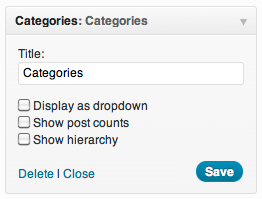
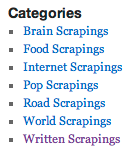
- Categories Widget: Create a list based on how you categorized your posts. You can also create drop-down menus by using subcategories.
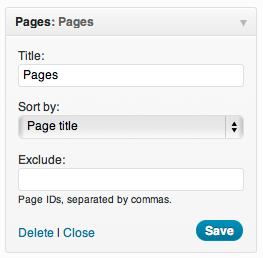
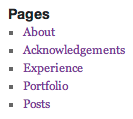
- Pages Widget: Creates a list based on the pages you have created.
Text Widget
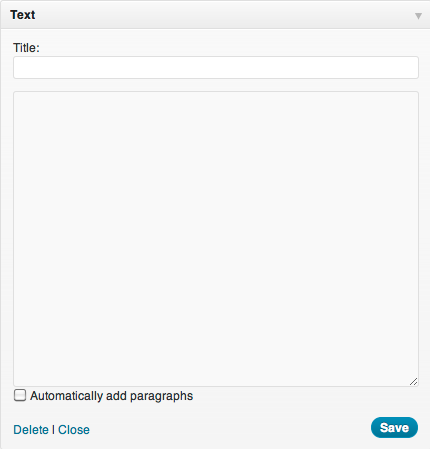
The Text Widget provides you added flexibility with an area to add custom text, images, or any other media onto your sidebar. Some knowledge of HTML is needed for more advanced and customized uses.
If you don't know HTML, try creating your content as a post and then copying the code in HTML View.
Take note that space for the sidebar area is limited. You may need to adjust or experiment a few times to get the sizing correctly.
Examples
You can add widgets that will help visitors navigate around your site. Depending on how your structured your content, you have a number of options at your disposal.
- Tag Cloud Widget: Creates a text cloud based on the tags you have used on your posts. The more a tag is used, the larger it will appear in the tag cloud.
- Categories Widget: Create a list based on how you categorized your posts. You can also create drop-down menus by using subcategories.
- Pages Widget: Creates a list based on the pages you have created.
Text Widget

The Text Widget provides you added flexibility with an area to add custom text, images, or any other media onto your sidebar. Some knowledge of HTML is needed for more advanced and customized uses.
If you don't know HTML, try creating your content as a post and then copying the code in HTML View.
Take note that space for the sidebar area is limited. You may need to adjust or experiment a few times to get the sizing correctly.
Examples
Hands-on Activity - Adding Widgets
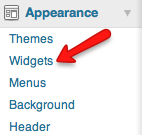
- From the Dashboard, under Appearance, click on Widgets
- Drag and drop the Tag Cloud, Categories, or Pages in the Primary Widget Area
- Review the custom settings on the widget
- Click Save and visit your site.
- What other widgets can you use to help visitors navigate around your site?
- From the Dashboard, under Appearance, click on Widgets
- Drag and drop the Text Widget onto SideBar 1 - right hand side the page
- Review the custom settings on the widget
- Click Visit Site and see what your webspace looks like now!
- Repeat the above steps and add the Text Widget to your webspace
Plugins
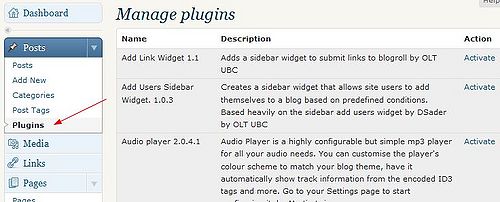
Plugins are software components that you can add to larger applications to extend or customize its capabilities. In WordPress, you can install and activate a variety of plugins to perform more advanced tasks such as including a wiki page with your post/page or allowing visitors to receive notifications for new comments on a post.
You can access the pre-installed plugins on your UBC Blog by clicking on the Plugins link under the Post section in the Dashboard. Here you'll see the plugins' name, what they can do and if they are activated. If you want to turn on/off a plugin, just click on the corresponding Activate/Deactivate link under the Actions column.
Audio Player 2.0.4.1
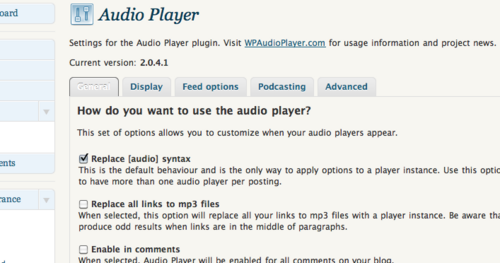
Audio Player is a highly configurable but simple mp3 player for all your audio needs. You can customise the player's colour scheme to match your blog
Example
Add Users Sidebar Widget
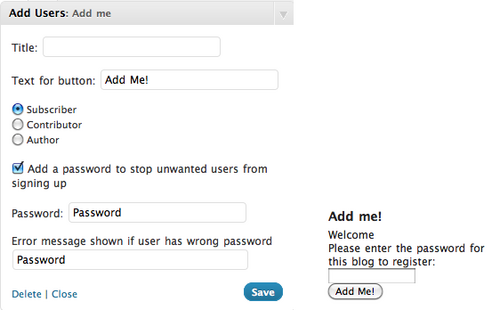
The Add Users Sidebar Widget plugin allows you to place a widget on your sidebar where users such as your students or your colleagues to add themselves to your blog. If you are using your own blog for this session, you will need to enable this plug-in.
You can set the level of access they will have as well include a password for added security. Take note that only UBC Blogs users or those with CWLs can add themselves.
The plugin is useful for course blogs where students need to contribute posts as well as those running community blogs.
Examples
CWP Render Blogroll Links 2.1.8
The Render Blogroll Links widgets allows you to easily add your blogroll links to a page or post. To use this plugin begin by selecting Plugins under posts and clicking Activate next to the widget.
- Open any page or post and open the HTML editor
- Enter the following shortcode to display your links [wp-blogroll]
- Update the post and click View Posts to view your changes
Hands-on Activity - Adding & Configuring Plugins
- From the Dashboard, under Posts, click on the Plugins section
- Review the pre-installed plugins already available
- Locate the Add User Sidebar widget and click Activate
- From the Dashboard under Appearance select Widgets and from the centre panel drag and drop the Add User widget into the sidebar.
- From the Dashboard, under Posts, click on the Plugins section
- Review the pre-installed plugins already available
- Activate the Audio Player 2.0.4.1 plugin
- Under the Settings menu, on the left hand side, click Audio Player
- Under the How do you want to use the audio player? browse through the General, Display, Feed options, Podcasting, Advanced settings
- From the Dashboard under posts select Add New, click on the add audio icon in the WYSIWYG editor.
- From your computer locate the MP3 file located in WordPress Basics 2 folder and upload it. Publish the post and you will know be able to play the MP3 file from your computer.
- Second Intermediate Activity: Add the Subscribe to Comments plugin
- From the Dashboard, under Posts, click on the Plugins section
- Review the pre-installed plugins already available
- Activate the WikiInc plugin
- Create a post and add a page from either UBC Wiki or Wikipedia
- Click View Post
Documentation:WordPress Basics/Embedding External Content
Custom Menus
In some themes in WordPress (Coraline, TwentyTen, TwentyEleven) you can customize your navigation using custom menus. This allows you to select which main pages, sub-pages, links and categories will be added to the header. In the UBC Blogs installation custom themes are available for the Coraline and Twenty 10 themes.
Hands-on Activity - Creating a Custom Menu for your Site
- To create a custom menu for your site begin in the Dashboard view* From the sidebar click on Appearance
- From the drop-down menu that appears select Menu
- Add a name for your menu in the Menu Name form* Select the pages and, links you wish to add to your navigation and click Add to Menu
- From this view you can drag and drop the pages to change their order or their position as main pages and sub-pages
- Under Theme Locations use the drop down menu to select the menu that you just created as primary navigation
- Click Save Menuand return to your site to see the changes that you have made.
- From your Dashboard view select Appearance and then select Menu
- From the Menu view try adding Categories to your menu as top level page titles.
- (Optional) Create two menus and use one menu in the sidebar and one as the sites primary navigation.
- Once you have saved this return to your site to view the changes.
Import/Export/Backing-up
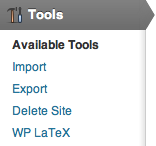
WordPress makes it easy for you to import your blog content from a variety of other blogging platforms, including Blogger, LiveJournal, Movable Type, and many more. You can also easily import content from another WordPress.com site!
You can also export a WordPress webspace. Why would you do this? Let's say you have created a Science course site at UBC (Science 201) using Wordpress. You have put a lot of time and energy in this ONE site, (i.e. a ton of pages, posts, multimedia, etc). But, you are actually teaching THREE sections of this course at the same time and each section needs their own wordpress site. The fastest and easiest way to duplicate a WordPress webspace is to export the master (or template) course and then import it into 3 blank wordpress sites, giving each of them a different - Science201LevelOne, Science201LevelTwo, Science201LevelThree, etc.
This should really go without saying, but backing up your WordPress website on a regular basis is extremely important. Although a lot of web hosts (UBC does daily backups) may offer free backups, it is still your responsibility to keep recent backups yourself, preferably hosted on a local hard drive.

Hands-on Activity: Import/Export/Backing-up
- If you have an external blog - for example on wordpress.com and would like to import it into blogs.ubc.ca, follow these instructions:
- From the Dashboard, click on Tools, and the select Import
- From the long list, click on the blogging platform to import from
- Browse and locate the required format
- Click the Upload File and Import button
Exporting
- If you have a webspace on blogs.ubc.ca - and would like export your blog to another web-based blogging application, follow these instructions:
- From the Dashboard, click on Tools, and the select Export
- Browse and adjust the various Filters (you can also leave all the defaults)
- Click Download Export File button (an .XML file is created and saved on your computer)
Wrap-Up
Your questions answered (hopefully...)
Where to Get Support
- Email
- You can send your support questions to cms.support@ubc.ca
- Drop-in Sessions
- There are regular drop-in sessions on Mondays and Thursdays, 1:00PM - 3:00PM at the 2nd Floor offices of the Centre for Teaching, Learning and Technology at the Irving K. Barber Learning Centre.
- Online Manual
- Search for answers to your questions in the CMS at UBC Online Manual at http://wiki.ubc.ca/Documentation:UBC_Content_Management_System.
Copyright
Another other copyright questions?
Feedback
Help us help you better! At the end of the session, please complete the feedback form.
