Documentation:Library:Circle/FROGBEAR Organizing content for upload
Overview
This document describes the steps that need to be taken in order to organize content for upload into FROGBEAR repository.
All files (images, video, audio, etc.) to be included in the repository must be accompanied by a metadata spreadsheet (.xls or .xlsx format). Files that are not accompanied by a metadata spreadsheet, or that are not referenced in the spreadsheet, will not be included in the repository.
In addition to the files and the metadata, two kinds of permission forms are required. First, permission is needed from anyone who created a file being added to the repository (the person who operated the camera, audio recorder, or other device; or the person who wrote a text or other document). This allows us to make the files publicly available through UBC Library Open Collections. Second, anyone (cluster participant or not) who appears in media files must grant permission to have their image and/or voice made public. This permission is granted by signing the forms listed below.
|
Document Checklist
The above forms must be provided for all relevant material (one form per person per trip). They will be kept on file by project staff, but will not be part of the public repository. |
Step 1: Prepare the documents
cIRcle License
- Language: The cIRcle License must be in English.
- Names: The content creators name should be written in the Latin alphabet (pinyin, romaji, etc.). Check that the same spelling is used in both the metadata spreadsheet and the all forms
- Description of work(s): Include the following statement and add relevant details for your trip, "All digital objects created as part of the From the Ground Up: Buddhism and East Asian Religions project [research cluster ID] [trip name] [trip dates]."
- Creative Commons: Content creators must answer YES to both questions in the Creative Commons License so that the UBC Library can host and display the files and others can reuse them
See this example of a completed license for reference.
Upload forms
The form can be completed and signed electronically. If paper copies are used, they should be scanned and uploaded as a PDF.
Name files
Ideally, the filename for the form should contain the name of the person signing them
- ex. “ZhangMing_License.pdf”
Alternatively, upload a single PDF combining all the signed forms.
Step 2: Prepare an upload destination
The files (licenses, metadata spreadsheets, and original data such as photos and videos) can be shared with FROGBEAR staff via a standard, web-accessible cloud services such as Google Drive, Dropbox, Box, OneDrive, etc., or via an institutional filesharing system. Whichever system is used, the file and folder structure should be the same.
First, if in addition to material for the repository (Frogbear database for research and teaching purposes) there is material intended for other purposes, such as project publicity such as reports on project outcomes or photos and videos of cluster activities for publicity use rather than for the repository, these should be kept separate. You can either create two separate batches of files on the filesharing cloud or create two top-level folders named "Repository" and "Publicity," containing the material destined for the repository and publicity material, respectively.
Step 3: Organizing folders for upload
The main folder should be named with the number of the cluster and the year of the visit (e.g., "Cluster 1.1 2018"). Data for the repository (images, video, audio, transcripts, etc.) can be placed in a single folder, or it can be organized into subfolders, for example by site or by day. Organizing by day may be the easiest approach, but any logical structure will work.
Each folder of content should contain one metadata spreadsheet (“Cluster 1.1 2018 Metadata.xls” or “Cluster 1.1 2018 Metadata.xlsx”) describing the files (multiple kinds of media can be included in the same spreadsheet). Create separate subfolders for Circle licenses (creator permissions) and Individual releases (permission to use peoples' image and/or voice).
The same basic folder structure should be used for material not intended for the repository (“Other Uploads”). No metadata spreadsheet is required for these, but the same permission requirements apply, and you should use a metadata spreadsheet or other document to explain the content of the images.

Step 4: Link to Metadata Spreadsheet
For information on how to fill out the metadata spreadsheet and to download the file, see Documentation:Library:Circle/FROGBEAR Describing your data.
The field that links the metadata in the spreadsheet to the material in the data files is the Filename(s) field. This must contain one or more filenames, including the extension (.jpg, .mp4, .mp3, etc.) but without no folder/path information. The files must be in the same folder as the metadata spreadsheet. Multiple filenames should be separated by double vertical lines (||).
Filenames
It is important that filenames appear in the spreadsheet exactly as they do in the folder, otherwise we will not be able to link the two. In general, we do not recommend trying to give the files meaningful names—the metadata provides the description, so the filename does not need to. Using the default filenames that come from recording devices (e.g., IMG_12345.jpg) is fine. There are two circumstances in which you may need to change filenames manually:
- If two files have the same name (for example, if two photographers using the same model of camera both produced photos with the filename IMG_12345.jpg). In such cases you may add an additional number or letter to the file (e.g., IMG_12345-1.jpg or IMG_12345A.jpg)
- If you wish to refer to specific files in a record by number. For details, see Documentation:Library:Circle/FROGBEAR_Description_metadata#Descriptions_for_Multiple_Objects
|
Filename Checklist
|
To ensure that filenames are correctly inserted into the spreadsheet, we recommend the following workflow:
- Organize data files into folders, following the above guidelines
- Copying an empty metadata template spreadsheet (metadata.xls or metadata.xlsx) into each folder
- Copying the file list and pasting it into the Filename(s) column of the metadata spreadsheet (see instructions below)
- Filling in metadata records, consolidating multiple filenames into single records as needed
Alternatively, in Step 3, instead of copying the list directly into the metadata spreadsheet, you can create a separate spreadsheet and copy the files into it. This may be easier if you anticipate having many records with references to multiple files.
Step 5: Create a File List
Creating a file list is needed in order to transfer the data files to the metadata spreadsheet. Copying filenames individually, or typing them in by hand, is tedious and error-prone. We recommend following one of the two procedures below:
Method 1: FilelistCreator (free software)
FilelistCreator is a free program for creating lists of files. It is available for Windows, Mac, and Linux at http://www.sttmedia.com/filelistcreator-download
- Run FilelistCreator by following the instructions on the website above. On Windows, it does not need to be installed, just copied to a convenient location on your hard drive.
- Save the attached profile in a convenient location (e.g., the folder with the FilelistCreator program). This profile contains the appropriate settings (set to export only filenames, with no additional information such as file size, folder name, etc.). This can also be found in the “FROGBEAR Documentation and Utilities” folder on OwnCloud.
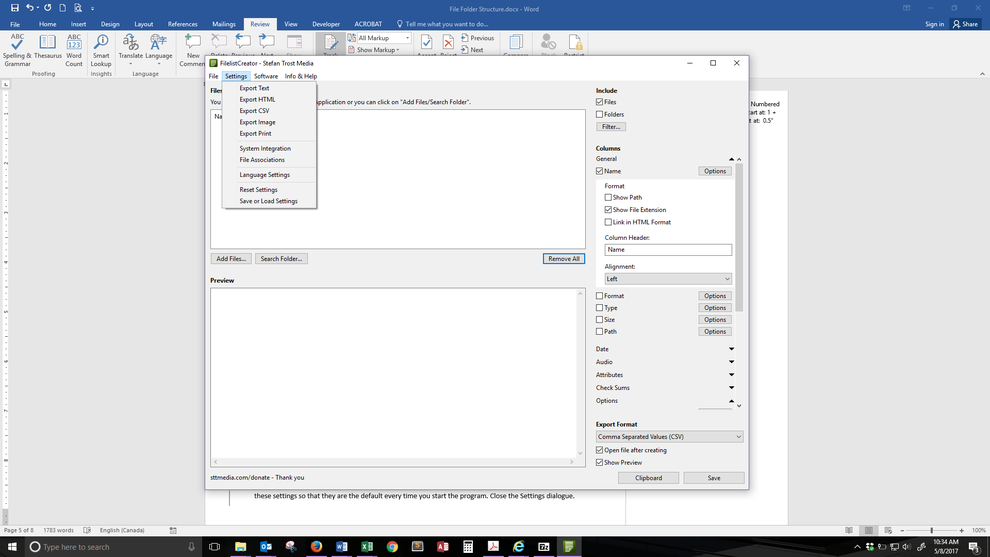
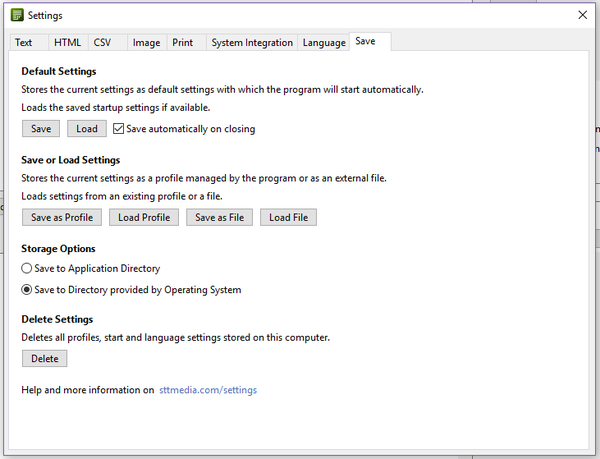
- Run FilelistCreator, and load the profile by choosing from the top menu Settings Save or Load Settings. In the dialogue that appears, under “Save or Load Settings,” click the “Load file” button, then choose the FROG_Metadata.fls file. This will load the settings and a pop-up window will confirm that they have been loaded. On the settings page, under “Default Settings,” click “Save.” This will save these settings so that they are the default every time you start the program. Close the Settings dialogue.
- You are now ready to move file lists into the metadata spreadsheet. Drag the folder of material onto the program window (from Windows Explorer, OS X Finder, etc.). It will fill the Files box with a list of files in that folder. Alternatively, you can use the “Search Folder…” button to choose a folder to add to the list. The top part of the window shows the files to be listed; the bottom Preview area shows the list as it will be formatted. There should be only one column, with the filename, and no folder or filesize information. If other information appears here, reload the FROG_Metadata.fls profile as described above
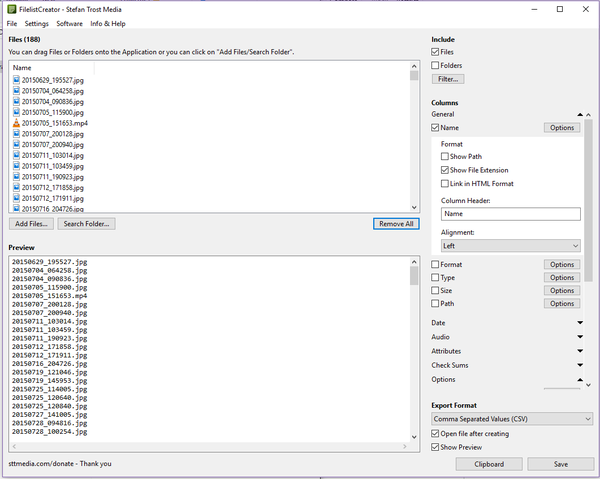
- To copy the list to the metadata template, click the Clipboard button on the bottom right of the FilelistCreator window to copy the list to the clipboard. Then open the template spreadsheet in Excel or another program. Find the filename column and select the first blank cell under the header column. Then paste (ctrl-v on Windows, command-v on Mac). The rows below will fill with the filenames.


Method 2: Copy-and-Paste
If you are not able to run FilelistCreator, you may also copy a list of files from your system directly into the spreadsheet.
In Windows, open the folder in Windows Explorer and select the files whose names you wish to copy, hold down Shift and right-click on the selected filenames, then from the menu that appears choose “Copy as path.” Go to the Filenames column in the spreadsheet and paste. This will paste the complete filenames include the full folder path, e.g., “C:\Users\YourName\Photos\FrogBear\2017-06-15\IMG_12345.jpg”, but the metadata should not include the path, just the filename. To fix this, in your spreadsheet choose a filename, copy the text in the cell, then perform a search-and-replace throughout the spreadsheet for the folder portion (in this case, “C:\Users\YourName\Photos\FrogBear\2017-06-15\”).
In OS X, open the folder in Finder, select the files (CMD-A to select all), copy (CMD-C), then in the first blank cell in the Filenames column paste (CMD-V). This will paste a file list including extensions.
Step 6: Creating Records
Some individual files will become individual records in the repository, but others will be grouped into records describing multiple files, for example multiple images of the same object or multiple audio segments from the same conversation. To do this, in the spreadsheet choose the row with the first filename that will be part of the record and start filling in the metadata. To add more files to the record, insert a separator of two vertical lines (“||”), then cut and paste the filename from another row.
- For an example of how a spreadsheet becomes a record, see Documentation:Library:Circle/FROGBEAR Item record example
If you find that you end up with gaps between records (blank row between entries), you can follow the instructions on this page to delete the blanks: http://www.techrepublic.com/blog/microsoft-office/a-quick-way-to-delete-blank-rows-in-excel/