Documentation:Clickers and Vista

|
This article is out of date. This article does not reflect recent events or newly available information. |
Instructor Checklist
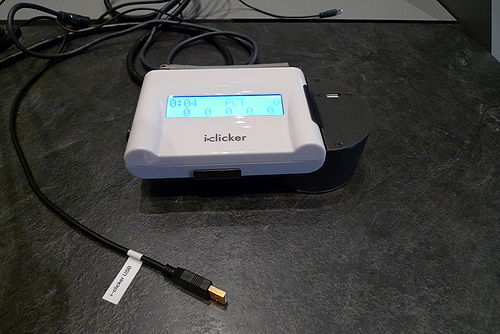
- Ensure you are using a new i>clicker base - New bases are WHITE
- Download the i>clicker software package configured for use with Vista: Windows | Mac
- This package includes a new CMS Integrate Wizard that is required for Vista
- We can also sign you out an instructor clicker kit from the Centre for Teaching, Learning, and Technology (IKBLC Room 102) and/or give you a tutorial in how to set up and use i>clickers with Vista
- Please make an appointment via clicker.support@ubc.ca if you need help or want an instructor clicker kit
- Support and software is also provided for Connect. See our Clickers and Connect page for details and Connect-compatible software
- If you are teaching another class in Connect you'll need to have two separate iClicker software folders on your computer - one for your Vista classes and one for your Connect classes
- Contact clicker.support@ubc.ca with any questions
Adding an iClicker registration link to your Course
- Students are able to register clickers in Vista through the i>clicker registration link that this section will help you set up
- Log into Vista
- Open the course in which you wish you wish to add a registration link for your students
- Click on the "Build" tab

- Click on "Add content Link"
- Select from the drop down list "iClicker Registration"
- Click "Create iClicker Registration"

- Enter any title, i.e. "Register Your Clicker"
- "Timeout" value should be set to 5000, and "open In New Window" should be set to "False".

- Press "Save"
- Click on the "Student View", and the iClicker registration icon should look like this:

iClicker Course Configuration for Vista
- Open iClicker and click "Add Course"
- Enter "Course Name," "Course Number," and "Section Number," the click "Create"
- "Choose" your course
- Go to "Your Settings and Preferences"
- Add your Instructor Remote ID (found on the back of your blue remote). No clicker ID contains the letter 'O', although it may contain zeroes
- Click on the "Registration and Export" tab
- Leave "Web Registration" blank
- Change "Course Management System" from "General" to "Vista (formerly WebCT Vista)" under Blackboard

- 9. Click "Set For Course"
- 10. You will now be able to download your class roster and export students' marks to Vista
- 11. Your course must be set up in iClicker before you can start using iClickers in your class
Using the CMS Integrate Wizard
- Login with your CWL account to retrieve your Utility ID and Password
- Make sure you are connected to ubcsecure if on campus or myvpn.ubc.ca if off campus
- Make sure the "Course Management System" in the iClicker settings (Registration/Export tab) is set to "Vista"
- Open iGrader and choose your course
- Click "Synchronize Web Registrations" (to Import Roster from Vista into iGrader or to Upload Scores to Vista)
| Using the CMS Integrate Wizard | |
|---|---|
 |
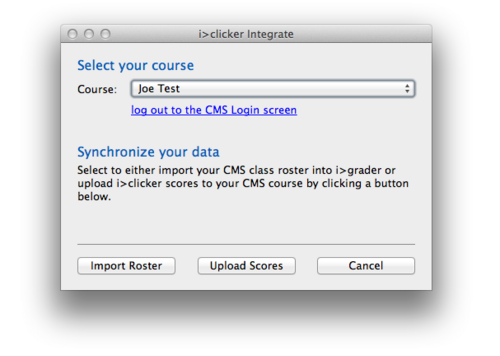 |
- Remember to click "Export term summary as CSV (Excel) file" in iGrader before uploading scores to Vista.
Import Class Roster with iGrader
- Make sure the "Course Management System" in the iClicker settings (Registration/Export tab) is set to "Vista"
- Open iGrader
- Highlight the Course in which you want to import your roster
- Click "Open i>grader"
- Click "Synchronize Web Registrations"
- Click "Yes"
- Find your CMS username and security key through the steps found at Using the CMS Integrate Wizard
- Check "Save my login credentials"
- Click "Log In"
- Select the desired course
- Click "Import Roster"
- If necessary, allow overwriting of your previous roster
- Restart iGrader to view updated class roster
- Students who have registered a clicker are in blue
- Students who have not registered a clicker are in red
- Clicker IDs not registered to a student are in red
Export Scores to Vista with iGrader
- Make sure the "Course Management System" in the iClicker settings (Registration/Export tab) is set to "Vista"
- Open iGrader
- Highlight the course for which you want to import your roster
- Click "Open i>grader"
- Click "Export Term Summary as CSV (Excel) File"
- Click "Ok"
- Click "Yes"
- Find your CMS username and security key through the steps found at Using the CMS Integrate Wizard
- Check "Save my login credentials"
- Click "Log In"
- Select the desired course from the dropdown menu
- Click "Upload Scores"
- Log in to Vista to see the entries which will now appear in your gradebook
Connect was decommissioned on August 31, 2018 and iClicker is no longer supported for that system.
Please contact clicker.support@ubc.ca with any questions.