Choose the 2nd option if it's a file created by somebody else. You will be asked to provide the source, author's name, and what kind of license does it have.
If you don't know the copyright status, you have the option of cancelling the upload.
Provide a description of the file.
Click Next at the bottom-right corner of the page.
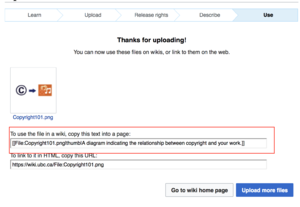
copy the embed code You will get an embed code after you upload an image. Copy the embed code
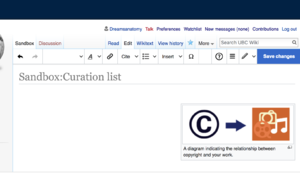
paste it directly to the editor Go back to the page that you want to insert an image, click Edit and then paste the embed code. Your image will be automatically inserted.
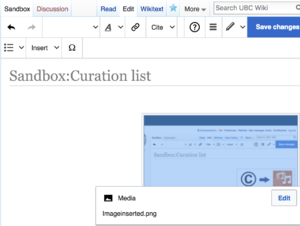
click on the image to edit the image. You're done. If you want to edit the image after you have embedded the image to the page, you can click on the image and press edit.
Add images that you have recently uploaded to a wiki page
Go to a wiki page that you want to add the image.
Go to Edit>Insert>Images and Media
Under Your Recent uploads, select the image or files that you would like to add to the page.
Go to Use this image and add caption and alternative text.
Under File history, click on Upload a new version of this file.
Upload the new version of the image.
Adding an existing image from UBC Wiki/Wikimedia Commons using Visual Editor
To search and add an existing image from Wikimedia Commons and UBC Wiki to your page, go to Insert>Images and Media
Pressing the "Media" icon opens a dialog that automatically searches Wikimedia Commons and your local wiki for media files related to the title of the page you're editing.
You can change the search by changing the text in the dialog's search box.
To choose a file, press on its thumbnail image. This places the image onto the page you are editing
After the image you selected is inserted into the page, another dialog will open. This dialog allows you to add and edit the caption of the image. The caption can contain formatting and links.
The media dialog also allows you to add alternative text captions, to help users who use screen readers, or who have disabled image display.
You can also set various parameters for the image in the "Advanced settings" window. These include the alignment, the type, and size of the image.
When you're done, press "Apply changes" to close the dialog and return to editing the page.
For an existing image, you can add or edit a caption or other settings by pressing on the image, then pressing on the "Media" icon that appears below the picture.
You can resize an existing image by pressing on it, then moving the resize icon (the two-headed arrow on one or both bottom corners).
You can also drag and drop an image to a place higher or lower on the page.
See Also
The MediaWiki help page on images is a good resource for learning how to format images.


