Documentation:WordPress Basics/Basics 1 Pre-Workshop Activity
Thank you for signing-up for WordPress Basics. This workshop will serve as an introduction on the WordPress platform through a number of examples in a teaching and learning context as well as numerous opportunities for hands-on practice.
Before you come to the workshop, we need you to create your account and blog at http://blogs.ubc.ca if you have not made one before. Please see the instructions below.
We also encourage you to take this time to explore WordPress to get yourself familiar with the platform.
This page will show you how to:
- Create a UBC Blogs account
- Create your own blog
- Change your blog's privacy settings
Get a UBC Blogs Account
- Go to https://blogs.ubc.ca/ (bookmark this for the future!) >> click on the LOGIN button and enter your CWL information.
The CWL button is located on the right-hand side of the screen. Use your CWL to sign-up for UBC Blogs.
- The “Get your own UBC Blogs account” screen appears
- Enter a Username (only the lowercase letters a-z and numbers allowed), Email address, and Display Name
- Agree to to the terms: "I have read and agree to the terms of service"
- Select "Gimme a Site" and click the NEXT button
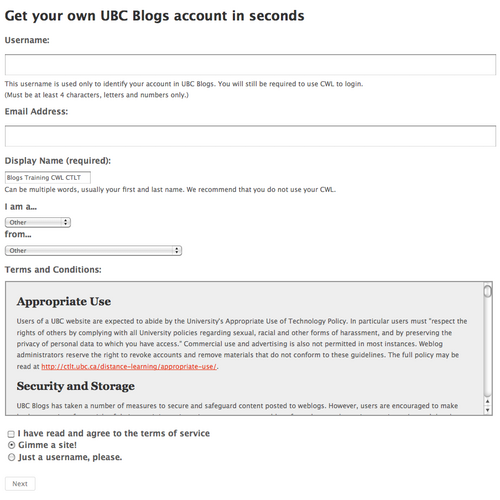
Fill out all the necessary information to start your own blog. (Click to Enlarge)


Create a Blog
- Choose a Site Name and Site Title.
- Note: The Site Name will become part of your URL and cannot be changed.
- Select the Privacy option you are comfortable with
- Click the SIGNUP button at the bottom of the page
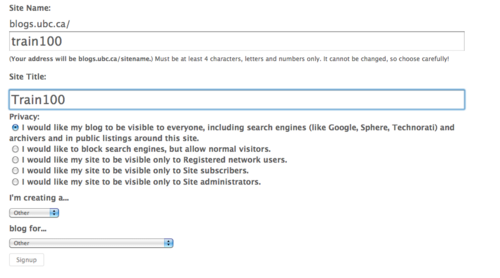
The image above shows the options when creating a blog. Remember that the Site Name is permanent. (Click to Enlarge)

The privacy settings control your site's visibility. You can decide if you would like your blog to be visible to everyone, including search engines. If you don't want your blog available to search engines you can block them, but allow normal visitors to see your site.
- From the Dashboard, under the Settings drop-down menu, click Reading.
- Browse through the Site Visibility settings at the bottom of the page and select the most appropriate settings for your webspace.
- Click Save Changes. (Note: If you have selected “I would like my blog to be visible only to registered members of the blog”, refer to Adding Specific Users section below)

Blog Visibility has 5 options, which goes from most open to most private:
- Allow search engines to index this site.
- This is the setting used by most blogs. It lets everyone read your blog and allows your blog to be included in search engines and other content sites.
- Ask search engines not to index this site.
- The site will be accessible to everybody but will not be searchable through search engines.
- I would like my site to be visible only to Registered network users.
- Only those with a CWL and a UBC Blogs account will be able to visit your site.
- I would like my site to be visible only to Site subscribers.
- Only people that are added to your blog as a user will be able to access the site.
- I would like my site to be visible only to Site administrators.
- Only you and other users with site administrator roles will be able to access the site.
Depending on your level of comfort, content type and target audience, different privacy levels will suite you in different contexts. The following are some of the most common examples:
- Sites in development are usually only visible to site administrators in the beginning.
- Course blogs that are restricted to only class participants are only visible to site subscribers.
- Community sites with content intended for visitors outside of the UBC community will allow search engines to index their site.