Documentation:Toolkit for the Digitization of First Nations Knowledge/SECTION E: Document Digitization
Scanning
Depending on the type and size of document, you may need to use a variety of methods to digitize the material. The section following discusses the types of scanners available as well as their associated uses in digitization.
NOTE: There are examples of Brand and Model offered but they are by no means an endorsement of a particular scanner. The examples are included for the purposes of illustration.
Types of Scanners
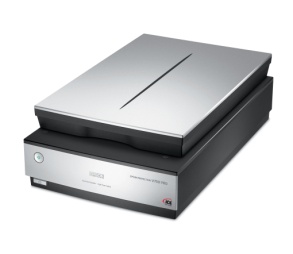
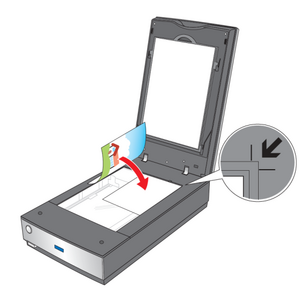
Flatbed: This is the most common type of scanner but can vary widely in terms of cost ranging from $100 for an entry level unity up to thousands for a high end unit. Flatbed scanners sometimes do come with attachments for scanning negatives and/or slides. E.g. Epson Perfection Pro 700/750
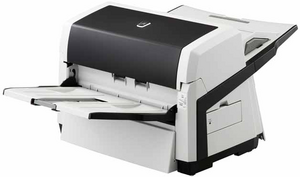
Automatic Document Feeder (ADF): This scanner takes multiple pages and feeds each page through one page at a time; depending on the model the scanner can scan one side (simplex) or both sides (duplex). This type of scanner is suitable for large batches of documents that do not require special handling or care. E.g. Fujitsu 6670A
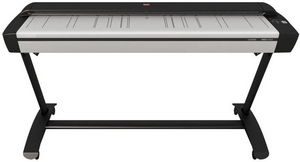
Wide Format: This scanner is suitable for documents are that are too big for flatbed scanning such as maps, posters, architectural drawings, etc. E.g. Contex HD 5450
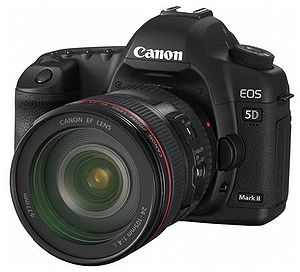
Digital SLR Camera: This method of digitization is less costly than purchasing a wide format scanner, but requires expertise in digital photography as well as purchase of additional equipment such as tripod, lights, light stands, etc. E.g. Canon EOS 5D Mark II
Sample Scanning Procedures
Depending on the type of scanner you select for your project, you will have to create procedures and workflows customized to the machine. For this toolkit, sample procedures have been provided for reference.
General scanning procedures will include the:
- Selection and purchase of an appropriate scanner. Some considerations may include the ability to:
- Automatically scan double-sided documents
- Automatically scan documents of different sizes
- Skip blank pages
- Utilize optical character recognition (OCR)
- Configuration of scanning software and calibration of scanner
- Identification of where to save scanned documents and access rights
- Determination of naming conventions
NOTE: The following are sample procedures regarding the operation of the Epson Perfection Pro 700/750 using the software Epson Scan These procedures do not include details on the installation and set up of the machines on actual workstations.
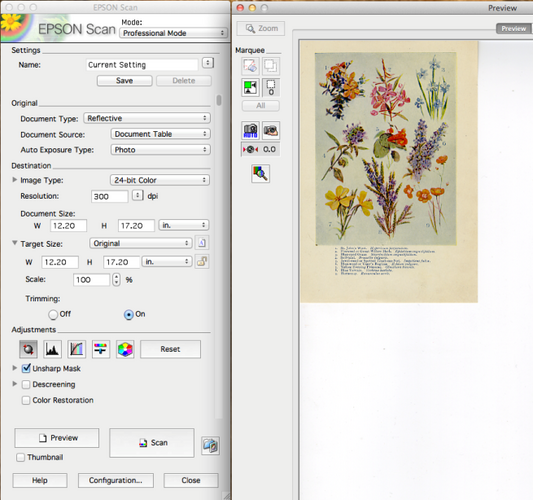
Open EPSON Scan
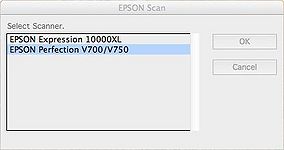
Select the appropriate scanner for your workstation -- choose EPSON Perfection V700/V750. Click OK.
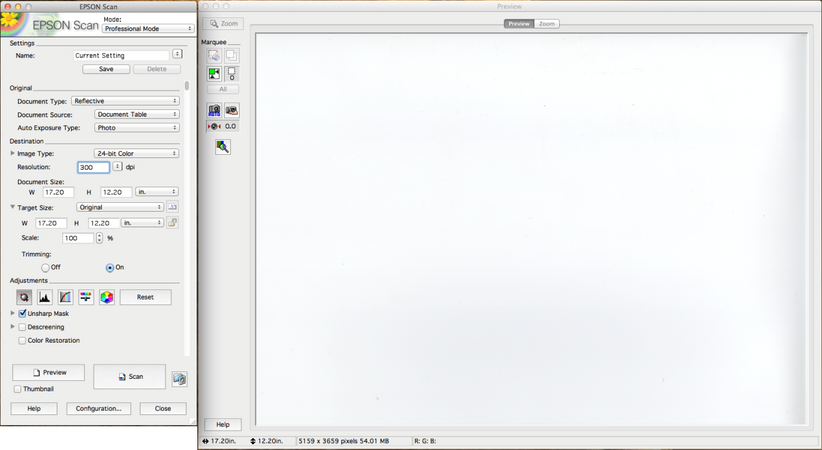
Two panels will appear. The left panel contains most of your settings and scan controls; the right panel is a preview window.
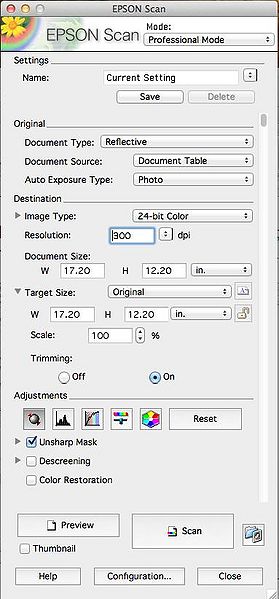
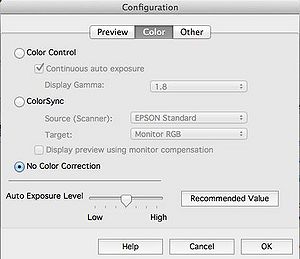
In the left panel ensure the following settings:
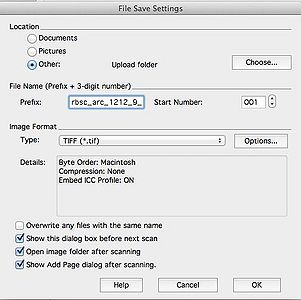
Under File Name enter the prefix as the root name you wish to use for your file or files (Please refer to Section B5: Naming Conventions). It is usually wise to append an underscore to the file name. The Start Number is appended by EPSON Scan to the file name and automatically incremented with each successive scan.
The Image Format Type should be TIFF (*.tif) for documents and photographs. If you are scanning a multipage document you may wish to use Multi-TIFF (*.tif) so that all images are rolled into a single file. The scanner will create an image file and save it to your desired folder. With the Multi-TIFF setting you will be asked if you wish to add additional pages to the image file. When you have finished scanning the pages for your document click Save File.
For the next item the scanning software will automatically increment the 3-digit suffix.
Sample Optical Character Recognition (OCR) Procedures
NOTE: These are sample procedures for the OCR software, ABBY FineReader.
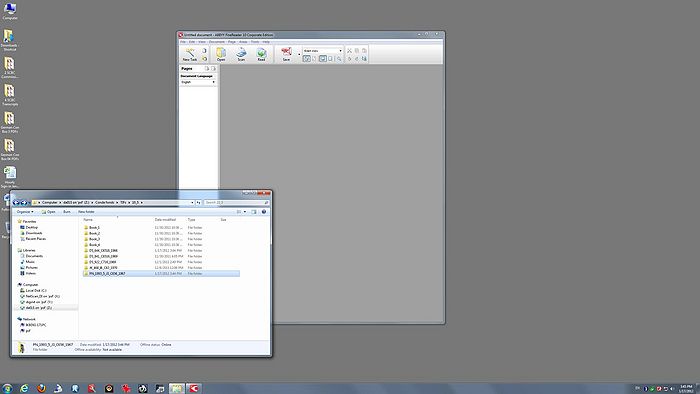
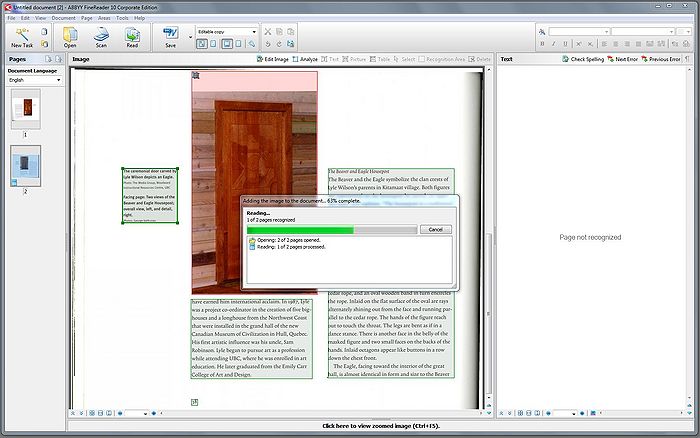
Open up ABBYY FineReader. If there is no white window on the left side of the grey field enter Ctrl+N to create a New FineReader Document.
Drag the files from your folder (you can drag the folder itself) into the empty white panel on ABBYY FineReader. Scanning may have been done with individual files for each page or as multi-tif to cluster several pages into one file.
Ensure that all files pertaining to a single object are dragged to the window. Re-order the pages in the left-hand panel, if necessary.
Once the pages have populated the left-hand window individual pages can be edited (if necessary) using the tools in ABBYY using the Edit Image button in the centre window.
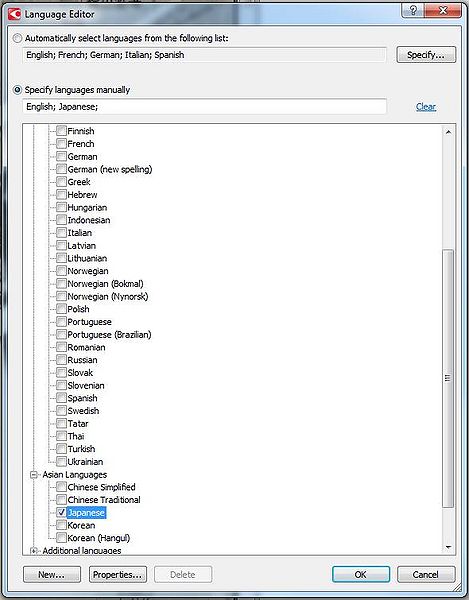
Select the document language from the drop-down box. ABBYY can OCR more than one language at a time. For this project select desired languages.
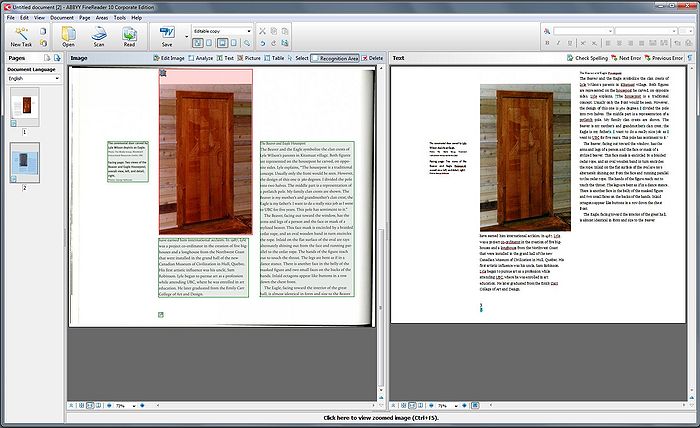
Click the Read button. ABBYY will now analyze the text and put the results of this action into the right hand pane.
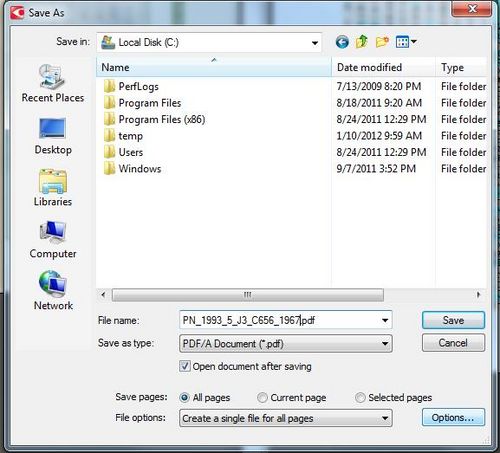
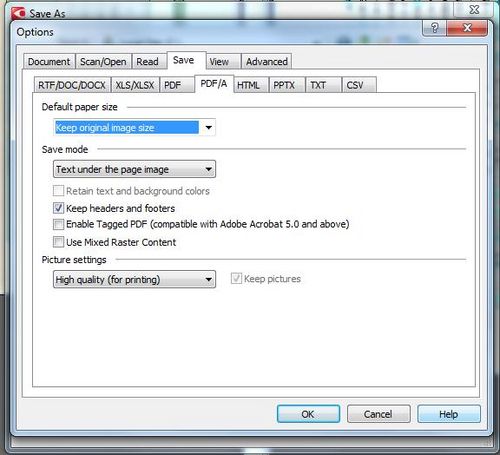
The document can now be saved. Click the Save button and ensure the file will be saved as a PDF/A document. The file should be named using the name of the source TIFF file. Save the files to the desired folder/directory.
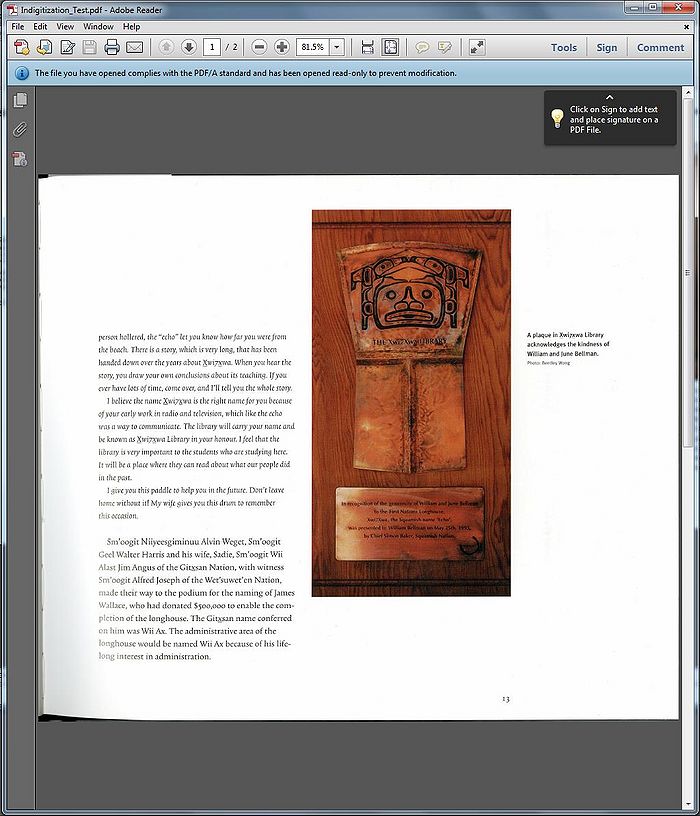
After the output from ABBYY has been saved the Adobe Reader software will now open automatically and display the output from the entire process. After briefly inspecting the document you may close Adobe Reader.
Once you are satisfied with the PDF document, you may save the project in case you need to generate other files such as .doc, or .txt.
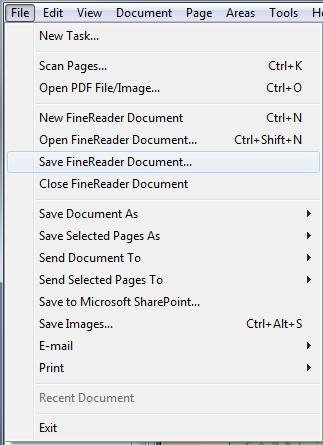
To save your project or FineReader Document, expand the File tab and select Save FineReader Document…
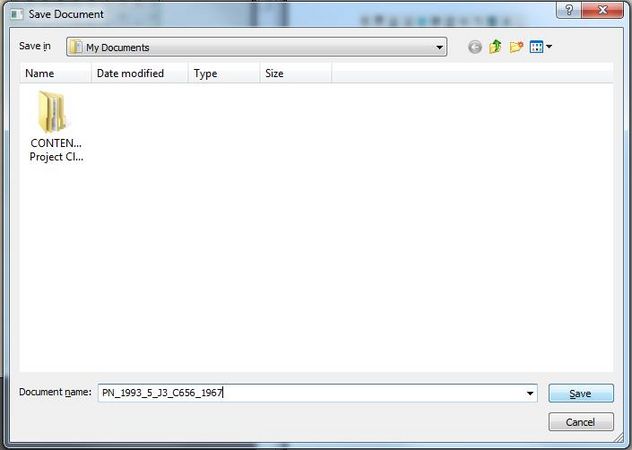
Navigate to your desired folder for saving the FineReader document and click Save.
Sample Derivative Processing
NOTE: These are sample procedures for the digital imaging software, IrfanView.
Once you have scanned your preservation copy, you may want to create copies/derivatives for print or screen access.
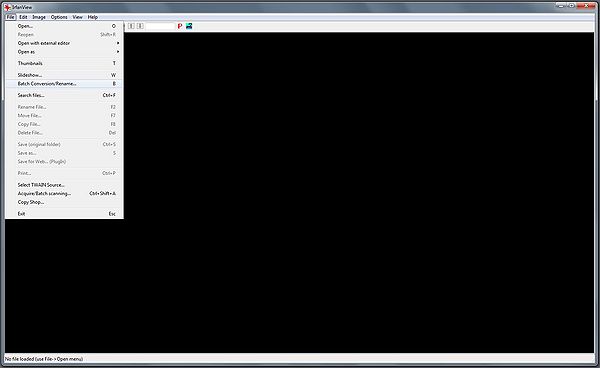
Open IrfanView.
Under the File tab, select Batch Conversion/Rename...
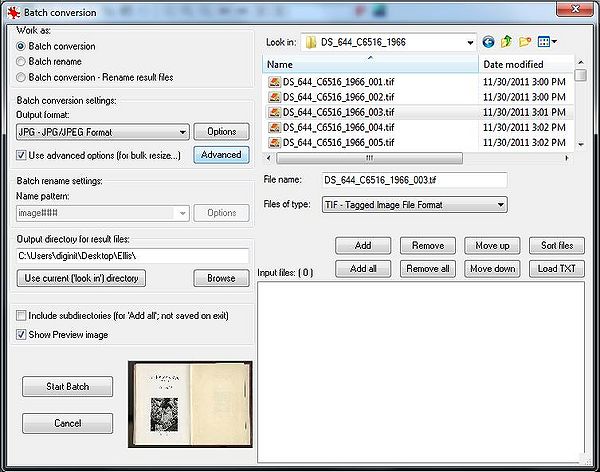
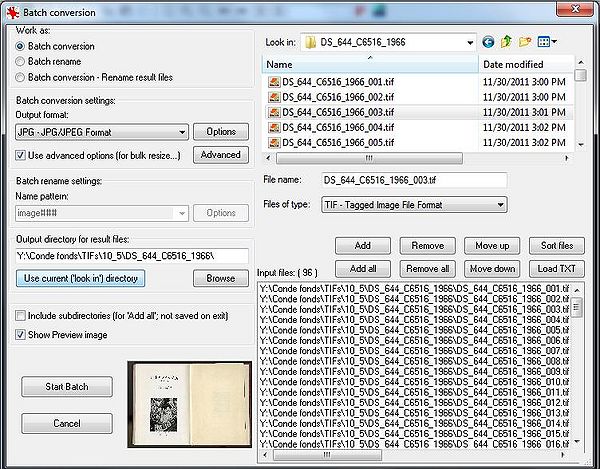
The Batch Conversion dialog window will open. Work your way from right to left to set the options/standards for your derivative files.
Look in: Browse to the directory/folder where your source image files are located
Once you are in the appropriate directory, you should see a list of all your image files in the dialog box.
If you do not see any files listed, use the drop down list beside Files of Type: to select the appropriate file format
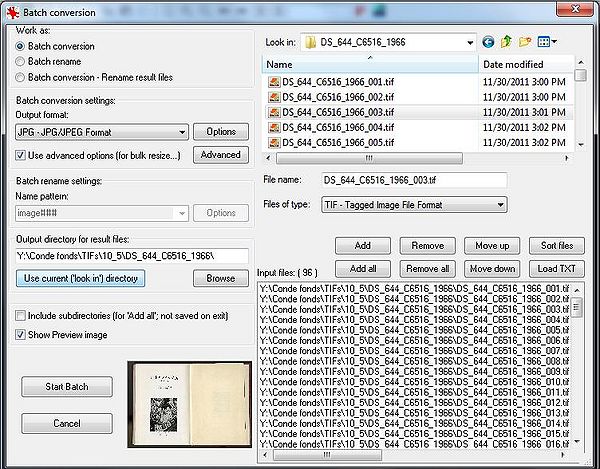
If you are converting one or selected files, highlight the desired files and click Add. If you are converting all files in a particular folder, simply click Add all.
When you are finished adding files for conversion, you should see a listing of the selected files in the dialog box below.
Now moving to the left side of the Batch conversion dialog window
Work as: Batch conversion (conversion of image files without renaming), Batch rename (renaming of files without conversion), or Batch Conversion -- Rename result files
Batch conversion settings: Output format: JPG -- JPG/JPEG Format (or whichever format you desire for your derivative image files)
Check the box: Use advanced options [for bulk, resize...]
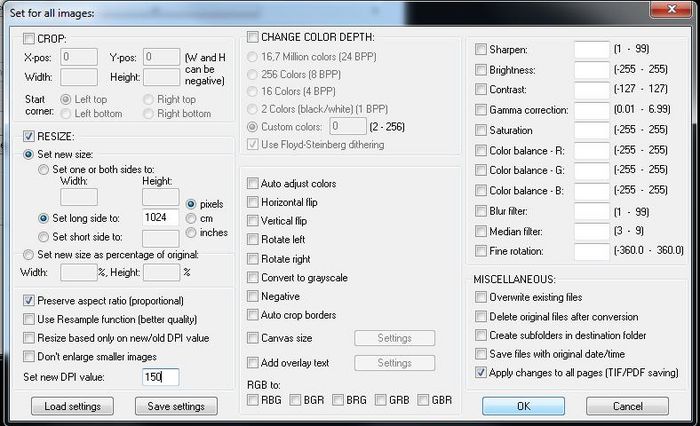
Click Advanced button to see more options
Check the box beside RESIZE:
Select radio button for Set new size:
Select radio button for Set long side to: and input the desired size for your derivative file (minimum of 800 pixels on the long edge for screen access file)
Beside Set new DPI value: input desired value for resolution (minimum of 150 dpi for screen access file)
Click OK button to return to Batch Conversion dialog window.
Under Output directory for result files, you can choose to use the same directory as your source files, i.e. Use current [look in] directory OR you can Browse to a desired directory for your derivative files.
Once you are satisfied with all your settings, click Start Batch to begin conversion.
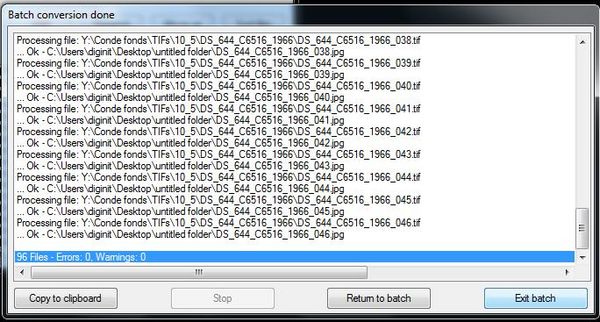
If there are no Errors or Warnings once the batch has been processed, you may Exit batch.
