Documentation:Toolkit for the Digitization of First Nations Knowledge/SECTION D: Audio Digitization/D1: Audio Cassette Tape/D1.2 Condition Assessment
Overview
The Condition Assessment process described below consists of an optional assessment of the containers which house cassette collections, and a mandatory assessment of each cassette tape to determine its likely physical condition. The cassette condition assessment procedures include steps intended to summarize information related to the original recording methods which may affect playback and digitization.
Condition Assessment Templates - See Appendices D1.2a and D1.2b
These procedures and forms were developed as a template that you may use for your condition assessment. There are many ways to conduct a conditions assessment, and this method – using a paper template – is simply one of them. You may also want to consider entering the information into a database or a media tracking spreadsheet.
It is recommended that the project manager edit these templates as required for the specific needs of the digitization project. _____________________________________________________________________________________________________________________________________
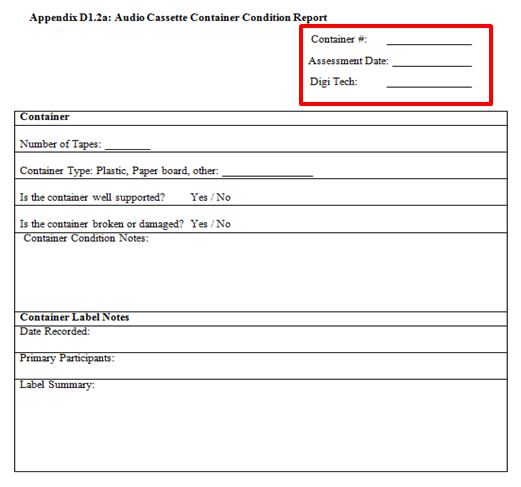
Container Condition Assessment See Appendix D1.2a
This assessment form was created so that if the majority of the containers in your collection have key information on them that needs to be recorded for your digitization project, you may wish to use this assessment form. This form includes sections on: recording the container number and its contents, assessing the condition of the container, and documenting information recorded on the container. The project manager may consider undertaking the container assessment, if required, in conjunction with an inventory in the planning phase of the project.
Step 1: Record tracking information for the container condition assessment
Enter the following on the corresponding line:
Container: The number, name, or other identification method of the container being assessed
Assessment Date: Date when the condition assessment was carried out. Please format it YYYY-MM-DD for consistency.
Digi Tech: Name of the individual who is conducting the condition assessment.
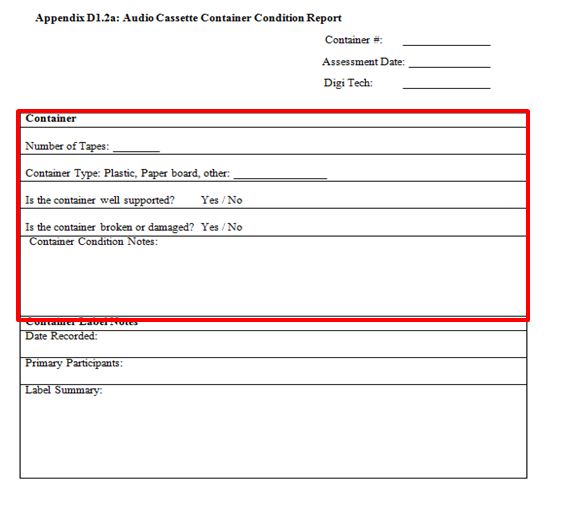
Step 2: Storage Container / Examine the storage container or box in which your cassette collection is stored
Review inventory documentation (e.g. Appendix D1.1a) if applicable and verify the number and sequence of tape identifiers for the container, if an inventory was undertaken. Enter the following information in the spaces provided on the report.
Number of Tapes: Number of tapes found in the container. Is there a discrepancy between what should be in the box as indicated by the label and the number of tapes actually in the box? Are the tapes in the box not those indicated by the label or inventory? If so, make sure to note it in the label summary for future reference. You may also want to record the tape ID numbers found in the box and/or those that are missing. Update the inventory if required.
Container Type: Indicate the material that the container is made out of. Circle type or add other if required.
Is the container effectively supporting the media inside? If no, recommend rehousing.
Is the container broken or damaged? After examining the container using the guidelines provided below, is the container showing signs of damage? If yes, recommend rehousing.
When examining the container for damage look for:
- Tidelines on the box or warped cardboard indicating that it has come into contact with water.
- Fading that indicates it has been exposed to light and heat.
- Gaps and holes that indicate exposure to particulates.
- Important markings or data recorded on the storage container concerning its contents. Be aware that the media housed in this container might not be the media that was originally housed in it, and any information recorded on the box could be incorrect.
- Ensure the container is constructed of acid-free paper or inert, flame-retardant plastic, protects the tape from contamination, and is in good condition.
Container Condition Notes: Describe here any damage or include any pertinent information as to the condition of the container that has not been included in the previous fields.
IMPORTANT:
If you see biological contamination (evidence of mould or pests) continue immediately to step 5 in the general condition assessment.
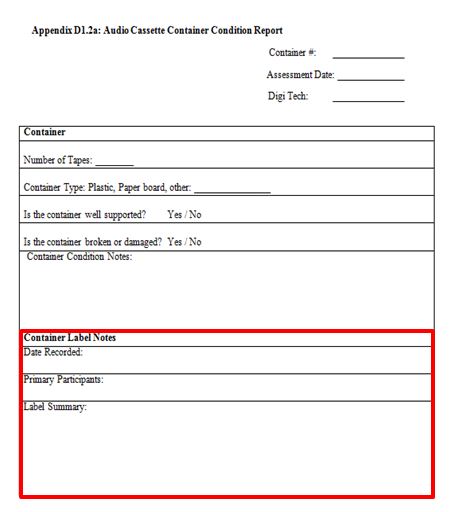
Step 3: Container label / Document information recorded on the container
Enter the following in the space provided on the form:
Date Recorded: If there is a label somewhere on the container that indicates the date that the media inside was recorded, include it here. Format the date YYYY-MM-DD for consistency.
Primary Participants: Include any label information on the primary participants in the recording of the container’s contents.
Project Information: Include any label information on the recording project of the contents on the box, if there was one.
Label summary: In this field summarize what can be found on the container’s label(s).
Audio Cassette Condition Assessment See Appendix D1.2b
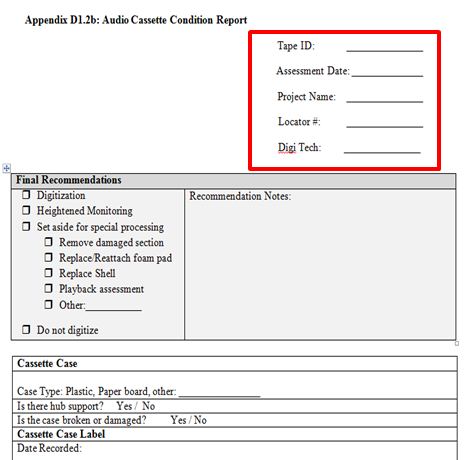
Step 1: Record tracking information for the condition assessment
Enter the following information on the corresponding box on the report
Tape ID: Use assigned cassette numbering sequence or existing ID number [as supplied by your project manager].
Assessment Date: Date when the condition assessment was carried out.
Project Name: Name of the project or collection the tape is a part of.
Locator: The container number, shelf number, or other information required to identify the location of the tape.
Digi Tech: Name of the individual who is conducting the condition assessment.
NOTE: The “Final Recommendations” section is to be completed last (in Step 11).
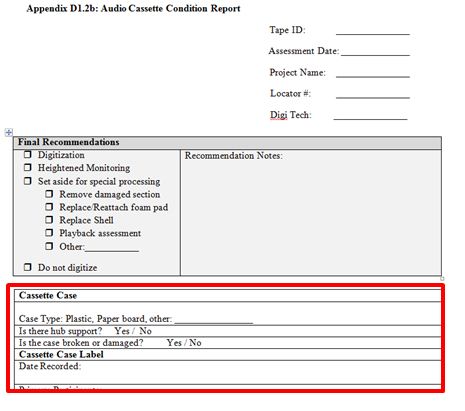
Step 2: Cassette Case / Examine the cassette case
Record information regarding material type and damage.
- Check to ensure that the tape is in the correct case. If not, set the case aside and note it in the condition assessment as the correct tape might appear later in the collection.
- If a tape is in a damaged case or without a case, the tape should be rehoused. If the original case has labeling information on it, make note of this information and retain the case. In addition, you may want to take photocopies or pictures of the labels and attach them to the condition assessment for future reference.
Case Type: Indicate the material that the case is made out of. For example, is it a paper sleeve or a plastic case?
Is there hub support? Indicate if the case provides hub support. Hub support prevents wheels from turning over time and damaging the magnetic tape.
Broken or Damaged Case: Indicate if the case is damaged in any way such as if it is warped or cracked.
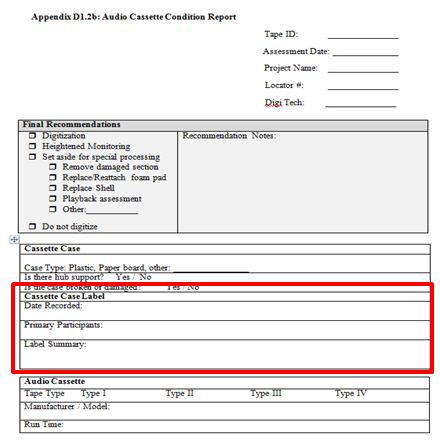
Step 3: Cassette Case Label / Record information found on the cassette case label
Before entering information on the Condition report review what type of information is required with the project manager.
- Decide if labels will be photographed or photocopied
- Leave fields blank if information is not known
- If there is information about the tape in associated records that should be recorded on the report, a standard approach is to put the information in square brackets to indicate that it is not from the tape / tape label.
Date Recorded: The date the cassette was recorded according to the cassette case label. YYYY-MM-DD format.
Primary Participants: The primary participants involved in the recording of the cassette according to the cassette case label.
Project Information: Include any label information on the recording project of the contents on the box, if there was one.
Label Summary: Summarize what can be found on the cassette case’s label(s). Include any inserts found in the case, and how many of these labels and/or inserts there are for future reference. You may also want to include here any information found on the cassette shell.
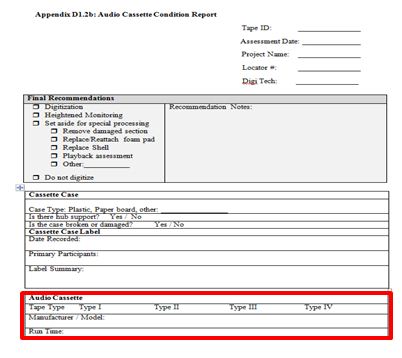
Step 4: Determine Cassette Specifications
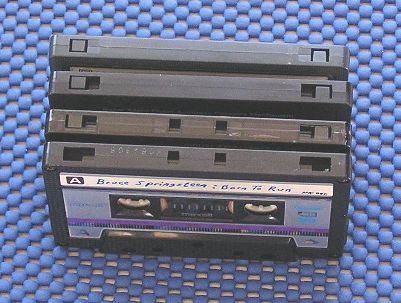
Tape Type: Circle the appropriate tape type:
From the top Types I, II, III, and a Tape IV with a write protection tabs removed to prevent recording over the contents.
Manufacturer / Model: The cassette manufacturer and/or model according to the cassette shell.
Run Time: The run time of the tape. The most common of which include: C46 (23 min. per side), C60 (30 min. per side), C90 (45 min. per side), and C120 (60 min. per side).
Noise Reduction: Circle whether or not noise reduction was used. The only way to determine if noise reduction was used is to examine the labels and see if anyone documented that noise reduction was enabled at the time of recording. Otherwise, circle “no.”
Step 5: Look for biological contamination
IMPORTANT:
Do NOT smell the media until you have examined it for mould contamination and confirmed that it is not present.
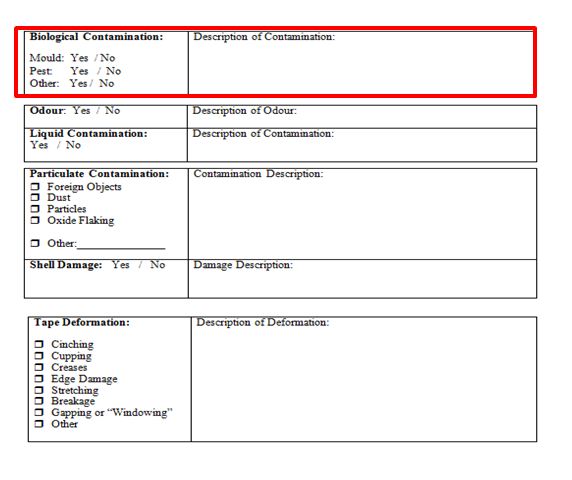
Examine the cassette for biological contamination and circle the appropriate box and describe the contamination.
- For mould, examine the inside of the cassette case and the edges of the tape. Mould can be black, brown, or mustard-coloured, and has fuzziness and hair-like growths.[1]
- Look for sightings of the pests, droppings, urine stains, tracks, and gnawing damage.
If pests or mould is discovered, immediately quarantine the media by sealing it in a plastic bag and set it aside for special processing. View the special processing guide provided with this toolkit for more information.
Step 6: Smell Test / Test the media for chemical breakdown by smelling the media
Open the cassette case and hold it slightly away from your nose.
Do not breathe in deeply, but instead waft the smell towards your nose by making quick fanning gestures with your hand.[2]
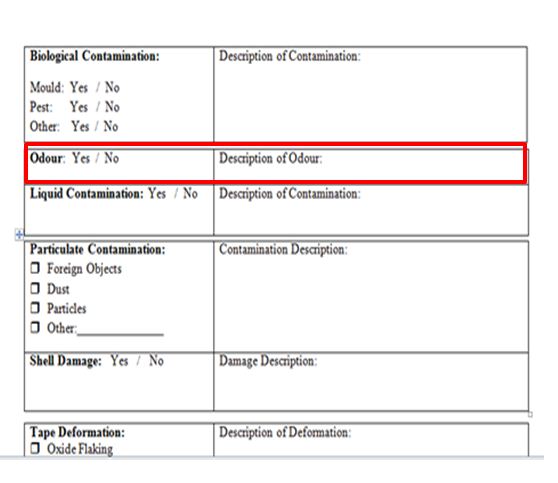
If the tape has a waxy, dirty socks, or pungent odour the chemical breakdown has likely occurred.[3] In this case, make the recommendation (see Step 11) of quarantined storage and Heightened Monitoring during digitization.
Circle Yes / No and describe smell.
Step 7: Liquid Contamination / Examine the tape for signs of liquid contamination
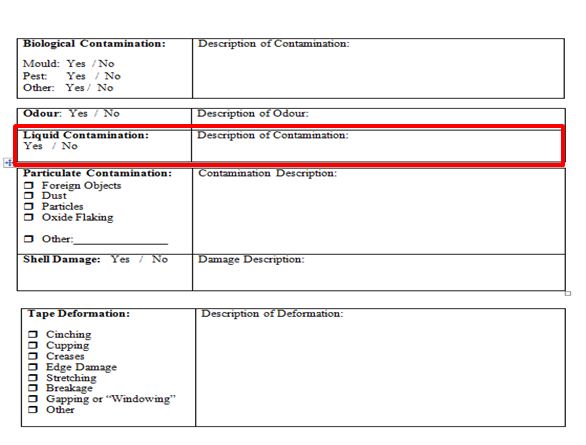
Note signs of liquid contamination including stains, cassette shell discolouration, or a curling label. If exposed to moisture media would be at a heightened risk for damage such as hydrolysis.
If you discover liquid contamination then make the recommendation of Heightened Monitoring during digitization and continue with the Condition Assessment (see Step 11).
Step 8: Particulate Contamination / Examine the tape for particulates
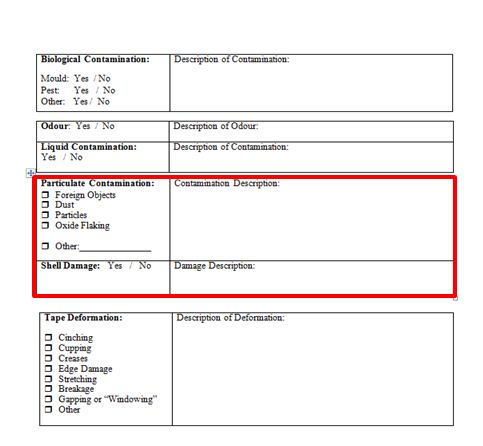
Note any particulates lodged inside the shell including: foreign objects, dust, or other particles. These particulates could affect playback and leave particulates in the machine. Check appropriate box and describe as required.
Check for Oxide Flaking - a binder/base adhesion failure by looking for tape particulates at the bottom of the cassette case and inside the shell. If you discover particulates inside the cassette shell then recommend particulate cleaning (special processing guide) and continue the condition assessment
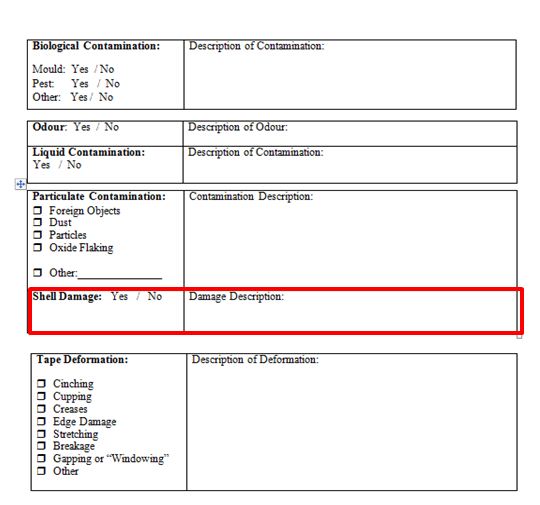
Step 9: Cassette Shell / Examine the cassette shell for damage
The shell is the plastic covering of the tape. Check for the following signs of damage:
- Cracked shell
- Cracked or missing cassette window
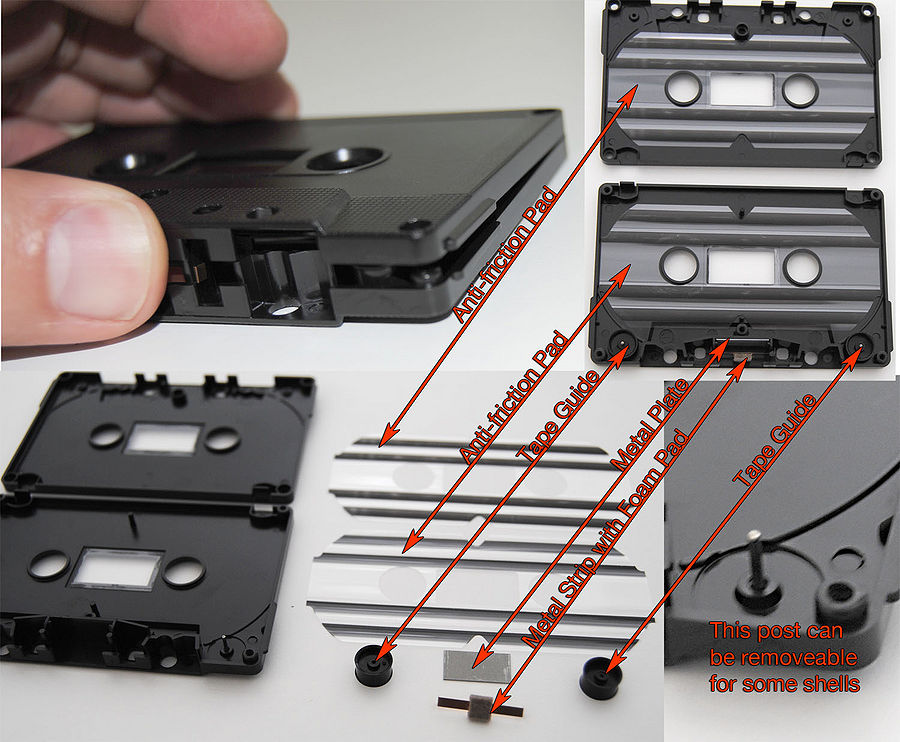
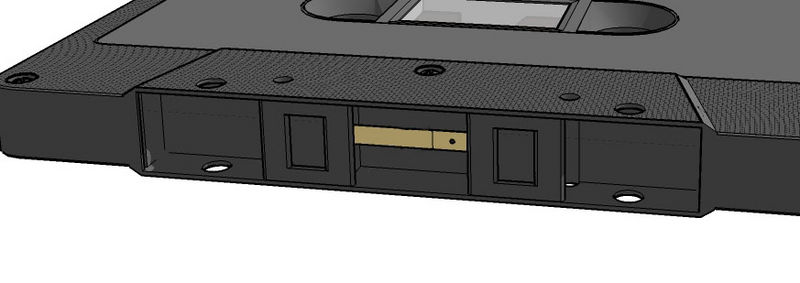
- Detached, off center, loose, or missing pressure pad.
Circle Yes / No. Make note of the damage and recommend either shell replacement or foam pad replacement based on type of damage (Step 11).
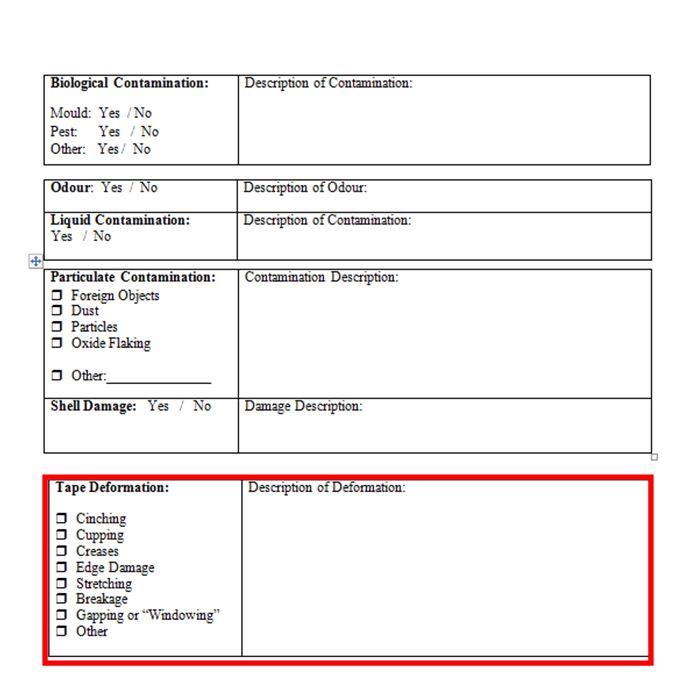
Step 10: Tape Deformation / Examine the cassette for signs of tape deformation
Check the appropriate box for the following conditions where appropriate and describe deformation.
Cinching: A section of the tape has wrinkled or folded in on itself “causing buckling and in severe cases can give the appearance of ‘accordion-like’ creases” .
Cupping: The tape is curved in a u-shape.
Creases: There are creases in the tape.
Edge damage: The top or bottom edge of the magnetic tape is distorted or damaged. Not very common in cassettes.
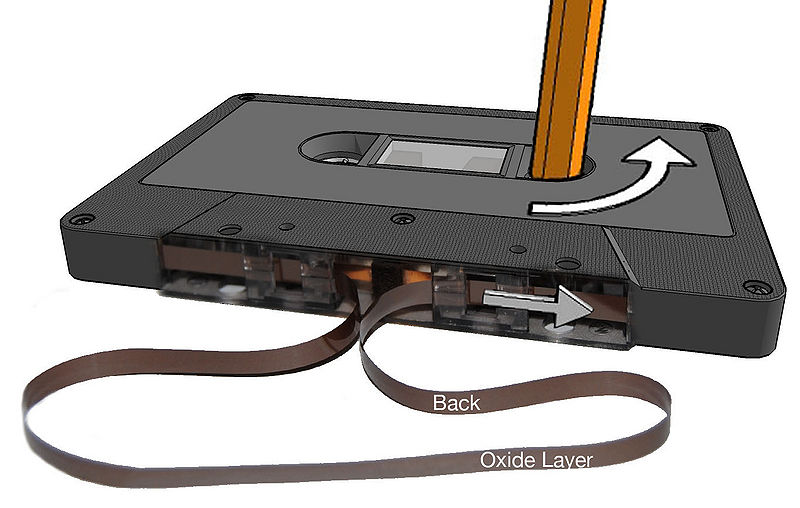
Stretching: The tape is stretched either in width and/or length. To check for stretching examine the exposed tape at the bottom of the cassette. Take your index finger and insert the tip of your finger into the right hub of the cassette. Turn the hub counter clockwise and, while winding, continue to check the tape for evidence of stretching.
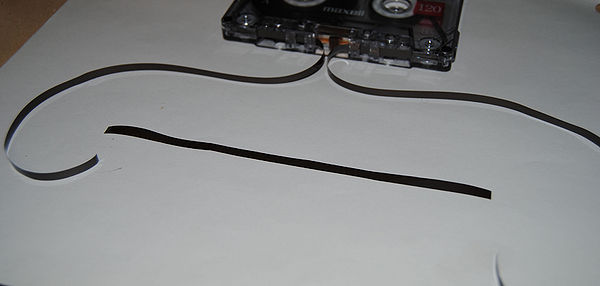
Breakage: A cut, tear or missing portion of the tape.
Gapping: There is a major tension loss and the tape strands buckle to the point where gaps or ‘windows’ appear in the tape pack.
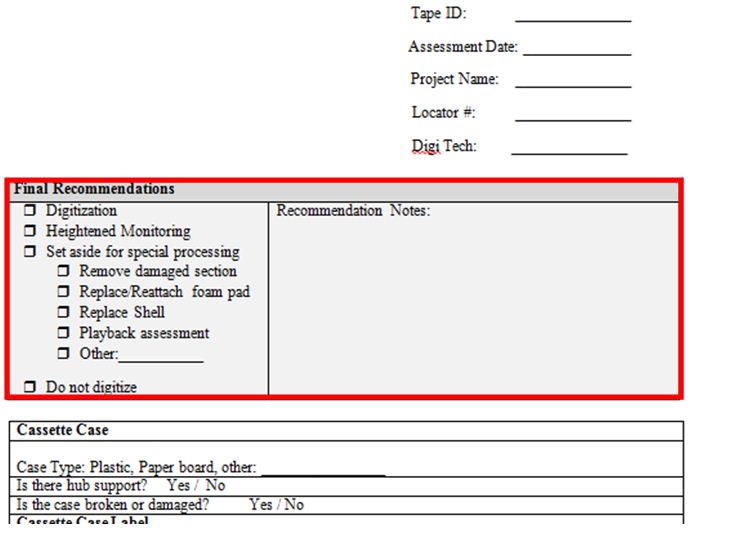
Step 11: Final Recommendations / Based on the condition report make final recommendations for this cassette
Return to the first page of the condition assessment. Fill in the grey box at the top of the form based on the recommendations noted for each step.
Digitization: The tape is in good condition and, therefore, ready for digitization.
Heightened monitoring: Storage condition (from container assessment or general condition of the tape indicated that heightened monitoring is required.
Set aside for special processing: The tape is significantly damaged or contaminated and further steps need to be taken in order to make this tape ready for digitization. Note the damage in the “Recommendation Notes” field. Select from one of the following the type of special processing necessary:
- Remove damaged section: There is a damaged section of the tape that needs to be removed.
- Replace/Reattach foam pad: The foam pad is missing or loose and needs to be replaced or reattached.
- Replace Shell: The cassette shell is damaged and needs to be replaced.
- Playback assessment: Unsure of whether or not the tape should be digitized and, therefore, a playback assessment is necessary.
- Other: Describe any other action you feel needs to be taken here.
- Do not digitize: The tape is too damaged to digitize and special processing is not possible.
Condition Assessment Summary
1. Record tracking information for the condition assessment.
2. Examine the cassette case. Record information regarding material type and damage.
3. Record information found on the cassette case label.
4. Examine the cassette to determine audio cassette specifications.
5. Examine the cassette for biological contamination.
6. Test the media for chemical breakdown by smelling the media. [Do not smell the media until after you have if mould or pest contamination was detected in step 5].
7. Examine the tape for signs of liquid contamination.
8. Examine the tape for particulates.
9. Examine the cassette shell for damage.
10. Examine the cassette for signs of tape deformation including:
- Cinching
- Cupping
- Creases
- Edge Damage
- Stretching
- Breakage
- Gapping or “Windowing”
11. Based on the results of the above examination, make final recommendations for this cassette.
Audio Cassette Special Processing Guide
Summary
Most audio cassettes are playable in their current condition. This guide contains procedures for fixing cassette tapes which are not playable due to physical issues with the cassette shell or tape damage. Addressing cassette tapes which have been contaminated with mould or another substance, or tapes which are chemically deteriorated, are not covered in this guide. Tapes which have problems not addressed in this manual should be set aside and external advice should be sought. Such cassette tapes can be repaired and digitized with external help, repaired and digitized by external contractors, or deemed not worth the expense of repair/digitization. Examine the condition assessment report (form) for the media item at hand. Ensure that special processing is required and appropriate. For all procedures in this section use a blank Special Processing Form to record what procedures were performed and what the results were.
NOTE:
Please ensure that you wear gloves or clean your hands well when handling media. Also ensure that your work area is clean, clear and well lit for all procedures in this section.
Replace Cassette Shell
Tools, supplies and resources:
- Media item
- Media item condition assessment report
- Blank special processing form
- New empty cassette shell
- Hobby knife (possibly)
- Plastic tweezers
- Small Phillips screwdriver
- Pencil
- Clean hands or rubber/cotton gloves
1. Record tracking info and procedure type on “special processing form” Record tracking info and check the “remove damaged tape section” box on the Special Processing Form.
2. Open new shell
- a. Place shell on work surface as shown with screws exposed
- b. Remove all screws
- c. Carefully separate the upper half of the shell from lower half (make sure that all small parts stay in position within the lower half of the shell.)
NOTE:
Not all cassette shells contain the exact same parts and small parts can easily become separated from the shell. If you are unsure of where each part should be situated then it is wise to take pictures of the shell for reference.
3. Open damaged shell.
- a. Place cassette on work surface with screws exposed.
- If the damaged shell is glued together and does not have screws then it must be separated, by cutting through the glue at the seam where the two halves meet. There are no safe procedures for this process at this time. Attempting this procedure with a hobby knife is dangerous to the technician as the blade can easily slip off of the cassette shell. Using a power rotary cutter presents a danger to damaging the magnetic media directly and would introduce a significant amount of sharp particulates that may stick to the tape surface. The development of safe procedures for opening glued cassette shells is a recommended area for further development of this manual.
- b. Remove all screws.
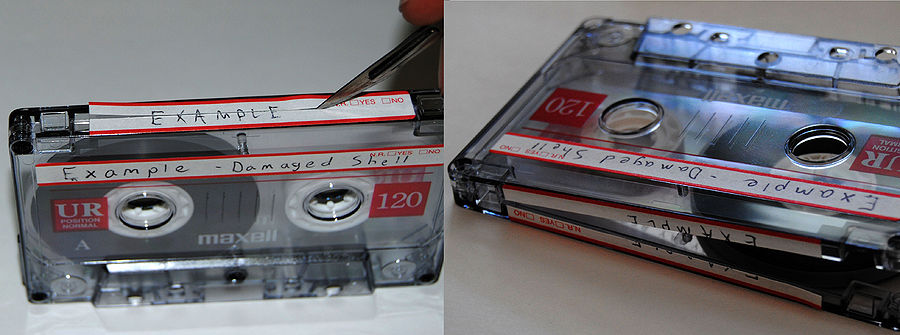
- c. If there are labels, which overlap both halves of the shell, then use a hobby knife to score the label along the seam between the halves (all labels should be documented by this point).
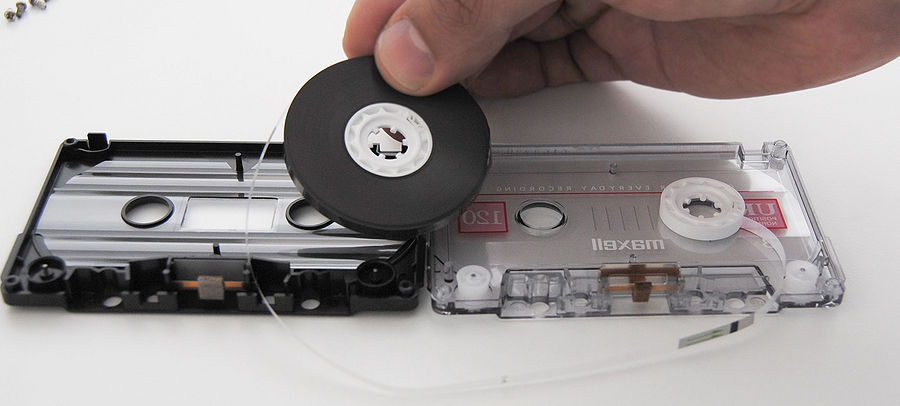
- d. Carefully separate the upper half of the shell from lower half (make sure that the tape reels and all small parts stay in position within the lower half of the shell).
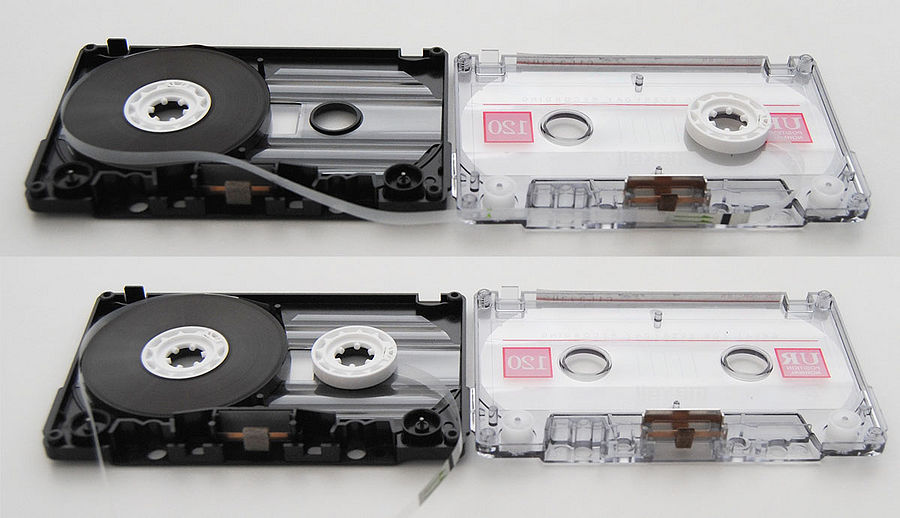
4. Move the old and new shells close together.
5. Move the tape reels to the new shell.
- a. Carefully pick up the cassette reel that is closest to the new shell (Be careful to keep the tape from unwinding due to gravity)
- b. Gently move the reel toward the same position on the new shell, unwinding the tape as it moves.
If the tape layers stick together then place the tape back into its original position and reassemble the tape securing the screws loosely. Do not try to move the tape to the new shell - proceed to step 9.
- c. Place reel into its position in the lower half of the new shell. Allow the slack tape to gently lie on the work surface.
- d. Gently move the second reel from the old shell to the new shell.
- e. Place the lower half of the old shell aside.
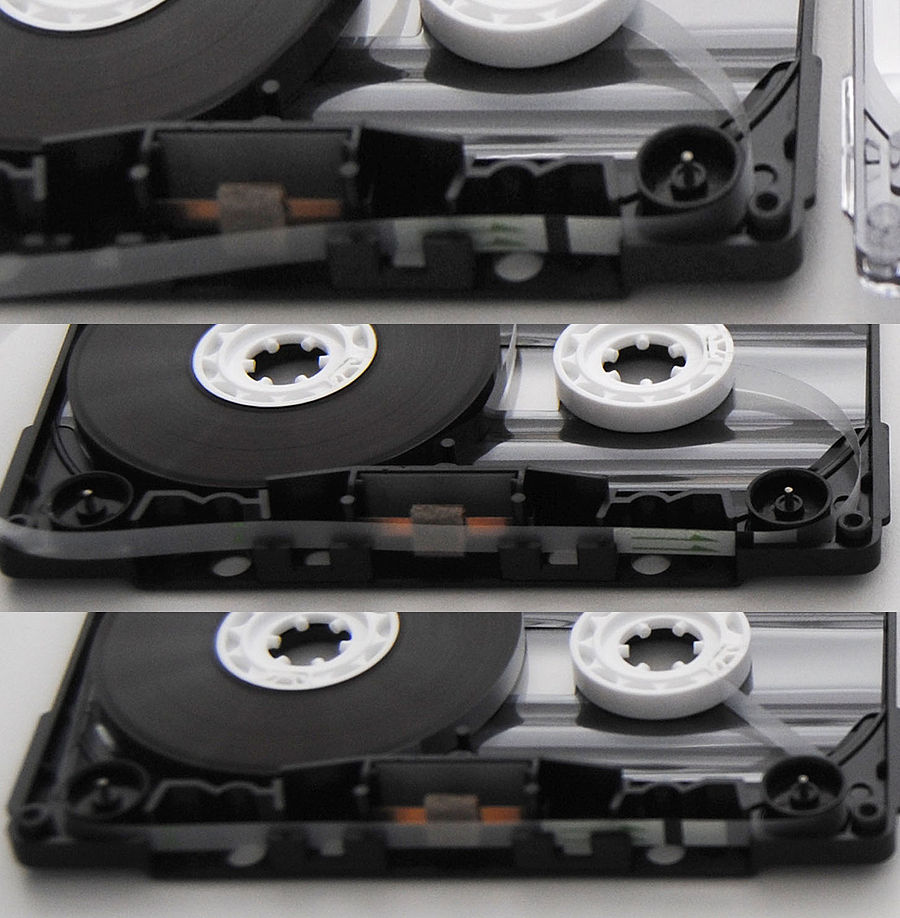
6. Thread the tape through the tape path and take up the slack.
- a. Working from one side, insert the tape into the path according to the directions given with the new cassette shells.
- b. By hand, gently turn one of the reels to take up the tape slack (do not allow the tape to snag on anything during this process).
7. Join the halves of the new shell and secure them together.
- a. Gently place the upper half of the new shell onto the lower half (be sure not to allow the tape to be pinched between the shell halves.)
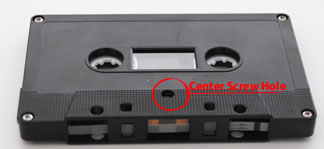
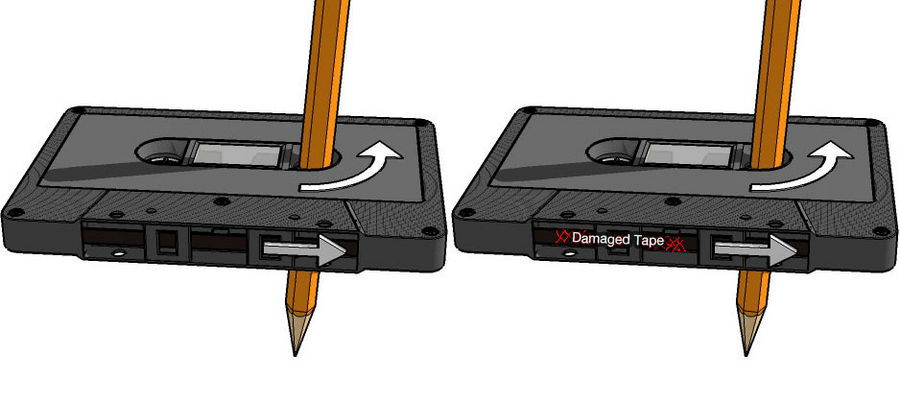
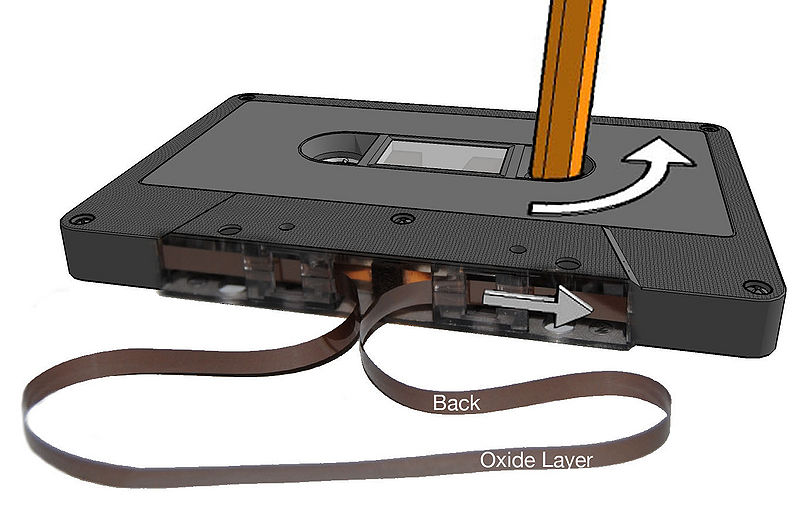
- b. Insert a screw into the center screw hole of the new shell. Loosely secure the screw and test the tape movement by winding the tape in both directions with a pencil. If the tape does not move smoothly then loosen the screw and make sure that the reels are sitting properly on the shell hubs, the tape is threaded properly and the tape isn’t pinched between shell halves. Repeat until tape moves smoothly – repeat entire procedure with a new shell if necessary.
- c. Insert the remaining screws and tighten.
8. Mark new cassette shell label with media ID# for tracking.
9. Record the outcome of the procedure on the Special Processing Form.
- a. Successful/Not successful (what further work needed?)
- b. If the tape was not repairable, but might be by somebody with more experience then set the tape safely aside and enter “no” into the digitize field in the media tracking spreadsheet. Record the issues preventing digitization in the notes field of the media tracking spreadsheet.
- c. If no more special processing is required then mark the special_processing_completed field as yes in the media tracking spreadsheet.
10. Attach the special processing form to the condition assessment form and file them.
11. Return the tape to its proper storage location.
Remove Damaged Section of Tape
Tools, supplies and resources:
- Cassette tape to be repaired
- Blank Cassette Tape
- Completed Condition assessment report
- Blank special processing form
- Razor blade (or hobby knife)
- Plastic tweezers (or any tool that can gently pull the tape out and away from the shell)
- Tool for winding tape (any tool that can gently engage the tape spindles and turn them e.g. Pencil)
- Ruler
- Splicing block
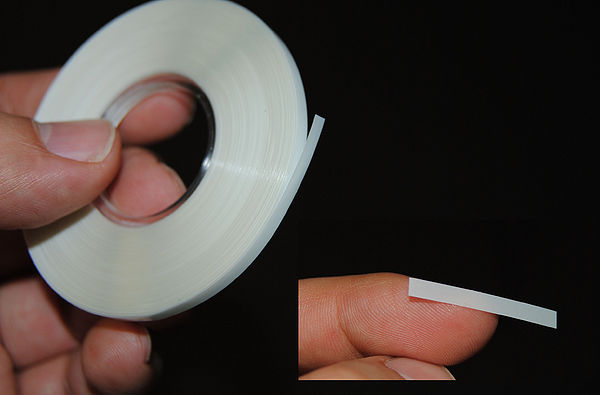
- Splicing tape
1. Record tracking info and procedure type on “special processing form” Record tracking info and check the “remove damaged tape section” box on the Special Processing Form.
2. Find damaged section of tape. a. If tape is damaged but not broken then use a pencil or other tool to gently wind the tape within the cassette shell until the damaged section is visible. Go to step 3.
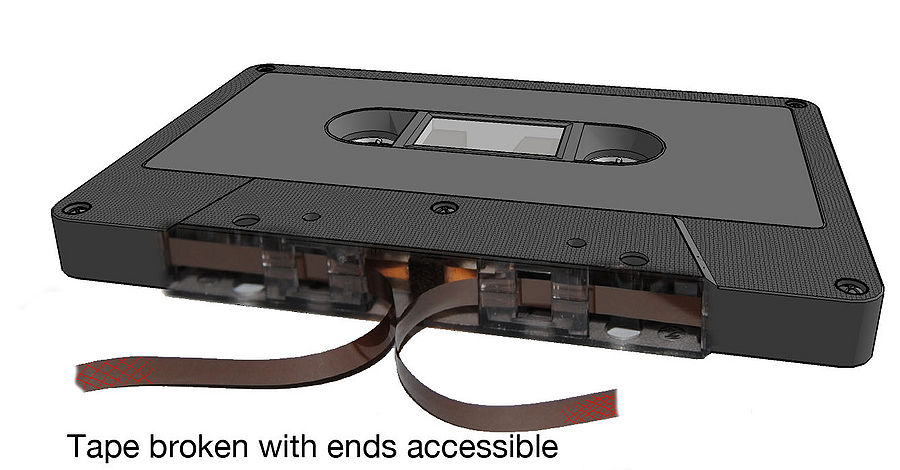
- b. IF the tape is broken but the ends are accessible then go to step 3.
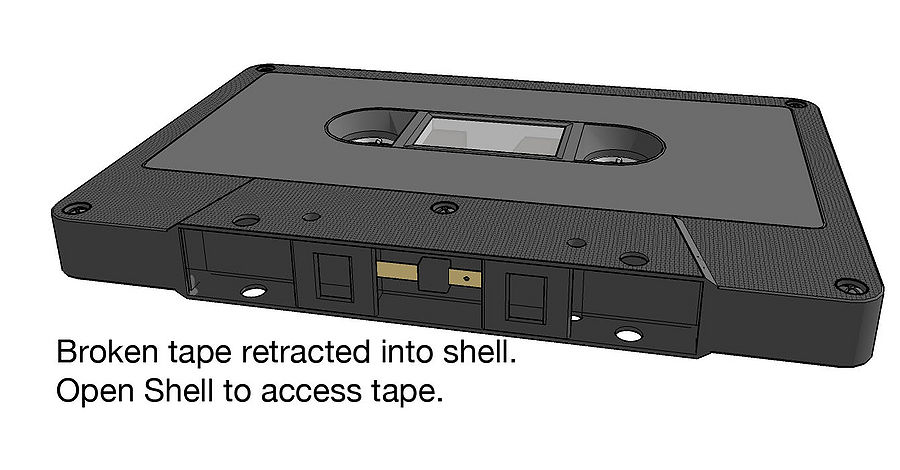
- c. If the tape is broken and one or both ends are retracted inside the cassette shell then follow Step 3 from the “replace cassette shell” procedures below to open the cassette shell exposing the reels.
Once the cassette shell is open and the reels are exposed…
- i. Carefully unwind a short section of tape from each reel.
- ii. Thread each side through the proper tape path and expose a section through the tape head slot.
- iii. Close the cassette shell according to the directions in the “replace cassette shell” procedures.
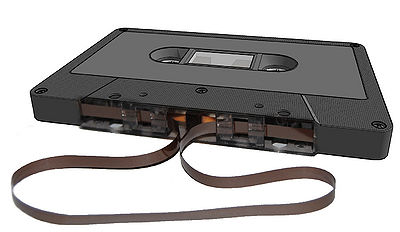
3. Pull the damaged section of tape out from the cassette shell
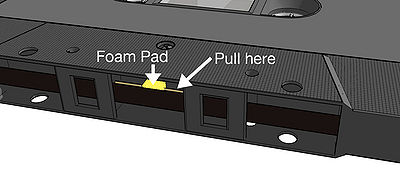
Access the tape from the location immediately beside the foam pad. Pry outward taking care not to grip or damage the foam pad while pulling on the tape. If possible, only make contact with the damaged section of tape so as to avoid damaging normal, playable tape. Expose about 8” of undamaged tape at each end of the damaged section.
4. Remove the damaged section of tape
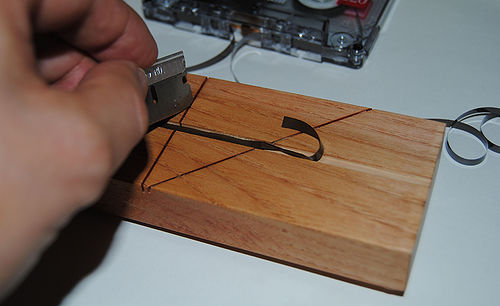
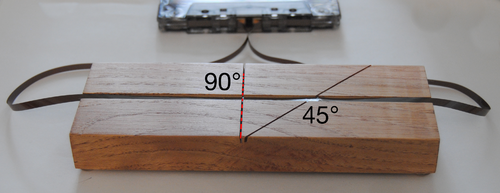
- a. Place the tape into the splicing block with the magnetic oxide layer downward; this is the side of the tape that faces outward from the reel. Position the border of the damaged and non-damaged tape over the 90 degree cutting slot. With a finger and thumb from one hand, press lightly on the tape on either side of the cutting slot. Use the razor blade to cut the tape at this position. Place the undamaged tape end safely aside.
- b. Slide the damaged tape end in the splicing block track to the other end of the damaged section. Cut the tape separating the damaged tape from the cassette reels. Set the undamaged tape end safely aside. Measure the removed section of tape and record the length on the Special Processing form.
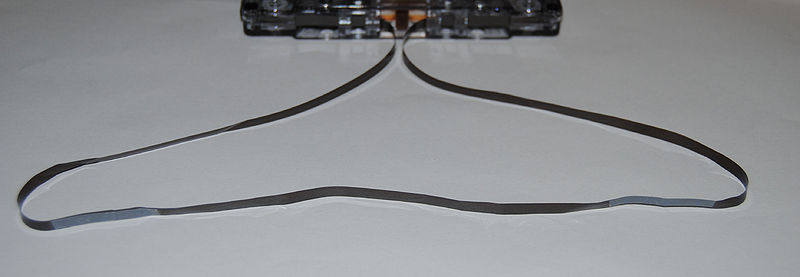
5. Cut 6” of blank (unrecorded) tape to separate undamaged tape ends.
Use the razor and 90 degree slot of the splicing block to cut a 6” section from the blank cassette tape (make sure that there is a clean 90 degree cut on each end of the tape.)
6. Attach blank tape section between the undamaged tape ends
- a. Place one undamaged tape end onto the long flat section of the splicing block track (oxide layer down.) Place the section of blank tape onto the splicing block so that one end buts up against the undamaged tape end.
- b. Cut off a small piece of splicing tape (approx. 1.5 cm.) Carefully place the tape lightly over the leader and tape ends so that the splicing tape does not overhang the tape or leader sides. If the tape is wrongly positioned to start with gently pull it from the leader/tape surface and try again. Once the tape is properly positioned press it firmly and rub it with a fingernail to remove any air bubbles.
- c. Repeat the previous two steps for the other side of the blank tape section and other undamaged tape end (Pay close attention to ensure that there are no twists in the tape before attaching these ends).
7. Use a pencil (or other tool) to gently wind the repaired tape and leader into the cassette shell.
8. Use the pencil to test the tape travel in each direction (pay attention to the point where the splicing tape interacts with the adjacent layer.) If the splicing tape sticks to an adjacent layer then remove repeat that splice with a new piece of tape.
9. Record the outcome of the procedure on the Special Processing Form.
- a. Successful/Not successful (what further work needed?)
- b. If the tape was not repairable, but might be by somebody with more experience then set the tape safely aside and enter “no” into the digitization field in the media tracking spreadsheet. Record the issues preventing digitization in the notes field of the media tracking spreadsheet.
- c. If no more special processing is required then mark the special_processing_completed field as yes in the media tracking spreadsheet.
10. Attach the special processing form to the condition assessment form and file them.
11. Return the tape to its proper storage location.
Replacing Metal Strip with Foam Pad
If a foam pad is missing or glued into the wrong position, and the cassette shell can be easily opened then you should try to replace the metal strip complete with foam pad.
Tools, supplies and resources:
- Media item
- Media item condition assessment report
- Blank special processing form
- New metal strip with foam pad (from new shell or from donor shell)
- Tool for winding tape (any tool that can gently engage the tape spindles and turn them e.g. Pencil)
1. Record tracking info and procedure type on “special processing form” Record tracking info and check the “Replace foam pad” box on the Special Processing Form.
2. Follow Step 3 from the “replace cassette shell” procedures above to open the cassette shell.
3. Use tweezers to carefully lift the metal strip out of the slots that hold it in place.
4. Set the new metal strip (with foam pad) into the retention slots.
- If the strip does not fit properly then go to Step 4 of the “Replace Cassette Shell” procedures below and continue replacing the entire cassette shell.
5. If the new metal strip fits the existing shell properly then proceed from Step 7 of the “Replace Cassette Shell” procedures below to reassemble the two halves of the cassette shell.
6. Record the outcome of the procedure on the Special Processing Form.
- a. Successful/Not successful (what further work needed?)
- b. If the tape was not repairable, but might be by somebody with more experience then set the tape safely aside and enter “no” into the digitize field in the media tracking spreadsheet. Record the issues preventing digitization in the notes field of the media tracking spreadsheet.
- c. If no more special processing is required then mark the special_processing_completed field as yes in the media tracking spreadsheet.
7. Attach the special processing form to the condition assessment form and file them.
8. Return the tape to its proper storage location.
Replacing or Reattaching Foam Pad
NOTE: It is sometimes simpler to replace the foam pad complete with the metal strip that it is mounted on, or to replace the entire cassette shell, than to remove a badly positioned pad and glue a new pad in its place. Removing an existing foam pad can bend the metal strip causing the pad to apply uneven pressure to the tape. It is very difficult to open cassette shells that are glued shut (not affixed by screws.) If the cassette that you are working with is glued then make every effort to replace the pad without having to open the shell. Shells that are glued closed, are usually broken in the process of opening, and the shell must be replaced in almost all instances that they are opened.
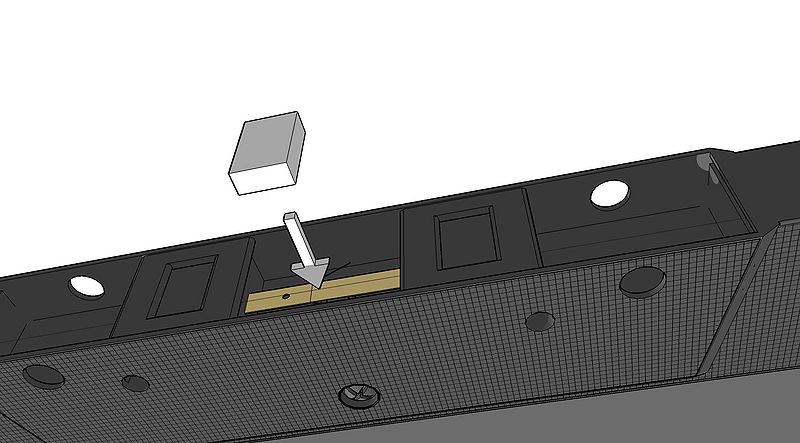
Replacing or Reattaching Foam Pad If a foam pad has come free from the metal strip that it was glued to then it may be glued back into place (the above process of replacing the metal strip with the foam pad is generally preferable to reattaching the pad).
Tools, supplies and resources:
- Media item
- Media item condition assessment report
- Blank special processing form
- Plastic tweezers
- Glue
- New foam pad or existing foam pad if in useable condition.
- Tool for winding tape (any tool that can gently engage the tape spindles and turn them e.g. Pencil)
1. Record tracking info and procedure type on “special processing form” Record tracking info and check the “Replace foam pad” box on the Special Processing Form.
2. Pull the section of tape out from the cassette shell exposing foam pad mount location. Use plastic tweezers to gently pull the tape away from the shell allowing for access to the metal strip.
 Disregard foam pad in left illustration.
3. Ready the foam pad mount surface for gluing new pad
- Using a cue tip dipped in isopropyl alcohol, clean the surface where the foam pad will be mounted. Allow 5 minutes to dry before proceeding to the next step.
4. Glue foam pad into position
- Read instructions for the application of the glue that is to be used. Apply glue as instructed to proper side of the foam pad (either large flat surface). Carefully glue the foam pad into its position within the shell.
5. Retract tape loosely into the cassette shell
- Use a pencil to gently wind the tape into the shell.
6. Allow glue to set.
- a. Place the tape into its case and set it so that the foam pad is facing up. This allows gravity to hold the foam pad in place while the glue sets. Allow tape to sit for length of time proscribed by the instructions for the glue used.
- b. When the glue has set, test the bond by gently tugging on the foam pad with the plastic tweezers. If pad does not seem to be held firmly in place then remove the pad and repeat the procedures above taking care to clean the surface and use the proper amount of glue and allow for enough curing time. If the pad is still not affixed properly then try using different glue or replace the entire shell.
7. Record the outcome of the procedure on the Special Processing Form.
- a. Successful/Not successful (what further work needed?)
- b. If the tape was not repairable, but might be by somebody with more experience then set the tape safely aside and enter “no” into the digitize field in the media tracking spreadsheet. Record the issues preventing digitization in the notes field of the media tracking spreadsheet.
- c. If no more special processing is required then mark the special_processing_completed field as yes in the media tracking spreadsheet.
8. Attach the special processing form to the condition assessment form and file them.
9. Return the tape to its proper storage location.
System Connections Guide
Preparing for System Installation
Prior to physically installing the digitization system please ensure that the following conditions are met:
- There is a clear work surface, that measures at least 30” X 60”, for the digitization system.
- A power outlet is available close to the work area (or power via extension cable.)
Placing the Components
Using the two illustrations as reference, choose a right or left orientation for the digitization components.
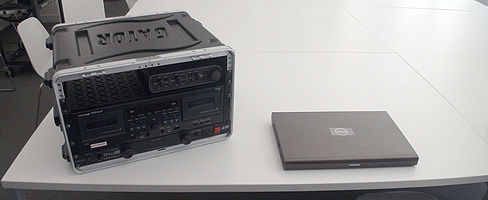
Step 1. Place the Gator case onto the table
Place the Gator case onto the work surface (left or right side) with the “front” label facing the front of the workstation and the arrow pointed upward. The case
Step 2. Remove Front and Back Covers of Gator Case
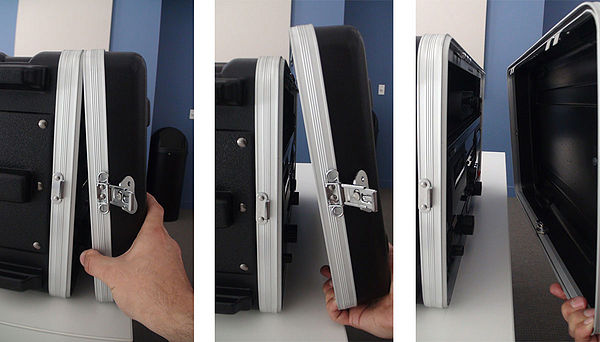
1. The front and back covers of the Gator case are secured on each side by small clamps. Release the clamp from each side of the front cover by swinging the retention tab outward and turning it counter-clockwise. Once the clamp is released swing the entire mechanism outward to free that side of the cover. Repeat for all four clamps.
2. Pull the front cover away from the case. The cover will still be connected to a bracket at the top of the case. Lift the cover up off of this bracket to completely release it. Place the cover in a safe place. Repeat for the rear cover.
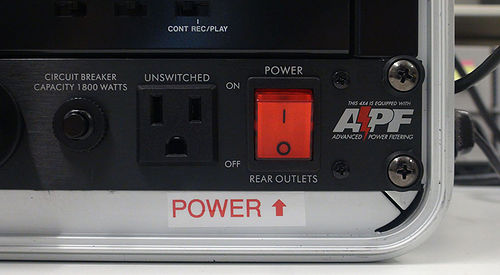
3. At this time ensure that the power switch of the SP4X4 Power Conditioner is set in the “off” position.
Step 3. Position the Laptop computer
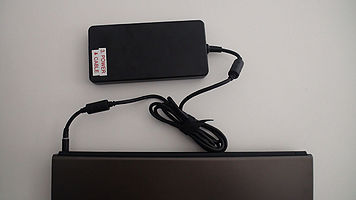
Place the laptop computer within three feet of the Gator case. Plug the included power supply into the laptop (the power supply will not yet be connected to an electrical source.)
Step 4. Position the Speakers
Place the speakers behind and to each side of the laptop. Pay attention to the “left/right” markings on the back of each speaker.
Step 5. Connect Power Cables
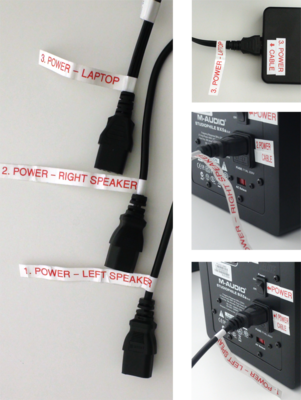
- Locate power cables in the rear of the Gator Case (left side when looking from behind.)
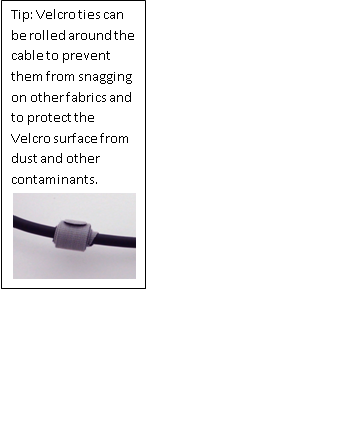
- Unwrap Velcro ties securing power cables.
- Match the label on the cable to the power input of the laptop power brick and the left and right speakers. Plug each cable into its corresponding component
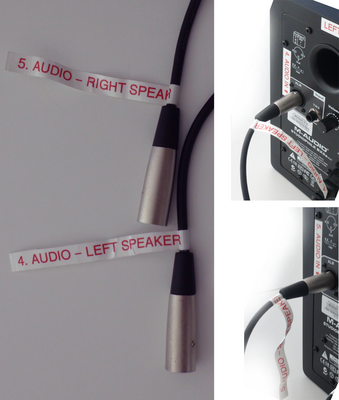
Step 6. Connect Speaker Audio Cables
- Locate audio cables in the rear of the Gator Case (right side when looking from behind.)
- Unwrap Velcro ties securing audio cables.
- Match the label on the cable to the left and right speakers. Plug each cable into its corresponding speaker.
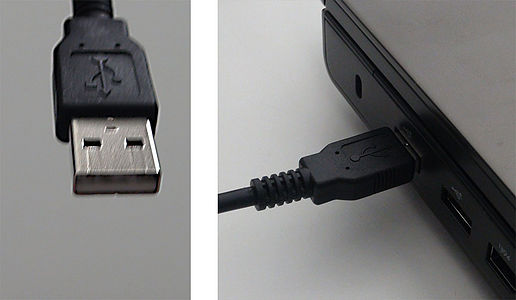
Step 7. Connect USB Cable
- Locate USB cable at the top rear of the Gator Case (right side when looking from behind.)
- Unwrap Velcro ties securing USB cable.
- Plug the USB cable into a free USB on the side of the laptop closest to the Gator case.
Step 8. Connect USB Mouse to Laptop
- Connect the included mouse to any open USB port on the laptop
System Start-up Guide
Electronic devices can output a power spike when those devices are turned on or off. The system start-up is processed in order to prevent power spikes from affecting other components. For this reason devices that send outputs to other devices are generally powered on before the receiving device.
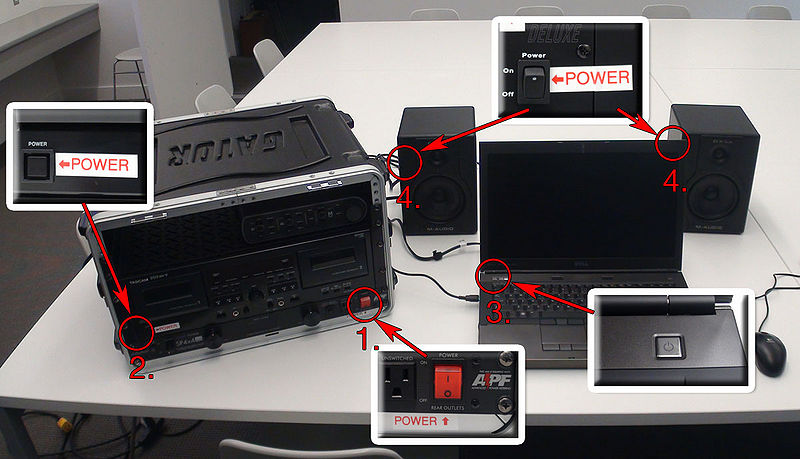
Step 1. Set all power switches to “off” position
Check the power switches on the following components and make sure they are set to off.
- Power Conditioner
- Cassette player
- Left Speaker
- Right Speaker
- Ensure laptop computer is powered down
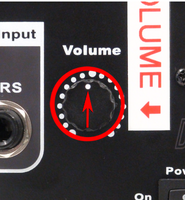
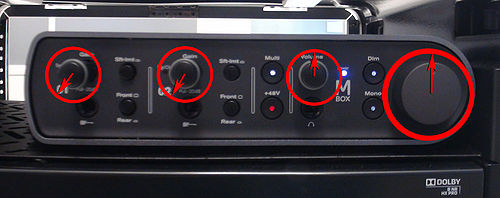
Step 2. Set all volume knobs to lowest setting
Check the volume settings on the following components and make sure they are set to the lowest settings (full counter-clockwise.)
- All MBOX knobs (Channel 1 & 2, Headphone volume, Speaker volume.)
- Left Speaker
- Right Speaker
Step 3. Test the wall power level
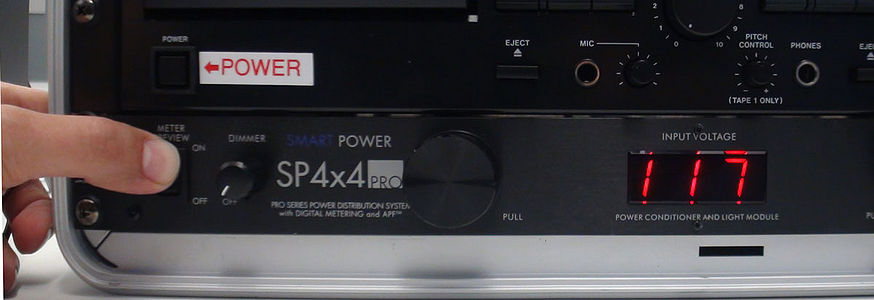
Flip and hold the “Meter Preview” switch on the front of the power conditioner. Wait for the voltage reading on the front meter to level out (5-10 seconds.) If the meter reads higher than too high, or lower than too low, then do not turn the system on. Consult your building maintenance support to troubleshoot power level issue.
Step 4: Power up components in order
Turn on the components of the digitization system in the following order waiting for each to fully power up before continuing.
- 1. Power conditioner (wait 5-10 seconds after applying power).
- 2. Tape deck (no wait time)
- 3. Power up laptop computer. WAIT until laptop has booted fully before proceeding. Note: laptop supplies power to MBOX digitization unit when laptop is on.
- 4. Left and right speakers (no wait time.)
Step 5: Set volume knobs to starting levels
-
- Set speaker volume to midpoint (White dot on knob pointing directly upward.)
- Set MBOX headphone volume to midpoint (Notch on knob pointing directly upward.)
- Set MBOX speaker volume to about a quarter of the max volume. (Notch on knob pointing directly leftward.)
NOTE: Leave both right and left channel (1 and 2) gains on the lowest setting.
The system is now ready for digitization.
System Shutdown Guide
Electronic devices can output a power spike when those devices are turned on or off. The system shutdown is processed in order to prevent power spikes from affecting other components. For this reason devices that receive outputs from other devices are generally powered off before the sending device.
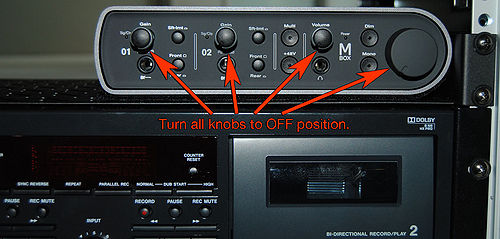
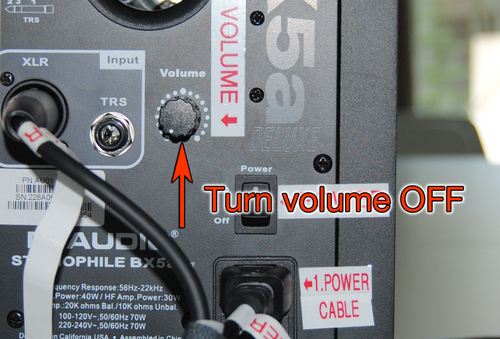
Step 1. Set all volume knobs to lowest setting
Check the volume settings on the following components and make sure they are set to the lowest settings (full counter-clockwise, order not important).
- All MBOX knobs (Channel 1 & 2, Headphone volume, Speaker volume).
Left Speaker Right Speaker
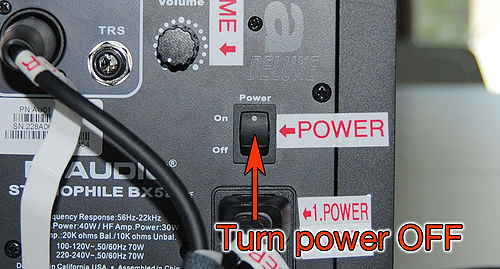
Step 2. Power down speakers
Flip the power switch on the back of each speaker (order not important.)
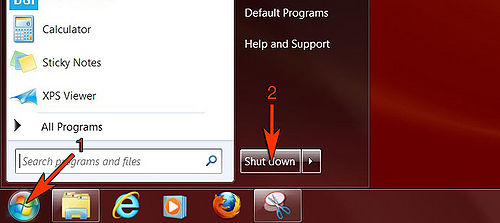
Step 3. Shut down laptop computer and MBOX unit
- 1. Make sure that all files are saved and all applications are closed.
- 2. Click on the start button and select shutdown (allow computer to fully turn off.) As the laptop supplies power to the MBOX unit through the USB connection, the MBOX will turn off as well.
Step 4. Turn off cassette player
If cassette player is ON then press power button to turn it off.
Step 5. Turn off power distributor/conditioner
After all other components are turned off, flip the power switch on the SP4X4 power conditioner to OFF.
NOTE: The cassette player can be turned on or off at any time, provided that the MBOX input GAINS are turned down beforehand.
References
- ↑ New York University (NYU), “ViPIRS Compact Cassette Survey Instructions,” Visual & Playback Inspection Rating System. Accessed November 17, 2011, http://library.nyu.edu/preservation/movingimage/files/ViPIRS%20Manual%20compact%20cassette.doc
- ↑ New York University (NYU), “ViPIRS Compact Cassette Survey Instructions,” Visual & Playback Inspection Rating System. Accessed November 17, 2011, http://library.nyu.edu/preservation/movingimage/files/ViPIRS%20Manual%20compact%20cassette.doc
- ↑ Ibid.
