Documentation:Student Toolkit/DIY Media
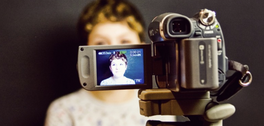
DIY (or do-it-yourself) media means that you are creating video, podcasts or screencasts for a class project, presentation or for some work you are doing on campus.
The DIY media website offers toolkit guidance on getting started with a project, borrowing equipment and preparing a script for creating DIY media projects for educational purposes. You'll also find some inspiring UBC examples to get you thinking.
Book the DIY Media Room in the Chapman Learning Commons to work on your project or rent out some of the equipment available at the Chapman Learning Commons
Helpful Resources
- UBC Mediamakers Production Guide: a comprehensive guide including checklists and things to consider at each stage of producing your media project.
- Design Principles for Multimedia
- Recording 101: a guide for audio recording and podcasting
UBC Supported Tools
Camtasia
Camtasia is a powerful screencasting desktop software that also supports video editing. You can choose the screen area you wish to record and easily include audio or other multimedia to create dynamic educational videos. UBC offers campus-wide free access to Camtasia for faculty, staff, and students. First, download the software to your computer, then install and open it to start making projects.
The easiest way to download and install is:
- Log in to Connect with your CWL.
- Click the "Resources" tab on the top of the page.
- Scroll down to "Camtasia Studio/Camtasia Mac License" to the license keys.
- Click the appropriate link and follow the instruction prompts to complete installation.
See how-tos and examples in the Camtasia Toolkit on the DIY Media site.
Videoscribe
VideoScribe is an animation software that allows you to create animation videos on a virtual whiteboard. You can choose from an extensive library of shapes, images and text fonts, customize the animations, and add voiceovers and soundtracks. UBC offers campus-wide free access to VideoScribe for faculty, staff, and students. You'll first download the software to your computer, then install and open it to start making projects.
The easiest way to download and install is:
- Log in to Connect with your CWL.
- Click the "Resources" tab on the top of the page.
- Scroll down to "VideoScribe Registration".
- Fill in the fields to register for a VideoScribe account.
- You will receive an email from VideoScribe with a link to complete your registration. After you have created a VideoScribe account, download the software onto your computer.
From there, you can reference VideoScribe's Getting Started Guide.
See the Videoscribe examples on the DIY Media site blog.