Documentation:Library:Circle/FROGBEAR OwnCloud
| Document-print.png |
Summary
This document describes how to create an OwnCloud account and upload FROGBEAR/From the Ground Up project content. The intended audience for these instructions is From The Ground Up project uploaders and team members that require access to project content.
Overview
To transfer files from the field trips to the repository, we will be using an interface called OwnCloud. OwnCloud is very much like DropBox or Google Drive, but allows the files to be stored on a variety of different systems. In our case, we will be storing the files on servers at WestGrid, part of the Compute Canada consortium of academic computing resources. This is a large, secure, robust infrastructure for use by Canadian academic institutions. Researchers outside of Canada that are affiliated with a Canada-based research project are also able to access it, but need to be sponsored by a Canadian partner.
For Researchers Based at Canadian Universities (including UBC): Sign up for a Compute Canada account through your home institution (check with your campus IT services for details). After creating a Compute Canada account, you will need to obtain access to the WestGrid servers (see Step 2 below).
For Non-Canadian Researchers: Follow the instructions below.
Step 1: Sign up for Compute Canada Account
Click https://ccdb.computecanada.ca/account_application to sign up for a Compute Canada account
a) Agree to the privacy and information policies and terms of use.
- The last question asks whether you agree to allow Compute Canada staff to access your data without specific permission; you may leave this as No.
- When you are finished, click Submit.
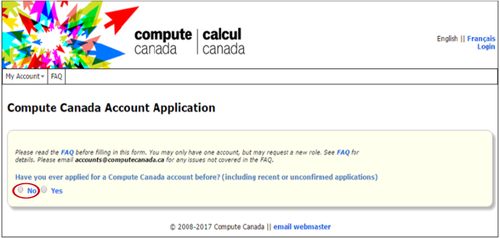
b) Have you applied for an account before? Click No.
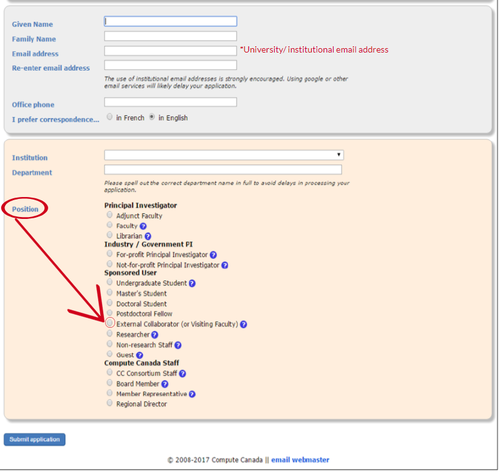
c) Fill out the application form
- Enter your name and contact details.Your application will be processed more quickly if you use an institutional email address (e.g., a university server) rather than a commercial email service such as Gmail or Yahoo.
- Under Position, choose External Collaborator under Sponsored User (even if you also fit one of the other categories, such as Student).
d) Fill in sponsor
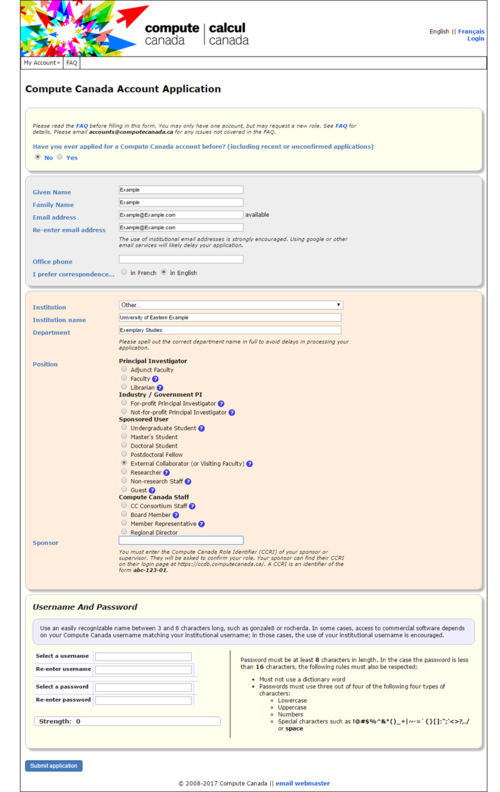
- After choosing External Collaborator, a box will pop up to enter a sponsor, identified by a Compute Canada Role Identifier. Please enter Bruce Rusk's CCRI: fvk-921-01
|
IMPORTANT! the application will not be processed if this is left blank. |
e) Choose a username and password and click Submit application.
f) Confirmation email
- You will be sent an email (at the address entered above) to confirm your contact details.
- Click the link in that email to finalize the application.
Within 2-3 business days you should receive a second email with the subject line "Compute/Calcul Canada: New role approved." This means that your Compute Canada account has been created.
Step 2: Create WestGrid Account
Click https://ccdb.computecanada.ca/me/facilities to create WestGrid account.
a) Apply to WestGrid
Follow the link to sign in to Compute Canada. You will see a list of consortia;
- click the Apply button beside WestGrid (the last entry):
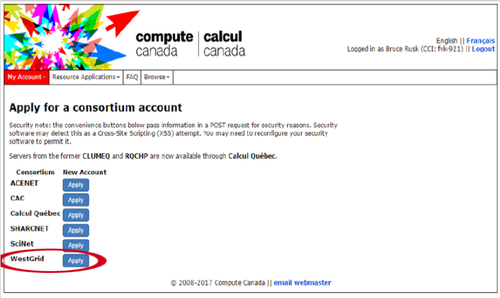
Once you have applied, your application will need to be approved manually by the Database Coordinator (Bruce Rusk) and by UBC. This should happen within 2 business days.
b) Receive confirmation email
Once you receive this email your account is ready to use. Please email your WestGrid ID (username) to vicky.baker@ubc.ca
Step 3: Sign in to OwnCloud
Click https://owncloud.westgrid.ca to sign in to OwnCloud
- use your WestGrid username and password
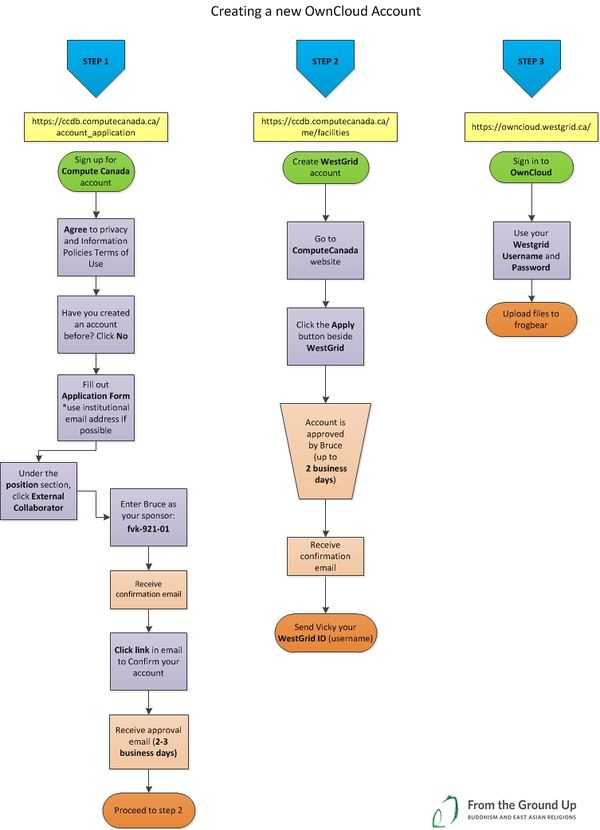
Creating OwnCloud Account Graphic
Using OwnCloud: Instructions for FROGBEAR Uploaders
After you have created Compute Canada and WestGrid accounts, you will be able to use OwnCloud to share files with the UBC staff who will be receiving the files and adding them to the repository.
Sign in to OwnCloud
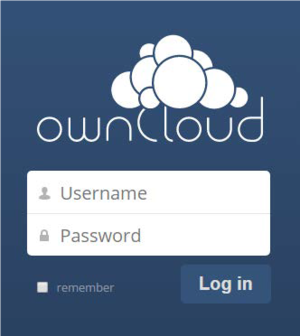
Click https://owncloud.westgrid.ca/ and you will see the following login prompt:
Enter the WestGrid credentials you created (your username is not your email address, but the username you chose).
OwnCloud Homepage
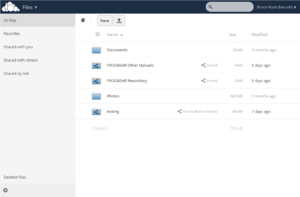
After logging in, you will see a list of folders to which you have access. These include folders you have created yourself and those others have shared with you. It will look something like this:
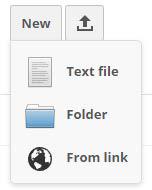
To open a folder, click on its name. Once you have opened a folder, you can create a new folder by clicking the word New on the top bar and choosing Folder:
The icon ( ![]() ) indicates a file or folder that is being shared.
) indicates a file or folder that is being shared.
Through the menu on the left-hand side of the screen, you can choose to view folders and files that others have shared with you or those that you have shared with others.
Once a user has been registered as an uploader for a given trip, we will provide access to two folders for uploads: one for uploads intended for the repository and one for other uploads (such as material that can be used for project publicity, but not intended to become part of the permanent research repository).
Upload Contents
To upload one or more files, there are two options.
Option 1
Click the upload icon (![]() ), to the right of New on the top bar, and choose files and/or folders with the file selection dialogue appears.
), to the right of New on the top bar, and choose files and/or folders with the file selection dialogue appears.
Option 2
Drag and drop files from your computer (Windows Explorer on Windows, Finder on OS X). You may upload entire folder structures at once.
While files are being uploaded, you will see a progress bar:
Wait until the progress bar reaches the end and disappears before closing the browser window, or the files will not completely upload.
References
http://frogbear.org/resources/database/
http://frogbear.org/wp-content/uploads/2016/10/Frogbear_Obtaining-and-Using-OwnCloud-Account.pdf
