Documentation:Kaltura/Kaltura in Connect (2014)
This page contains up-to-date information regarding the integration of Kaltura in Connect. (Last updated June 2014.)
Activation of Kaltura in Connect
Activate 'My Media'
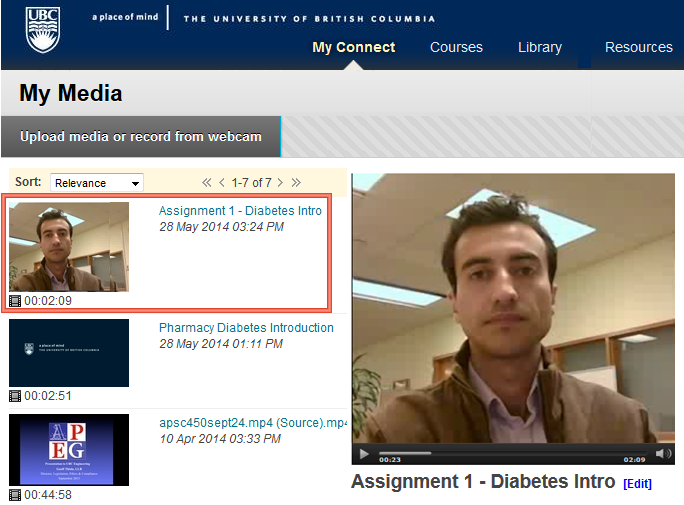
'My Media' is your personal video gallery in Connect. To activate it, log into Connect and add the 'My Media' module. These instructions apply to students and instructors.
- Click the 'My Connect' tab at the top of the screen.
- Click 'Add Module'.
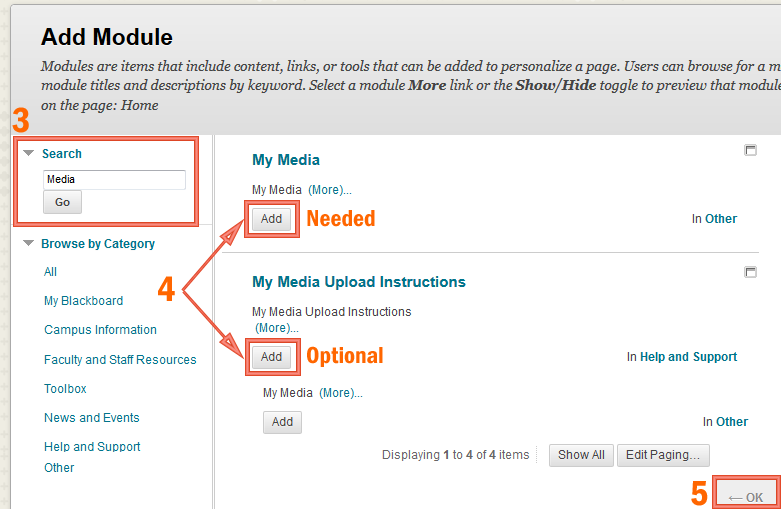
- On the 'Add Module' screen, search for 'Media'.
- On the search result screen, click 'Add' under 'My Media', and, optionally, 'My Media Upload Instructions'.
- Click 'OK' to save your choices.
Upload a video in Connect
The Course Media Gallery (or Course Gallery) is a course tool allowing the members of a course to view videos contributed by the instructor and students enrolled in the course. The instructor and the students can contribute videos from their personal library (My Media) to the Course Gallery. The instructor is the only one who can directly publish videos to the Course Gallery: videos contributed by students need to be approved and made visible by the instructor.
In order to activate this tool in a course, you must be the instructor.
- Select the desired course in Connect.
- Click 'Add Course Module' on the course homepage.
- Search for Media.
- Add 'Course Media' and, optionally, 'Shared Media Repository'.
- Click OK to save your choices.
Upload a video to Connect
- Click the 'My Media' link on the side of the page
- Click 'Upload media or record from a webcam'.
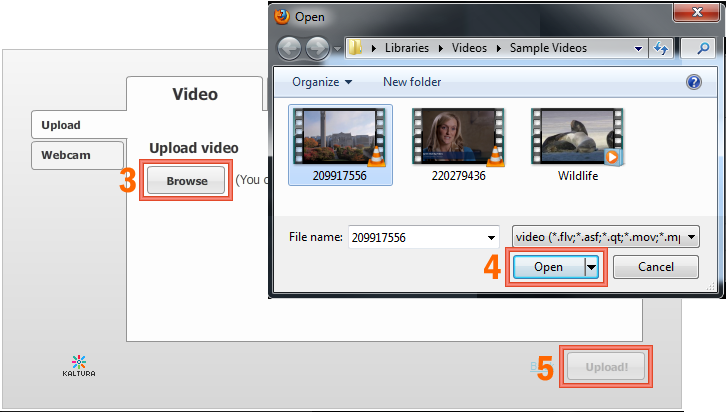
- Make sure you have the 'Upload' tab selected on the screen that appears. Click 'Browse'.
- Select the video you want to upload, and click 'Open'.
- Click 'Upload!'.
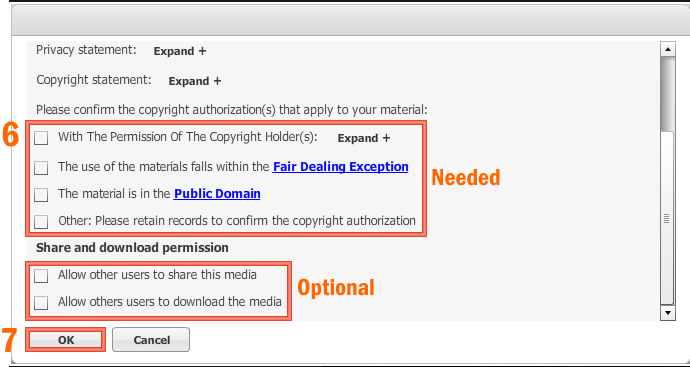
- Select the appropriate copyright license. If applicable, you can allow other users to share or download the media you are uploading.
- Click 'OK'.
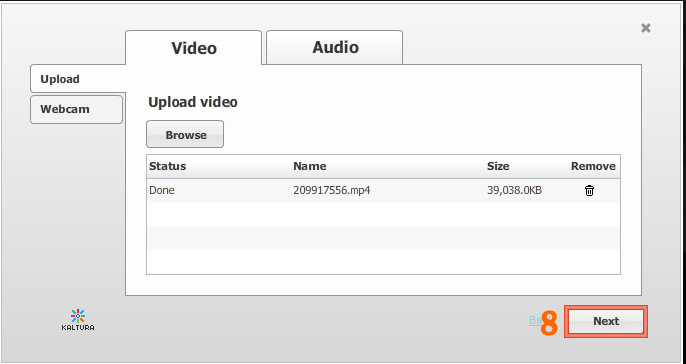
- Click 'Next'.
- Give your video a title, tags, and a description. When you are finished, click next. Your video will now be converted to a format Connect can play, and be placed in your 'My Media' area.
Record a video in Connect via your webcam
You can record videos via your webcam and upload them directly to Connect. Follow steps 1 and 2 from the previous section.
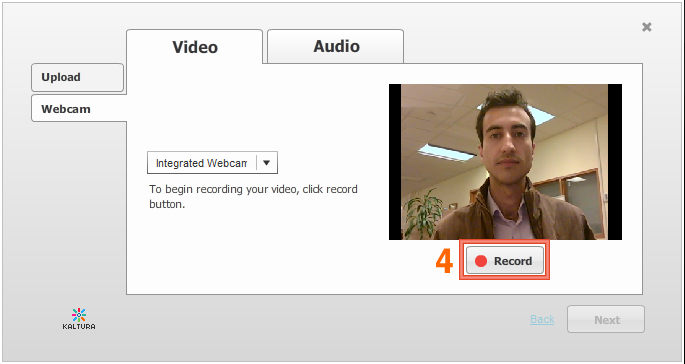
- Select the 'webcam' tab.
- Select the webcam you want to use. If you have an external camera plugged in, make sure you select that, instead of the built-in camera on your computer, as that will likely be the default.
- Allow your browser to access your camera and microphone.
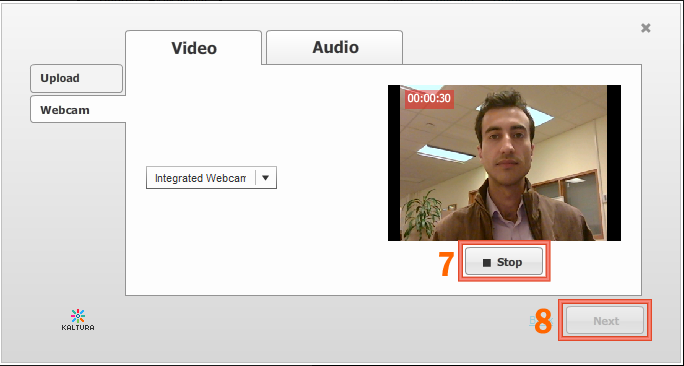
- Record your video.
- Select the appropriate copyright license. If applicable, you can allow other users to share or download the media you are uploading.
- Click 'OK', give your video a title, tags, and description, and click 'Next' to convert and post your video.

