Documentation:Fall 2020 Acquisition Documentation
Background Information
The goal is to photograph every point of interest, with camera orbiting around specimen in poses which are at most 5-15 degrees apart. Some specimens - for instance, a painting - have just one "primary" area which needs to be scanned & reconstructed. We call this a "single component" scan, because the reconstruction is performed with just one set of images, all of which feature the specimen in a single physical pose. Most specimens - for instance, a statue - need to be captured from every angle, so that a full 360 reconstruction can be produced. Since the turntable itself prevents us from capturing the bottom of a specimen (the part that rests on the turntable), we need to scan the specimen once, flip it, and scan it again. For feature-rich specimens having regular dimensions, these two poses are usually sufficient. Specimens lacking photogrammetry-relevant features and/or having irregular shape will often require one or two additional poses & image sets, of the specimen on its left and/or right sides, to ensure the reconstruction process produces a coherent 3D model. We call these "dual/triple/quad component" scans.
Electronics
It’s essential to plug the right cables in the right places otherwise you might end up frying some things.
The Rig Computer

In the picture above you can see two boxes on top of each other. The rig computer is the one on the bottom and requires 5V MicroUSB power supply capable of providing at least 3A. It is connected to the USB hub.
The Camera Power Box
In the picture above you can see two boxes on top of each other. The camera box is the one on top, it sits above the rig computer and requires 12V power supply capable of providing at least 2.5A.
The Turntable Controller

The turntable controller needs to be connected to the rig computer using a USB cable. Requires 12V power supply capable of providing at least 500mA.
The USB Hub

Provides extra USB ports (rig computer has 4) for cameras, turntable, and other equipment. It is not supposed to have any power cables connected to it.
Power Cables

All have the the same output voltage (12V). We have two of them, one connected to the camera box (2.5A) and one connected to the turntable (500mA).
Acquisition: Capturing and Reconstruction
Capturing
Physical Setup
Use solid (featureless) background & turntable, black/white/gray; other colors could bounce color onto specimen. Try to choose color that maximizes contrast with specimen (avoid white background/turntable with white specimens, etc). Indoor lighting is usually ok when using high power flash bulbs since it's relatively weak; however, sunlight - especially direct - should be avoided.
Preparing the Specimen
- Place specimen in center of turntable (such that dimensional extremes of specimen remain roughly equidistant from turntable center throughout revolution).
- If clamp is being used to hold specimen, ensure cameras are pointed such that clamp is excluded from photos.
- Focus cameras (either by manual camera focusing or software autofocus process).
Capturing the Specimen
- Go to http://ubc.778labs.com/capture/ or http://ubc.778labs.com/capture2/
- For login details check with team.
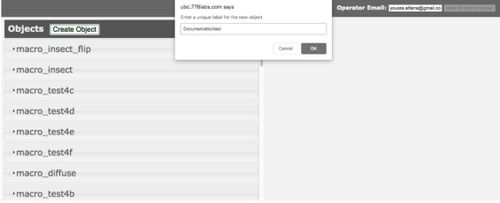
- Click on Create Object after you login.
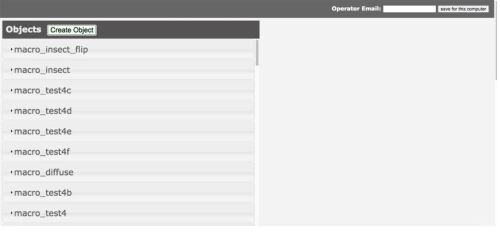
- Enter your object name.
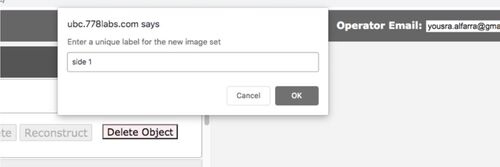
- Now it's time to create an image set, click on Create image set and choose a name for your image set then save. You can create as many image sets as you like.
- Image sets are now created.
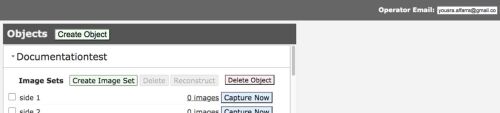
- Now it's time to hit the blue Capture Now button.


Reconstruction

- Using the same links for the capturing (http://ubc.778labs.com/capture/ or http://ubc.778labs.com/capture2/)
- Click on your intended object and then select the image set then hit the Reconstruct button.
- You may need to access TeamViewer and click on Start_Autoscan.
Examples of Challenging Specimen
Some specimens can deform if you flip or put them on their side. The solution would be to mount them on a stand or hang them from a very thin string (sort of an upside down turntable).

Focus Stacking Technique
Focus stacking is one of the methods of capturing an object.
In focus stacking the camera will take multiple pictures of the object in the same position. Each picture will have a different focus. Some pictures will be zoomed in while others are slightly zoomed out of varying degrees.
One set of photos from a group of different focuses at the same position is a stack.
The goal of focus stacking is to get at least 1 good picture per stack for every angle so that a detailed model can be formed from the set of pictures.
Process:
- Go to http://ubc.778labs.com/capture/ or http://ubc.778labs.com/capture2/
- Do the steps from step 1 to 6 from the Capturing the Specimen.
- Go to the capture menu and check the enable focus control button.
- Click the link open camera config beside enable focus control.
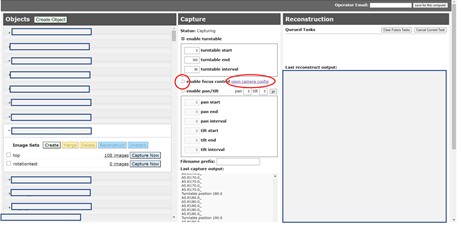
Main menu to capture system
- This should take you to a new window labelled Camera Config.
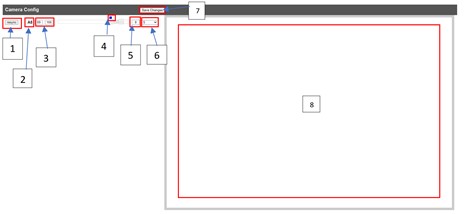
- 1. Resync 2. Camera Name 3. input box of lower and upper focus 4. Camera’s current focus 5.Number of focus steps a camera moves for each picture 6.Camera light settings
- 7. Save changes
- Resync camera by pressing the resync button. (1)
- Estimate potential range of focus for your object.
- To adjust focus drag the bars to desired position. The camera labels beside the name will have the numbers of the upper and lower level focus range. (3) You can see the picture after it has taken a shot (8).
- There are multiple ways you can find this range. One method is reach a good focus of the object.
- Then slowly increase the focus until the object becomes slightly blurry. This is the upper range.
- Go back to original focus
- Slowly decrease the focus until the object becomes slightly blurry. This is the lower range.
- Adjust number of focus steps the camera will take for each step.
- The focus will manually adjust itself before taking the next picture. Focus steps are an indicator of how much the camera should adjust itself.
- For example if the current focus is at 80, and the focus step is 6, the camera will adjust the focus to 86, 92, 98 etc....
- Adjust the camera settings (6)
- Numerical values indicate the shutter speed. So a '4' will indicate the camera will wait 4 seconds before taking a shot. Benefits of a longer shutter speed are allowing more light, but it may be more time consuming.
- Save the changes (7).
- Go to the main page and press the capture now button.
- Once capture is finished click the image set and press unstack. This will combine all your pictures in the stack to a single in focus picture.
- Your image sets are ready to reconstruct.


Troubleshooting
Below are some issues that have occurred when doing acquisition and potential solutions.
- The camera does not show the image.
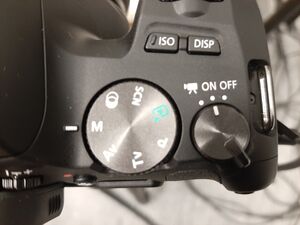
- Is the camera placed in the ON position instead of video/movie mode or OFF.
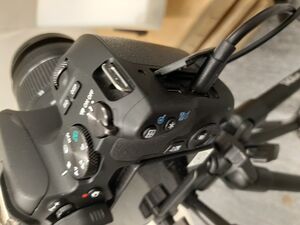
Camera - Settings
- Is the camera in preview mode? To confirm press the preview mode button (it has the red circle beside it)
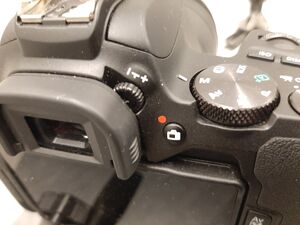
Camera- Preview Mode
- Is the power on? Look to see if it is plugged in.
- Is the camera placed in the ON position instead of video/movie mode or OFF.
- The camera is not taking pictures.
- Check to see if USB is plugged into camera.
Camera
- Is the camera in Movie Mode instead of ON?
ON section is between movie mode and OFF - Try to take off the lens and put it back on.
- Check to see if USB is plugged into camera.
- There is a menu on the screen instead of object.
- Press preview picture
- My pictures have a strange smudge.
- Remove the lens and see if debris or dust is on the lens
- You may have to use a cloth to clean it.
- No matter how much I zoom in or out the picture remains blurry.
- Try physically moving your camera closer or farther from the object.
- The turntable is not moving even though it is taking pictures
- Make sure to have the enabled turn table option checked.
- The camera does not change focus during the capture.
- Ensure the lens are set on Manual Focus (MF) not Autofocus (AF).
- Ensure camera is set to Manual (M) mode on the dial.
- Lighting is too dark/too light
- Change shutter speed in camera configuration look at focus stacking camera configuration.
- Adjust aperture settings by going leaving preview mode (press the red button) then adjusting f settings. In general it is better to keep lighting and color consistent, so try to avoid changing the aperature, and keep ISO the same. It might be better to change shutter speed.
- My item has too many details or a complex structure
- You may need to do focus stacking.
- Do the same scans again but smaller intervals in the complex areas.
- Do the same scan multiple times but at a different focus (like focus stacking).
- Do a zoomed in scan that only captures part of the object in detail. Great if you have multiple cameras to adjust for height.
- My scan is taking so long.
- Check shutter speed. If one camera has a large shutter speed, then chances are that this delay the scan regardless of the shutter speed of the others.
- If you are doing focus stacking check focus steps. If it is a really small number you will be taking more pictures and take more time.
- Look at your turntable interval settings to see how many positions are being captured.
- One or all the cameras are not appearing in camera configuration
- Do a test capture. Often a capture needs to occur before the camera appears on the system.
- Check to see if USB is connected to camera, if not connect it. If it is reconnect it. Then do test capture.
- Reattach the lenses as a last resort.
- My scan stops halfway through.
- If your camera is in autofocus, observe the screen for the camera constantly changing focus or a blurry screen. This is likely caused by the camera not being in focus. You could manually adjust the focus and tap on an area easy to focus, but it might be better to stop the capture and restarting a capture at this position on manual focus.
- My focus capture doesn't take the correct amount of pictures.
- This may depend on the scanning software. However the best work around would be to do a test focus capture (1 or 2 positions) resync before doing the capture, or both.
- My capture changes its overall lighting/color when placed by different background colors (greyish white vs vibrant white).
- Ideally you should have the same background color.
- If not an option adjust the shutter speed to get a similar lighting to the original capture. Best done by getting the old capture and new capture side by side.
- My image sets doesn't reconstruct.
- Compare image sets for
- distracting objects in background
- consistent image lighting
- change in model color between pictures (one image may be grey while the other has a brown tint)
- focus (some focus are blurry while others are clear)
- similarity between image sets (more similarity means easier for alignment)
- number of perspectives (more perspectives allows additional angles to be accounted for)
- Compare image sets for


Tips
Autofocus mode: When in autofocus mode the camera will find the best area of focus to get the most of the object in focus, or focus on the area that you point to on the screen through tapping. When the object moves from the turntable movement the camera will follow the section in order to keep that area in focus. To use autofocus make sure the button by the lens is at the AF setting instead of MF. This mode would be the default mode unless a specific situation requires manual adjustments.
- This mode is useful if your object is fairly uniform in depth (smooth surface, no concave or protruding structures, not very thin etc....) otherwise the capture may stop halfway through because it can't find a place to focus on or one section will be clear while the rest of the photo is blurry.
Pros: Easy to use and set up. It is quick to use.
Cons: Some sections will appear blurry and it is difficult to control autofocus in the middle of the scan. Certain areas that you need to focus on, such as the tips are difficult to capture or will cause the other sections to become blurry. The area of the focus easily changes as soon as it is out of view.
Manual mode: In manual mode the camera will stay at the focus you set it either by adjusting the lens or through auto capture's camera config. This mode is good when you need to use focus stacking, do simple rotation tests, or take a specific shot that autofocus has difficulty with.
Pros: Good for quick lighting and rotation tests.
Cons: Takes a long time to set up. If not centered well will easily go out of focus.