Documentation:Distance and Blended Learning Course Support/Collaborate Scavenger Hunt
Appearance
Getting to know the Collaborate live classroom
This activity will help you become familiar with the Collaborate live classroom.
To get started, you're going to launch the classroom and enter the room.
- In the Course Content or Course menu, locate the Collaborate live classroom tool.
- Select a session that is currently available.
- Launch the session.
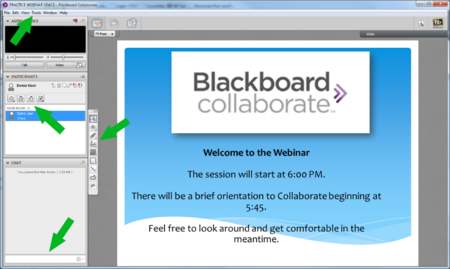
- Once the room is fully loaded, you should see something similar to the image below.
Next, you're going to check your microphone and speaker levels.
- In the 'Tools' menu at the top of the room, select 'Audio'.
- Run the audio wizard, or set your audio levels manually using the microphone and speaker settings.
- Under Edit>> Preferences >> General, look for the Hot Keys settings. This will enable you to toggle your mic on/off using a keyboard shortcut instead of using your mouse/trackpad.
- Next, in the Participants area, look for the Talk button and try it using either your mouse/trackpad or the keyboard shortcut.
- Finally, try the Video button to see if your camera is working.
Finally, you're going to use some of interactive features.
- Look for the Raise your hand tool in the Participants area. Raise and lower your hand.
- Try the other icons as well to see what they do.
- Try the whiteboard tools, if they have been enabled, to add information to the presentation area.
- Post a message using the chat feature.
TIPS
- Use a wired ethernet connection instead of wireless.
- Use a headset with microphone - it will reduce the amount of background noise and feedback in the session.
- Turn off the Talk button when you aren't speaking.
- Use the text Chat to let the presenter know if you have questions or are having problems. You can also use the Raise Your Hand tool.
For further information on using Collaborate, go to https://blackboard.secure.force.com/apex/publickbarticleview?id=kA770000000CbIW
