Documentation:Archival Processing
RBSC Archival Processing Guide
This is a guide for processing archival materials at University of British Columbia Library - Rare Books and Special Collections. This guide is part of the RBSC Archives Toolkit.
RBSC Archival processing guide created by Jacky Lai, RBSC Archives Assistant.
Introduction
- Before proceeding with archival processing, please read this guide all the way through and ask Archives Assistant if anything is unclear
- We recommend using this guide to do initial assessments of records each time students begin work on a new project (i.e. are there non-textual records? What are they, approximately how many, what size and condition?). Please review the Archival Arrangement and Description wiki for recommendations on how to perform an initial assessment of record. This way students are prepared for an initial consultation with the Archives Assistant which should occur within the first few weeks of working on a new project
- For new students, check-in with Archives Assistant after a full box of materials has been processed and some descriptions have been created in AtoM. Archives Assistant will provide feedback before you proceed further with processing
- In cases where archival processing projects cannot be completed, archivists and student archivists should focus on intellectual work (i.e. arrangement, top-level/series level descriptions) instead of physical processing. Physical processing can be done at a later time by the archives assistant or other support staff/volunteers. See section on Physical processing handoff for workflow.
File folders
- Use legal size folders (unless otherwise instructed to use letter size folders and boxes)
- “Rare Books and Special Collections” stamp, “Please retain original order” stamp
- Title
- Use square brackets for supplied titles (RAD advises against using square brackets for supplied titles but this is our institutional practice)
- Identifier (Box-File number), leading zeroes depend on total count
- Fonds/collection name (can be abbreviated)
- Use (1 of X) if materials don’t fit in one file folder
- Example folder
Boxes
- Use pencil to mark lid and front of box with fonds/collection name (can be abbreviated) and box number
- Do not use post-it notes!
- White Hollinger boxes for most textual records
- Flat archival boxes for larger items including textual records, graphic works, ephemera
- Fill ALL boxes to maximum capacity but make sure files can still be easily pulled out and put back in (check with Archives Assistant if unsure)
- If a box cannot be filled to maximum capacity, use archival-quality corrugated cardboard to prop up files
Identifiers
| Identifier type | Format |
|---|---|
| RBSC-ARC-####-##-## | Textual records (box-file #) Please note TX is only used for textual records in the Chung collection. |
| RBSC-ARC-####-PH-## | Photographs |
| RBSC-ARC-####-OS-## | Oversize – flat storage. Please note that as of January 2023, OS will no longer be used as an identifier. Moving forward, OS will be used as a location code in the generate note field. |
| RBSC-ARC-####-Item-## | Use this for materials that do not fall within the categories in this table. For example, if a large textual item is stored in OS-01 but is not separated from a file (i.e. it is "born oversize"). |
| RBSC-ARC-####-GR-## | Graphic works |
| RBSC-ARC-####-CM-## | Cartographic materials |
| RBSC-ARC-####-AD-## | Architectural drawings |
| RBSC-ARC-####-AR-## | Artifacts |
| RBSC-ARC-####-BD-## | Born digital (ex. Laptop, Hard drive, USB thumb drive, CD, DVD, Floppy disks) |
| RBSC-ARC-####-DO-## | Digital objects (i.e. Digitized content - This identifier is used on a case by case basis.) |
| RBSC-ARC-####-SPC-## | Cassettes |
| RBSC-ARC-####-SPLP-## | Long Play records (12", 10") |
| RBSC-ARC-####-SPEP-## | Extended Play records (10", 7"). Note: 10" and 33+1⁄3 rpm = LP, 10" and 45 rpm = EP |
| RBSC-ARC-####-Floppy-## | Floppy disks. Please note that as of December 2023, Floppy-## will no longer be used for born digital materials. Moving forward, BD-## (Born digital) will be used as identifiers for physical carriers of digital media. |
| RBSC-ARC-####-SPCD-## | CD (Do not use for born digital records on CDs - use DM-## instead) |
| RBSC-ARC-####-SPDVD-## | DVD (Do not use for born digital records on DVDs - use DM-## instead) |
| RBSC-ARC-####-SP33-## | 33 1/3’s. Please note that as of September 2024, RPM (rotations per minute) is no longer used as a type of RBSC identifier. All vinyl records are assigned either SPLP or SPEP identifiers - see above). Enter RPM in the physical description field. |
| RBSC-ARC-####-SP78-## | 78’s Please note that as of September 2024, RPM (rotations per minute) is no longer used as a type of RBSC identifier. All vinyl records are assigned either SPLP or SPEP identifiers - see above). Enter RPM in the physical description field. |
| RBSC-ARC-####-SP45-## | 45’s Please note that as of September 2024, RPM (rotations per minute) is no longer used as a type of RBSC identifier. All vinyl records are assigned either SPLP or SPEP identifiers - see above). Enter RPM in the physical description field. |
| RBSC-ARC-####-SPSR-## | Sound Reels |
| RBSC-ARC-####-SPVT-## | Video Cassettes |
| RBSC-ARC-####-SPFilm-## | Film Reels |
| RBSC-ARC-####-SPMicrofilm-## | Microfilm Reels |
| UBCA-ARC-####-AUD-### | All audio carriers (e.g. Audio cassette, Audio reels) |
| UBCA-ARC-####-VID-### | All video carriers (e.g. VHS, Betacam, Mini DV) |
| UBCA-ARC-####-AD-### | Architectural drawings |
| UBCA-ARC-####-PH-### | Photogrpahs |
NOTE: Additional leading zeroes for identifiers should be added based on total count of materials.
Conservation/Preservation
- Let Archives Assistant know if there are any preservation/conservation concerns or issues, they will assess and contact the Library’s conservator
- Remove all paperclips, binder clips, pins and rusted staples
- Notify Archives Assistant, Archivist, and/or RBSC staff immediately if you discover any signs of mould or insects
- If no one is available, quarantine the item/file/box by sealing it in a garbage bag and then notify staff re: issue and location of quarantined items
- Do not handle contaminated items without protective gear – gloves, mask
- Nitrate films
- Archives Assistant will provide more information on identifying and handling nitrate materials
- Mylar enclosures should NOT be used for:
- Materials with friable media (charcoal ink, pastels, flaking ink - these will rub off from static)
- Vellum
- Materials that have not been deacidified (unless alkaline buffer is added to absorb acidity)
- Blueprints or Diazoprints (L-sleeves are fine)
Photograph processing
NOTE: Photograph storage is often treated case-by-case – check with Archives Assistant first if your fonds/collection has photographs
Photograph rehousing
| Size type | Photograph size | Storage location |
|---|---|---|
| Small | Smaller than 18.8 x 13.5cm | Photograph drawers in the vault |
| Medium | Smaller than 30.4 x 23cm and larger than 18.8 x 13.5cm | Upright grey archival boxes in the vault |
| Large | Larger than 30.4 x 23cm and can fit into flat boxes (45.72 x 30.48 x 7.62cm) | Flat boxes in the vault |
| Oversize | Larger than 45.72 x 30.48 x 7.62cm | Map drawers in the vault |
- Store photographs in envelopes/sleeves according to size (i.e. don’t use a large envelope for a small photograph)
- Use buffered envelopes for black and white photographs and unbuffered envelopes for colour photographs
- Identifier: RBSC-ARC-XXXX-PH-001 (leading zeroes depend on total count of photographs), written on top left corner
- Each print, slide, negative is assigned a PH number
- For contact sheets, if accompanied by original negatives, do not assign new identifiers for images shown on contact sheets
- On envelope for contact sheet, write corresponding PH numbers from negatives and indicate this is a contact sheet
- If contacts sheets are not accompanied by original negatives, assign each image a PH number
- If photographs are in an album, depending on how they are mounted, they can be removed and stored in envelopes – consult with Archives Assistant
- Albums may be assigned one AB number (ex. RBSC-ARC-XXXX-AB-123-01-01 = first photograph in album #123-01)
- When numbering photographs in albums (simple write "1" instead of "RBSC-ARC-1234-123-01" or "PH-01"), start with the top row and go from left to right. When one row is complete, move to the next row.
- Please note it is likely the arrangement of photographs in an album might not follow traditional grid style. If this is the case, it is okay to number photographs in another manner. However, it is important to maintain consistency within the album so once you have decided how to number photographs on the first page, you must do the same for the entire album!
- Glass plates/negatives, slides, film negatives have special types of envelopes / enclosures / sleeves
- If photograph is not a print, mark the format on the envelope (ex. neg, gls, gls neg, slide, positive, etc.) on the top right corner of sleeve
- Postcards are considered textual records so envelopes are not required for storage and PH numbers are not necessary
- Scrapbooks are considered textual records so photographs will not be assigned PH numbers
- Always check with Archives Assistant first as the condition of some scrapbooks may benefit from being taken apart and in this case photographs may be separated and assigned PH numbers
- Generally, photographs glued to regular paper stock with captions are considered part of a scrapbook so keep with textual records and do not assign PH numbers
Limited photograph processing
- There may be scenarios where it is not possible to process all photographs within a fonds in its entirety due to time and supplies constraints. In these cases the Archivist may make a decision to process photographs in a way that will allow access but does not involve the full processing workflow (i.e. rehousing each photograph into a photograph sleeve and assign a PH number for each photograph)
- Rehouse groups of photographs into file folders and assign a PHFile number to each file folder (ex. PHFile-01)
- Remove any plastic sleeves
- Place photographic prints directly into file folders
- Do not place photographs into sleeves unless it is fragile
- Place slides and negatives in archival sleeves before placing into archival folders
- Do not assign PH numbers
- If photographs are not in existing grouping (i.e. loose photographs found in boxes and files) and there is no arrant original order, you may group these photographs based on subject (ex. events, portraits, travel, etc.)
- If photographs are interfiled with textual records, consult with Archives Assistant before proceeding with processing as this may be dealt with on a case-by-case basis
- Create brief file level descriptions (Title, box-file number, date) based on existing file titles and contents of photographs if no title information is available
- Sample supplied file titles with minimal context/information from images:
- [Interfiled portraits and photos of rallies and events]
- [Unknown event negatives]
- [Unfiled photos, contact sheets, negatives, and graphics]
- Depending on the number of photographs in the fonds, we may or may not count the number of photographs. Consult with Archives Assistant and/or Archivist
- Sample supplied file titles with minimal context/information from images:
- Create an arrangement note at the top level and at lower levels to explain limited processing of photographs.
- Example of an arrangement note at the fonds level from the Vancouver Status of Women fonds:
- Photographic materials from the 2019 and 2021 accrual, specifically the Kinesis Photobank and Production Room Materials series, are still to be fully processed. These photographs were minimally processed and are currently accessible.
- Example of an arrangement note at the series level from the Vancouver Status of Women fonds:
- The materials were minimally processed due to time constraint and the nature of the collection of photographs -- rather than single individual photos, these materials were kept as 'bank' of materials that could be pulled from when needed. The physical order in which records were received has been maintained to retain the context and reflect the way in which the materials would have been stored and referenced. This does not always reflect chronological order for the materials. In instances where photos were grouped together but unlabeled, the archivist attempted to provide a title that characterizes the activities captured within them. In some cases, large quantities of photographs were placed loosely in boxes without groupings. In these instances, all loose photos have been placed in a folder together with 'unfiled' in the title and a general description of the material types.
- Example of an arrangement note at the fonds level from the Vancouver Status of Women fonds:
Photograph separation
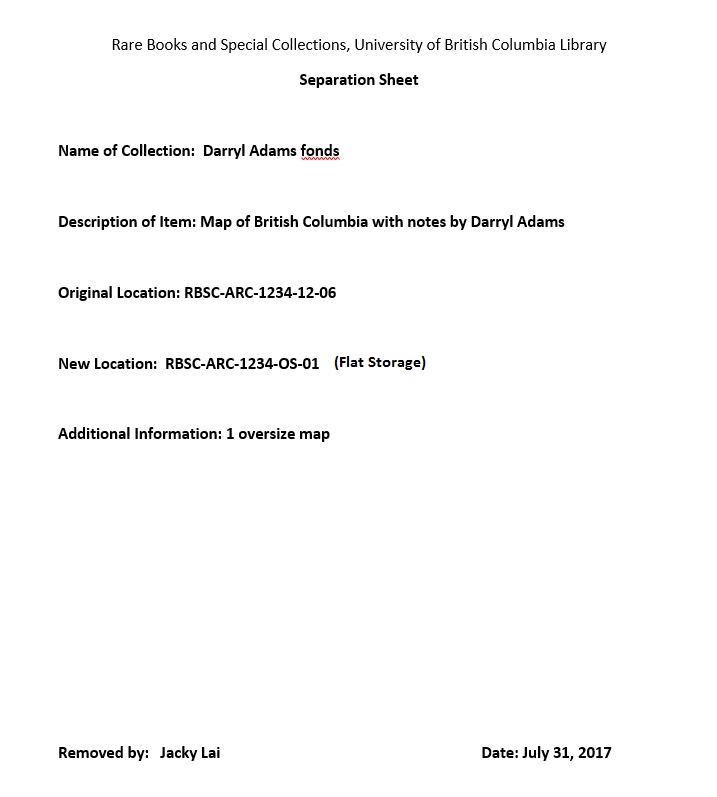
- Photographs are generally separated from textual records for proper storage. Replace separated photographs with separation sheets after rehousing (Example)
- See section on separation sheets for more information
- Generally if there are less than 100 photographs separated then these will be stored in locations according to the photograph size table above. If there are more than 100 photographs separated, they may be stored together in file folders and then archival boxes (i.e. not interfiled with photographs from other fonds/collections according to RBSC-ARC number) and then on shelves in the photograph area
- For separation of more than 100 photographs, place batches of photographs into file folders and write photograph identifier range at the top right corner of each folder (ex. RBCS-ARC-1234-PH-1 to PH-50)
- Example: Peter Moogk collection consists of over 1500 photographs and therefore they are stored in boxes specific to this fonds and not interfiled in regular photograph storage by size
AtoM descriptions - Photographs
- Photograph descriptions in AtoM must have the following:
- In file-level description, include PH number and photograph size information and/or location information in the general note field (Example for photographs in general photograph storage, Example for photographs stored in boxes)
- Create an item-level description under the file-level description and enter the following information (Example for photographs in general photograph storage, Example for photographs stored in boxes)
- Title (“Photographs” is sufficient but can be elaborated if necessary)
- Identifier (this will be the PH number range assigned)
- General note (list all PH numbers and photograph size information and/or location information)
- By listing all identifiers in this field, AtoM will be able to search for a specific number and user can easily identify an item’s original location and new location information
- If PH number range within a file is not sequential then multiple item records should be created so the number range is reflected in the identifier field. For example, RBSC-ARC-1234 file 5-01 has the following
- RBSC-ARC-1234-PH-101 to PH-125 (Small prints – photograph storage)
- RBSC-ARC-1234-PH-133 to PH-145 (Medium prints – Photograph storage)
- RBSC-ARC-1234-PH-150 to PH-160 (Small prints – Photograph storage)
- There should be three item records under file 5-01 to indicate these PH number ranges
- Remember to list all PH numbers and photograph size information and/or location information (Example)
- Include PH number range as “General note” in fonds and series-level descriptions
Separation sheets
- Separation sheet template: File:Separation Sheet.doc
- Separation sheets are used if an item is removed from a processed file folder due to storage issues such as being too large or requires special storage – A/V materials, photographs, artefacts, maps, plans.
- Do not use a separation sheet if there is nothing else in the file folder other than the item that needs to be separated. In this case, simply assign a new appropriate identifier and location.
- Example separation sheet for oversize items and photographs
- Keep track of which files contain items that are separated. A simple table/document such as the one below is sufficient. When processing is finished, please forward this document to Archives Assistant.
- If you are doing data entry via spreadsheet/CSV, use the tab titled "separation" to keep track of separated materials.
| Original location | Description | New location |
|---|---|---|
| 12-05 | 1 poster | 30-01 |
| 12-06 | 1 oversize map | RBSC-ARC-1234-OS-01 (Flat storage) |
| 13-01 | 1 audio cassette tape | RBSC-ARC-1234-SPC-01 (A/V storage) |
| 14-03 | 4 small photographs | RBSC-ARC-1234-PH-01 to 04 (Small prints - photograph storage) |
| 14-03 | 1 medium photograph | RBSC-ARC-1234-PH-05 (Medium prints - photograph storage) |
| 15-04 | 1 medium photograph | RBSC-ARC-1234-PH-06 (Medium prints - photograph storage) |
NOTE: Follow the steps listed in section “AtoM descriptions – Photographs” for ALL separated items.
- Title field of item-level descriptions should include the format of separated item (ex. Photographs, Posters, Maps, Artefacts, Audio cassettes, Film reels, etc.) and can include additional contextual information if necessary.
- If there is no new available location during processing (ex. waiting for a custom made box or oversize file folder), attach a copy of the separation sheet to separated items
- When new location is ready, update the “new location” field in original separation sheets in file folders and AtoM general notes re: location information
Digital media
- Published works on digital media should be weeded during appraisal (talk to Archivist if unsure)
- Digital media containing archival records (i.e. not published works) should be separated from textual records
- Floppy disks
- CDs
- DVDs
- USB drives
- Hard drives
- DO NOT create separation sheets for digital media
- DO NOT list/include digital media in AtoM descriptions – all levels
- Keep note of where the digital media was originally (i.e. file number and between which textual records) in processing notes for Archives Assistant/Archivist
- Label digital media with file number
- Put all digital media in one envelope
- On envelope, write fonds name, ARC number, list of file numbers originally containing digital media (Example)
- Keep a list of computer media and their location and forward to Archives Assistant when processing is complete, see example below
| Location | Description | |
|---|---|---|
| 3-05 | Between 1985 journal and 1986 journal | 2 CDs |
| 11-10 | Between Dec 12, 1985 and Dec 20, 1985 correspondence | One 3.5” floppy disk, One 5 1/4” floppy disk |
| 11-17 | At end of file | 1 SD card |
| 12-01 | At beginning of file | 1 USB drive |
- Keep a copy of the list in the envelope and a copy in the accession file which will go to Archivist when everything is done
- Archives Assistant will store digital media in vault
Accruals
- When working with accruals always use AtoM and Voyager to check the last processed box to see if there is space to add materials before starting a new box
- Archives assistant can assist with retrieving the last box
Restrictions
- RBSC research agreement covers research access to personal information so it is not necessary to apply restrictions unless otherwise noted by Archivist and/or donor
- Consult with Archivist regarding materials you think should be restricted
- Any files identified as restricted must be clearly marked on the top right corner of file folders with a red dot sticker (Example)
- Write “Restricted” on the lid and front of the box
- Add restriction note in AtoM for fonds, series, file, item-level descriptions
Circulation of restricted materials
- Prior to the implementation of RBSC research agreement, files were restricted if they contain third party information
- If there are patron requests for boxes with restricted materials (files with red dots, boxes marked with restriction labels), always check with the Archivist before circulating any restricted materials. Sometimes the restriction is placed by donor and therefore not covered by the research agreement
- When materials are returned, please let Archives Assistant know which boxes and/or files have been cleared by the Archivist so restrictions can be lifted (i.e. remove red dots, restriction labels and AtoM restriction notes)
Artifacts
- Most artifacts are wrapped in tissue paper and then a layer of bubble wrap
- Consult with Archives Assistant before rehousing artifacts
Rolled items
- Depending on size and type of material, rolled items may be flattened and stored in folders or kept rolled using archival quality materials
- If items cannot be flattened, Archives Assistant will create custom tubes for storage
- For ASRS storage: Wrap tube with mylar, wrap item over tube, and then place in tyvek sleeve
- For vault storage: Wrap tube with mylar, wrap item over tube, and wrap another piece of mylar over the rolled item
- Consult with Archives Assistant before rehousing rolled items
Supplies
- Most archival supplies can be found in the supply closet in the seminar room, on the shelves in the ASRS room, and on the shelves just outside of the ASRS room
- Ask Archives Assistant for key to the supply closet; if Archives Assistant is not around, ask other Library Assistants
- Let Archives Assistant know if you are taking the last of something (file folder, envelope, mylar, etc.)
Physical processing handoff
In cases where archival processing projects cannot be completed, archivists and student archivists should focus on intellectual work (i.e. arrangement, top-level/series level descriptions) instead of physical processing. Physical processing can be done at a later time by the archives assistant or other support staff/volunteers.
In addition to the steps outlined below, it is helpful to create a handoff document with notes such as:
- Series/subseries titles and abbreviations
- Restrictions (ex. Files identified for restriction are restricted until 2050.)
- Preservation
Workflow for retaining original order
- Once series structure has been established, each file/item should be marked with an assigned series.
- To retain original order of materials, keep files in their original order in original boxes. For each file, indicate which series the file belongs to. There are a number of ways to do this:
- Write the series title or abbreviation of series title on a flag and insert it in the file. Make sure flags are visible when files are in boxes
- Write the series title or abbreviation of series title directly on file (only if the file folder is not kept as part of records)
- Files with existing titles will be transcribed into AtoM by the person doing physical processing. If no file title is available or the existing file title is not clear, archivist/student archivist should supply a title in square brackets. This can be written on the flag or directly on the original file folders (again, only if the file folder is not kept as part of records).
- In files where materials are destined for separation (ex. photographs, digital media, artefacts), please indicate this on the flag or on original file folders. A simple note such as “contains photographs” is sufficient.
- Add a restriction note on the flag or on original file folders for files containing restricted materials.
Workflow for not retaining original order
- If original order of materials does not have to be retained, arrange files into boxes by series. Mark boxes clearly with series titles. Files with existing titles will be transcribed into AtoM by the person doing physical processing. If no file title is available or the existing file title is not clear, archivist/student archivist should supply a title in square brackets. This can be written on the flag or directly on the original file folders (again, only if the file folder is not kept as part of records).
- In files where materials are destined for separation (ex. photographs, digital media, artefacts), please indicate this on the flag or on original file folders. A simple note such as “contains photographs” is sufficient.
- Add a restriction note on the flag or on original file folders for files containing restricted materials.
What happens after materials have been marked and arranged?
- The archives assistant or other support staff/volunteers will rehouse materials, assign identifiers, separate materials based on format, and enter file-level description into a spreadsheet or directly into AtoM. The description includes identifier, file title, date range of materials for each file and any separation information (see section on Separation sheets for details).
- Physical extent for fonds/series level will be determined after physical processing is complete.
Completed projects
- When a project is complete, send an email to both Archivists as well as Archives Assistant
- Include a link to AtoM descriptions and/or word doc of descriptions
- Send Archives Assistant separation table/document
- Archivist will review and approve descriptions
- Once approved, RBSC Archivist will create/update voyager bibliographic records
- Archives Assistant will then take care of remaining tasks:
- Review physical processing
- Review project spreadsheet
- Prepare CSV for AtoM import
- Create/update voyager holding/item records
- Label boxes
- Store materials in appropriate locations (ASRS, vault, map drawers, photograph storage, A/V, etc.)
- Publish AtoM descriptions
- Generate PDF finding aid
- Save a copy of PDF finding aid to our common drive
- Create/update descriptions to MemoryBC (to be implemented)
- Update project tracking and physical extent/subject access points spreadsheets
- Export AtoM description (all levels) to CSV and save to CM folder
Resources
- Examples of RBSC AtoM descriptions
- Johanna den Hertog fonds - Most recent and follows the latest processing standards
- Swedish-Canadian research collection - Most recent and follows the latest processing standards
- B.C. Dairy Historical Society collection - Extensible processing
- Ray Haynes fonds - Extensible processing
- YWCA Metro Vancouver fonds - Extensible processing (PHFile)
- RAD Physical Description Builder
- AABC Archivist's Toolkit
- Rules for Archival Description
- SAA Dictionary of Archives Terminology