Documentation:Adding Students to Your Course Website
If your site is 'open' (i.e. users don't have to be logged in to view content) you have the following option:
UBC CMS provides an "ADD USERS" plug-in to make it easier for you to have students self-enrol in your course website. CMS stands for content management system. It offers a UBC Theme (Common Look and Feel) and is often reserved for department level websites or curricular projects involving more than one course. Arts One - Open is an example.
The steps below make it easy for you to set up a process for students to add themselves as authors on your course website. There are 2 very important parts to this process:
- Adding the plug-in and configuring the widget for your course site.
- Notifying students of the 2 step process for adding themselves to your site.
You may choose to notify students of the sign up process either by email or via an announcement in class. Attention to this step will reduce confusion and get your class off to a good start.
Video
Step 1: Login to your UBC CMS Website.
- Access to http://cms.ubc.ca and click on the login button.
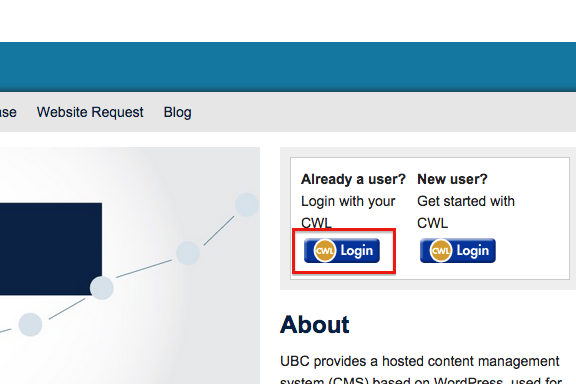
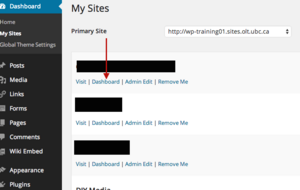
Logintoubccms.png - From the left menu bar, under Dashboard, click on My Sites.
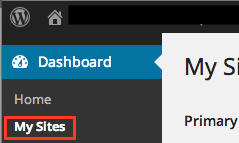
- Look for the site that you want to add students to your course, and click on Dashboard.


Step 2: Add the plugin
- Contact CMS support from the form here to request activation of Add Users Sidebar Widget. 1.0.3 plugin
Step 3: Add the widget
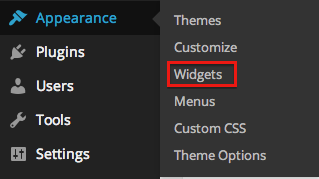
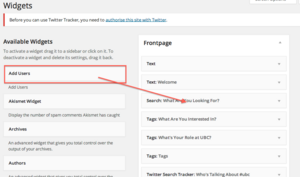
- From the left sidebar, hover on Appearance Then select Widgets.
- Click and drag on the Add Users widget to the section that you would like to make the Add User button to appear.


Step 4: Configure the widget
- Under Add Users, insert a title. Select either of subscriber, contributor and author depending on the level of access you want your students to have.
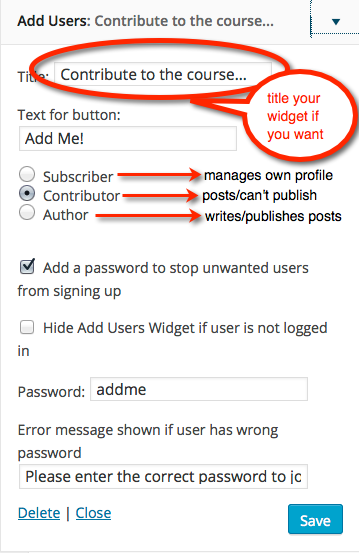
- (Recommended) Check Add a password to stop unwanted users from signing up. This will avoid random users registering to the website. Then, set a password.
- Press Save.

Step 5: Check the result
- Now your students will be able to see the "Add User" section on the sidebar.

Note: When you add the plugin to the widget to the Front Page, make that the widget is displaying on the front page. To display the widget on frontpage, go to Dashboard>Appearance>Theme Options>Front Page, and select either of option1, 2, 3 or 5.

Step 6: Notify your students
This is a very important part of the process. Send an email to your students asking them to do 2 things:
- Get an account on cms.ubc.ca.
- Go back to the website and add yourself to the site with the password provided. Remember to include your site url AND the password in your email.
When students return to the course website in future, they will need to login to cms.ubc.ca if they want to contribute.