Documentation:Video Basics/Elearning
What is it?
Creating your own video is as easy as aiming your smartphone at a subject and pressing the record button. Creating video for educational purposes requires a little more planning and clarity about your goals. Here are some things you'll want to consider:
- Why am I making this video? Consider your objectives carefully and make sure they are in line with what's important for learning. What will students learn? How will I know when they've learned it? How does the learning relate to the overall learning objectives for the course.
- Who is it for? For example, recent research demonstrates that novices may benefit more from learning through video than more experienced students (Muller, D.).
- What kind of video will help me convey what I need to convey? Animations or whiteboard illustrations in combination with dialogue may suit purposes where you want to explain detail not easily seen by a camera or the naked eye. Video interviews are important when you want to capture an individuals story or experience in their own words. Screencasting allows you to capture action on your screen as you are interacting with it to show people how to search a database or use a software application - for example.
- How will learners use what they learn with the video? Will they participate in online or in-class discussion or problem solving, or will they self assess their understanding to better monitor their own learning?
- Is the quality (production value) important or is the purpose to document and share? DIY video production can be as effective as full professional production, but the quality will be different (in terms of lighting, sound and post production effects).
- What are my time and budget constraints? This may affect your decision about DIY vs. professional production and will also help you be realistic as to what you can expect to produce during your first attempt.
- Where will I host the video? Do I want it to be open to the world or limited to a specific group of viewers?
However you answer these questions, creating your video will involve essentially 4 stages:
- Pre-production: planning your project
- Production: creating your video
- Post-production: editing your video
- Distribution: hosting and embedding your video
Resources to stimulate thinking and planning:
- UBC's Design Principles for Multimedia: an overview of research and practice based principles for effective multimedia design, within a practical framework.
- What Makes an Instructional Video Compelling?: an interesting piece looking at factors like relationship to course content and conversational language, as contributors to compelling viewing of instructional media among students.
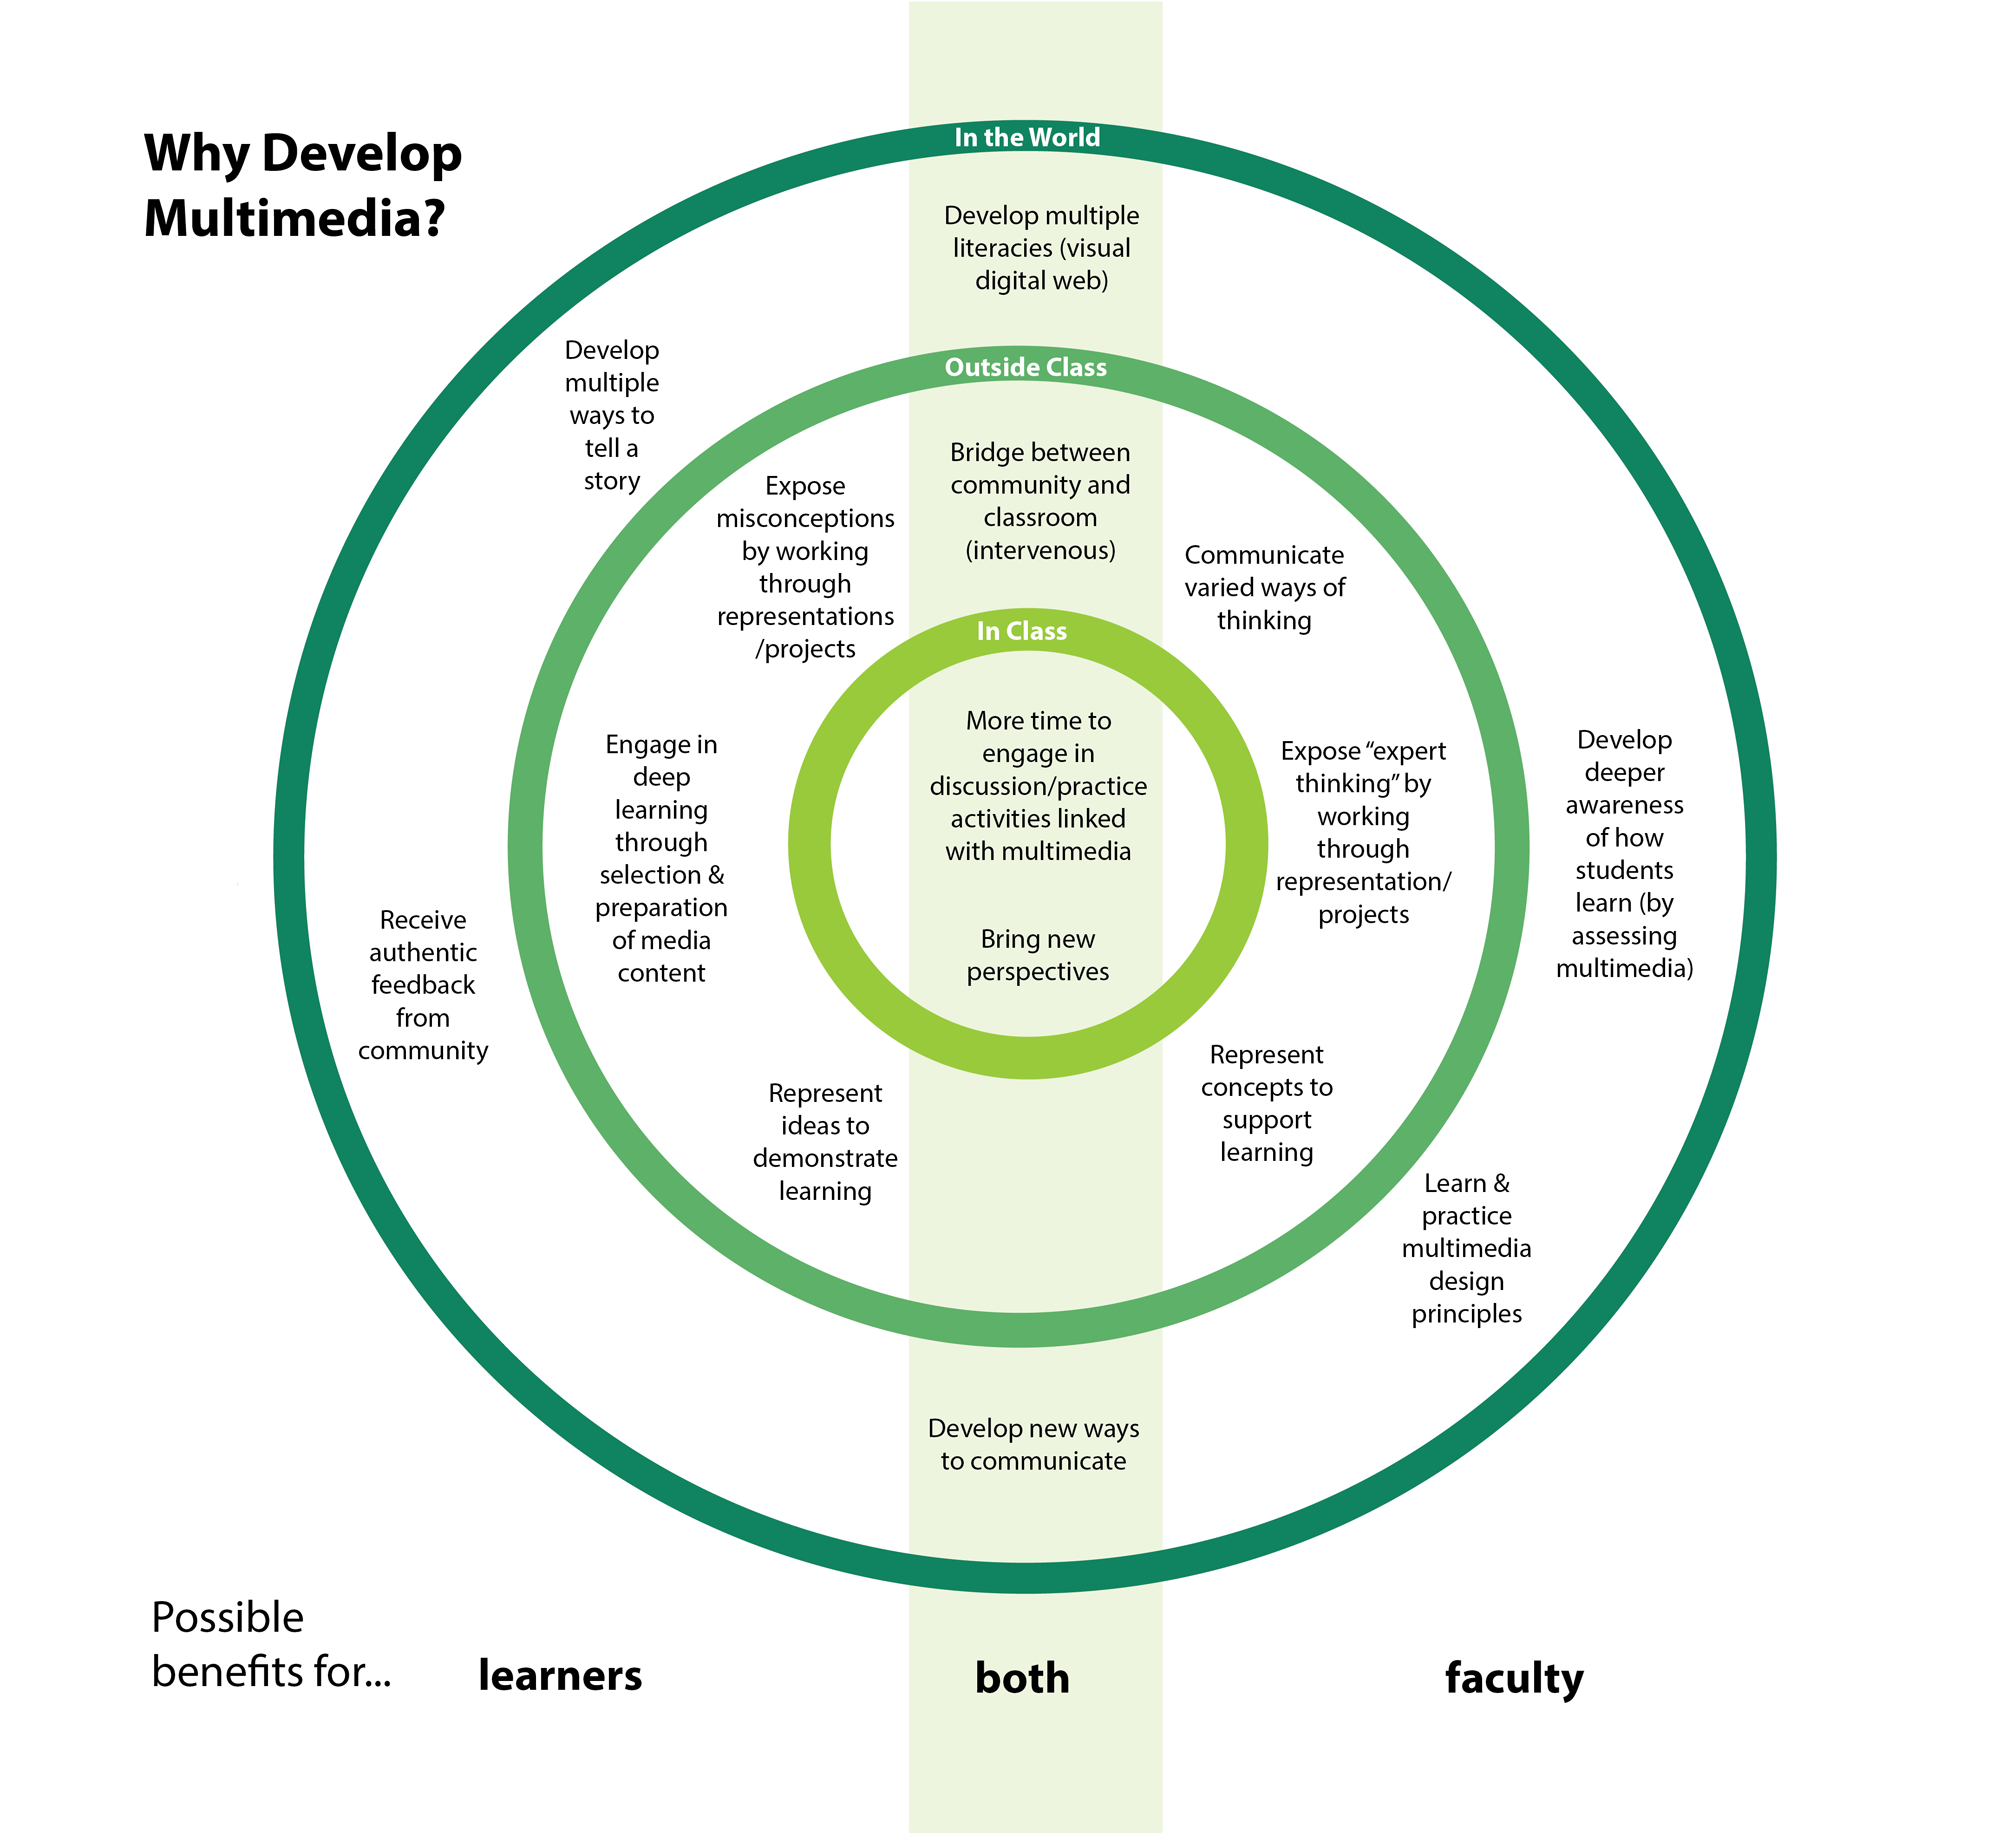
Uses and Benefits
Why Do This?
"Visual culture is not limited to the study of images or media, but extends to everyday practices of seeing and showing, especially those that we take to be immediate and unmediated" (Mitchell, 2002, Showing seeing: A critique of visual culture. Journal of Visual Culture, p. 170).
There are many ways to create video to support learning - from creative stop-motion animations like this to demonstrate a concept to live demonstration or interview. Basic uses for video in learning include:
- Documenting an experience or event
- Explaining something
- Demonstrating something
- Telling a story
To see a sample of our own student/staff/faculty created video at UBC, have a look at UBC's YouTube Channel
Benefits of Video for Learning
- "for a novice learner, I have found that concise expository summaries do very little to improve learning - a key for me is to start with misconceptions and show how misconceptions can morph into a complete scientific truth."
- Derek Muller of Veritasium in an interview with nottingham science on YouTube.
- "students can develop a deep understanding of a science concept by bringing together different ways of making meaning,: researching content, storyboarding, making models, using narration, labelling key aspects, etc."
- Gary Hoban, Associate Professor, University of Wollongong, Australia who developed Slowmation
Examples
Need More Inspiration?
New forms for creating and sharing video include the Twitter app called Vine. It allows users to create and share short looping videos (of 6 seconds or less). As with Twitter, the short format can inspire creativity.
Consider GE's launch of the world's first 6 second science fair in the summer of 2013. Here is a snippet of their compilation of some the entries:
This is a beginning collection of practices, experiments and examples of the online use of visual media to support learning.
Live Demonstration
Part 1 of a 4 part series in Neuroanatomy - produced by a graduate student at MIT. Features narrated brain dissection.
Stop-Motion Animation
Video illustrating how haemophilus influenzae cells take up DNA - by UBC's Rosie Redfield
A sample from the MinutePhysics Channel on YouTube
Henry Reich - the guy behind the making of MinutePhysics video - talks about the process. He's based at the Perimeter Institute in Waterloo, Canada.
Talking Head
Samples below illustrate what can be done to introduce a module or learning experience.
More from Coursera's channel on YouTube.
Self-Guided Learning Resource
Combination slides/video, resources, reflection activity.
DIY Animation
More 3 minute tutorials, made by students, using Go Animate.
Java Based Interactive Animations
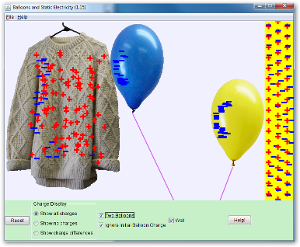
Interactive physics and chemistry simulations from the University at Colorado in Boulder.
Get Started
You likely have the tools to make a video already, even if you don't have a camcorder. Web cams, digital cameras, and smart phones often have video recording features—many digital cameras even have a simple switch to choose between stills and video.
Most devices record in either the .AVI or .MPG formats, both of which are supported by most hosting services, and the video shot with them can be uploaded directly from the device or after being edited on your computer.
Equipment
You will need to choose a basic set of equipment to create your project. Essentially, your needs can be broken down into the following categories
Video
- video camera or one of the following devices (with video capabilities):
- iphone
- ipad
Audio
- clip on lavalier mics with extension cords(for most situations)
- handheld mic (for roving reporter/streeter type video)
- Rode smartLav Mic - Wired (for iphone/ipad recording)
- desktop mic (like a Blue)for table top, group recording.
Lighting
Editing
Video editing software: iMovie for Mac, Windows MovieMaker or another free video editing tool.
- iMovie
- Final Cut Pro
- Camtasia
- Screenflow (for Screencasting on Mac)
- workstation with computer, monitor and headset
All-in-One
Recommended list for an ipad kit for DIY media production.
- iPad 16 GB wifi w/ AppleCare
- Apple Polyurethane Smart Cover for iPad
- Adonit Green Jot Pro iPad Stylus
- One Sleeve 11" Black with Shoulder Strap
- Rode smartLav Mic - Wired
- Joy Factory Unite Universal Tablet Carbon Fiber C-CLAMP Mount for iPad
- Audio Extension Cable
- Apogee MiC Lightning
- Apogee MIC carry case
Tip: Make sure you have all of the equipment you need and test it (including the transfer to the computer you'll be using) to ensure it is in good working order and the recorded quality is what you need. If you don't have your own equipment you may be able to borrow what you need.
Pre-Production:Planning
The first place to start in planning your shoot is with the story. What's the story you want to tell? Knowing exactly what and how you are going to shoot (your subject) why you are shooting (your message), as well as the audience for which you are shooting, is very important part of planning.
Here are some resources that may help you in this phase of your project:
Storyboard/Scripts
- Storyboard template (from Penn State Media Commons) along with storyboarding tips and examples.
- For storyboard pointers check out storyboarding for explainer videos by Common Craft.
- For scripting pointers look at Scripting for explainer videos by Lee Lefever at Common Craft
Forms


Production: Creating
In this phase, you will be creating your project. You will have tested your recording device and planned your shoot or screencast with a storyboard.
Here are the resources that will support this phase of your project
lynda.com
Explore the following courses on lynda.com. For registration information, visit lynda.ubc.ca. Take note that the service is only available to UBC faculty, staff and post-doctoral fellows. If you are a student, please see additional resources.
Video Recording and Shooting
- Foundations of Video: Cameras and Shooting
- This course provides you with the information to start shooting your own movies and videos. It covers topics such as lighting, exposure, sound, and equipment.
- iMovie for iPad Essential Training
- You can start shooting and editing your own video using your own mobile devices. This course will walk you through the process of recording, editing, and exporting video on your iOS devices (e.g. iPad/iPhone) using the iMovie app.
Screencasting
- Camtasia Studio 8 Essential Training
- Camtasia Studio is a screencasting program where you can capture what is happening on your computer. This course will demonstrates how to set up, record, edit, and share screencasts for online lectures and assignment feedback.
Production Techniques and Approaches
- Camtasia for PC and Camtasia for mac: Using Camtasia and need some training? These short (2-5 min) videos offer excellent training support for beginners to advanced.
- How to Shoot a Good iphone video - Part of a great series from the iphoneographers. They also cover editing and app reviews for iphone moviemaking.
- Penn State's Video Production Tips
- Video Techniques from kdmcBerkely (School of Journalism) for more depth and detail.
- YouTube Tutorial Videos Video to help you with all phases of production.
- Indy Mogul's YouTube Channel Great Resource for DIY Video support for things like lighting, special effects.
B-roll Content
- Find OER : Open Professionals Education Network
- UBC's Image Sources Guide
- UBC's Public Domain Guide
Copyright
Do you need to find copyright safe sound or images for your project? The following resources can help:
- Image Sources: UBC's Copyright resource provides an excellent list of various "copyright safe" image databases and also includes some discipline specific ones as well.
- Creative Commons Guide: UBC's Copyright Guide provides lists of databases for free and "copyright safe" sounds, music and video for your digital media projects. It also helps you understand Creative Commons licenses and how and why you may want to apply one to your work.
- Public domain resources: this page provides an overview of what public domain is, how material in the public domain can be used, and much more, including quick tips to check if something is or is not considered public domain in Canada, as well as links to public domain sources.
Students and Copyright
- Why should I care about copyright?: this student-centered guide, put together by the UBC Learning Commons team, answers questions on the subject of copyright and addresses a number of myths and misconceptions surrounding copyright.
Post Production: Editing
This is where you will be adding your intro, your credits and acknowledgements (including references to any source material, images, music or video clips you have included) and assempled your project.
There are the resources that will be useful to you:
- Final Cut Pro X Essential Training
- Final Cut Pro X is a powerful video editing program widely used by professional videographers and filmmakers. It is available for use at various Mac Workstations in UBC Vancouver Library locations. This course will help you with the full editing process, from preparation to exporting.
Or, for students:
- Basic Tutorial for iMovie and Final Cut Pro
Publishing your content
When you've finished recording, editing and exporting your content to an acceptable file format, you'll need to publish it so that you can embed it where you like. You can publish your content on:
- Your own website.
- UBC's Kaltura platform
- UBC's YouTube Channel: using the upload form
- Your own YouTube Channel: YouTube Help
- Soundcloud for audio files.
- another free content hosting service.
Embedding your content
Once your content is hosted (on YouTube or Kaltura) you can embed it in a Canvas course, WordPress environment or on a wiki page. See how-tos below.
- Embed on UBC's CMS WordPress
- Embed on the UBC Wiki
Resources
lynda.com courses
Explore the following courses on lynda.com. For registration information, visit lynda.ubc.ca. Take note that the service is only available to UBC faculty, staff and post-doctoral fellows.
Video recording and shooting
- Foundations of Video: Cameras and Shooting
- This course provides you with the information to start shooting your own movies and videos. It covers topics such as lighting, exposure, sound, and equipment.
- iMovie for iPad Essential Training
- You can start shooting and editing your own video using your own mobile devices. This course will walk you through the process of recording, editing, and exporting video on your iOS devices (e.g. iPad/iPhone) using the iMovie app.
Video editing
- Final Cut Pro X Essential Training
- Final Cut Pro X is a powerful video editing program widely used by professional videographers and filmmakers. It is available for use at various Mac Workstations in UBC Vancouver Library locations. This course will help you with the full editing process, from preparation to exporting.
Storing and sharing
- YouTube Essential Training
- YouTube is one of the most popular online video sharing platforms, used for a diverse range of learning goals. This course will show the basics of YouTube from starting an account to some tips in shooting and editing.
- Vimeo Essential Training
- Vimeo is an online video sharing platform geared towards independent filmmakers and artists. This course provides an introduction to the service's features and tips on editing and compression.
How tos
- How to shoot a good iPhone video is part of a great series from the iphoneographers. Editing and app reviews for iPhone moviemaking are also covered.
- Video Techniques from Berkely's School of Journalism are detailed and in-depth resources.
- YouTube Tutorial Videos can help you with all phases of production.
- Indy Mogul's YouTube Channel is a great resource for DIY video support, from lighting to special effects.
Publishing your content
When you've finished recording, editing and exporting your content to an acceptable file format, you'll need to publish it so that you can embed it where you like. You can publish your content on:
- Your own website.
- UBC's Kaltura platform
- UBC's YouTube Channel: using the upload form
- Your own YouTube Channel: YouTube Help
- Soundcloud for audio files.
- another free content hosting service.
Embedding your content
Once your content is hosted (on YouTube or Kaltura) you can embed it in a Canvas course, WordPress environment or on a wiki page. See how-tos below.
- Embed on UBC's CMS WordPress
- Embed on the UBC Wiki
Copyright
Do you need to find copyright safe sound or images for your project? The following resources can help:
- Image Sources: UBC's Copyright resource provides an excellent list of various "copyright safe" image databases and also includes some discipline specific ones as well.
- Creative Commons Guide: UBC's Copyright Guide provides lists of databases for free and "copyright safe" sounds, music and video for your digital media projects. It also helps you understand Creative Commons licenses and how and why you may want to apply one to your work.
- Public domain resources: this page provides an overview of what public domain is, how material in the public domain can be used, and much more, including quick tips to check if something is or is not considered public domain in Canada, as well as links to public domain sources.
Students and Copyright
- Why should I care about copyright?: this student-centered guide, put together by the UBC Learning Commons team, answers questions on the subject of copyright and addresses a number of myths and misconceptions surrounding copyright.
Open Educational Resources
- Find OER: Open Professionals Education Network.
- Finding and using Creative Commons materials: UBC's guide to Creative Commons.
- UBC Image Sources Guide: crediting image sources.
Guides
- DIY Media Toolkits Guides/Audio
- DIY Media Toolkits Guides/Video
- DIY Media Toolkits Guides/Video/Kaltura
Research
- DIY Media (UBC collaboration): research section
Highlights
Overview:
- The Media Scholarship Project: Strategic Thinking about Media and Multimodal Assignments in the Liberal Arts. Watts, Simons, and Baird (2010).
Video:
- The Secret to Engagement: Lessons from Video. This video from the Perimeter Institute addresses why why video, on its own, may not be as engaging as you think, and how to fix it. Science filmmaker and communicator Derek Muller, best known for his YouTube channel Veritasium effectively illustrates and explains why addressing misconceptions head on may be key to engagement and learning.
- Using “Slowmation” to Enable Preservice Primary Teachers to Create Multimodal Representations of Science Concepts. Hoban, G. and Neilson, W. (2011)
Audio:
- McGarr, O. (2009). A review of podcasting in higher education: Its influence on the traditional lecture. Australasian Journal of Educational Technology, 25, 309-321.

- This paper examines a possible influence of podcasting on the traditional lecture in higher education. The review explores three key questions: What are the educational uses of podcasting in teaching and learning in higher education? Can podcasting facilitate more flexible and mobile learning? In what ways will podcasting influence the traditional lecture? These questions are discussed in the final section of the paper with reference to future policies and practices.
- Murphy, B. (2008, July). Podcasting in higher education. Retrieved on May 28, 2014, from http://www.bcs.org/content/ConWebDoc/20217
- Reviews how podcasting is currently used in higher education: How it is used in course lectures, pre-class listening materials, and coursework feedback. Includes top tips for podcasters.
Tips
For Faculty
For Students