Documentation:CTLT 2.22 Lecturn Cheat Sheet/Interactive Projector Portable Lecturn
- Roll the Portable Lecturn out of the storage room at the corner of 2.22B, and place it close to the storage room door so that is in close enough proximity to the projector inputs and the power outlets
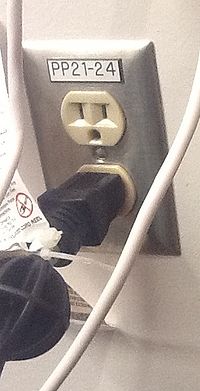
- Plug the Portable Lecturn into the wall
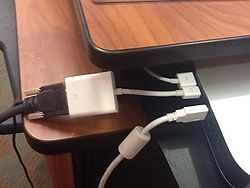
- Connect the VGA cable already connected to the wall into the Room PC (Mac Mini) located on the Portable Lecturn, as shown in the picture below. The VGA cable will need to go into the thunderbolt to VGA adapter plugged into the back of the Mac Mini.
- Turn on the Mac Mini (power button is on the back corner)
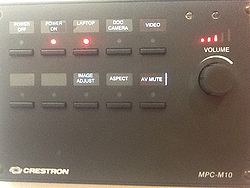
- From the Crestron panel on the wall, select "Power On" and "Laptop"
- Wait a minute for the projector to finish warming up and turning on, if necessary
- Log into the Mac Mini
- Make sure the white USB cable from the wall is plugged into the Mac Mini on the Portable Lecturn in order to be able to use the interactive capabilities of the projector
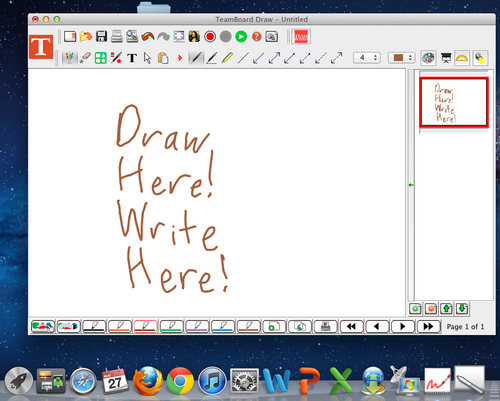
- Start up TeamBoard Draw
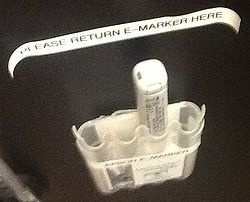
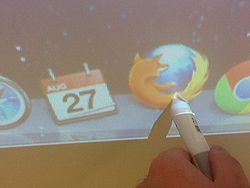
- Locate the e-marker, found inside the lecturn:
- The e-marker can be used to open applications on the projector, and perform other regular left-click operations
- TeamBoard Draw can be used to write, draw, annotate, etc, using the e-marker