Documentation:Creating Sign-up sheets with limited spots on Qualtrics
With the new UBC Survey Tool - Qualtrics - you can create sign-up sheets that maintain a counter of the number of people who have selected a particular answer which can have some actions associated with it. This option helps create sign-up sheets for event registrations which will stop people from registering once the spots are filled in.
Creating the Survey
- To begin, create a project in Qualtrics via the 'Create Project' tab.
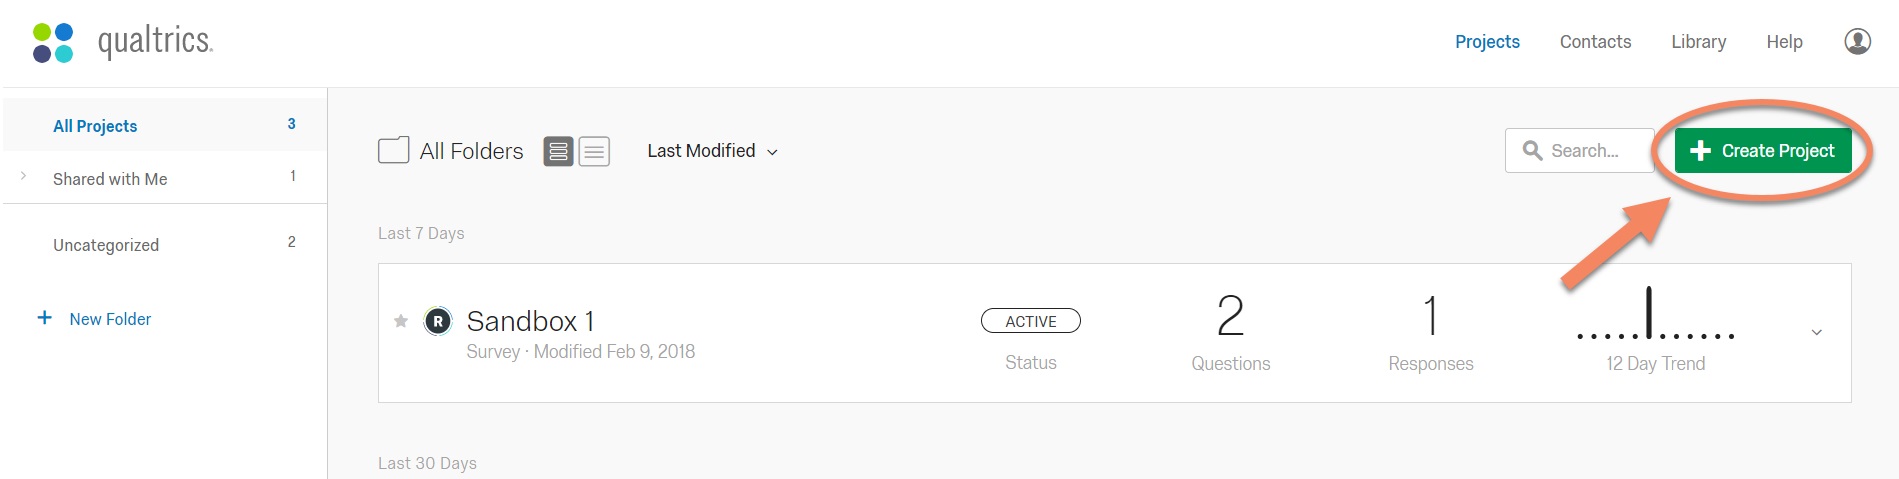 How to create a new project in Qualtrics
 - Write in the questions needed to make the sign-up sheet. This should include a block for the registrant's information and a separate block for registration time slots. This can be done in two styles.
- For same-day time slots, or small number of time slots, it is best to add them all under one question.
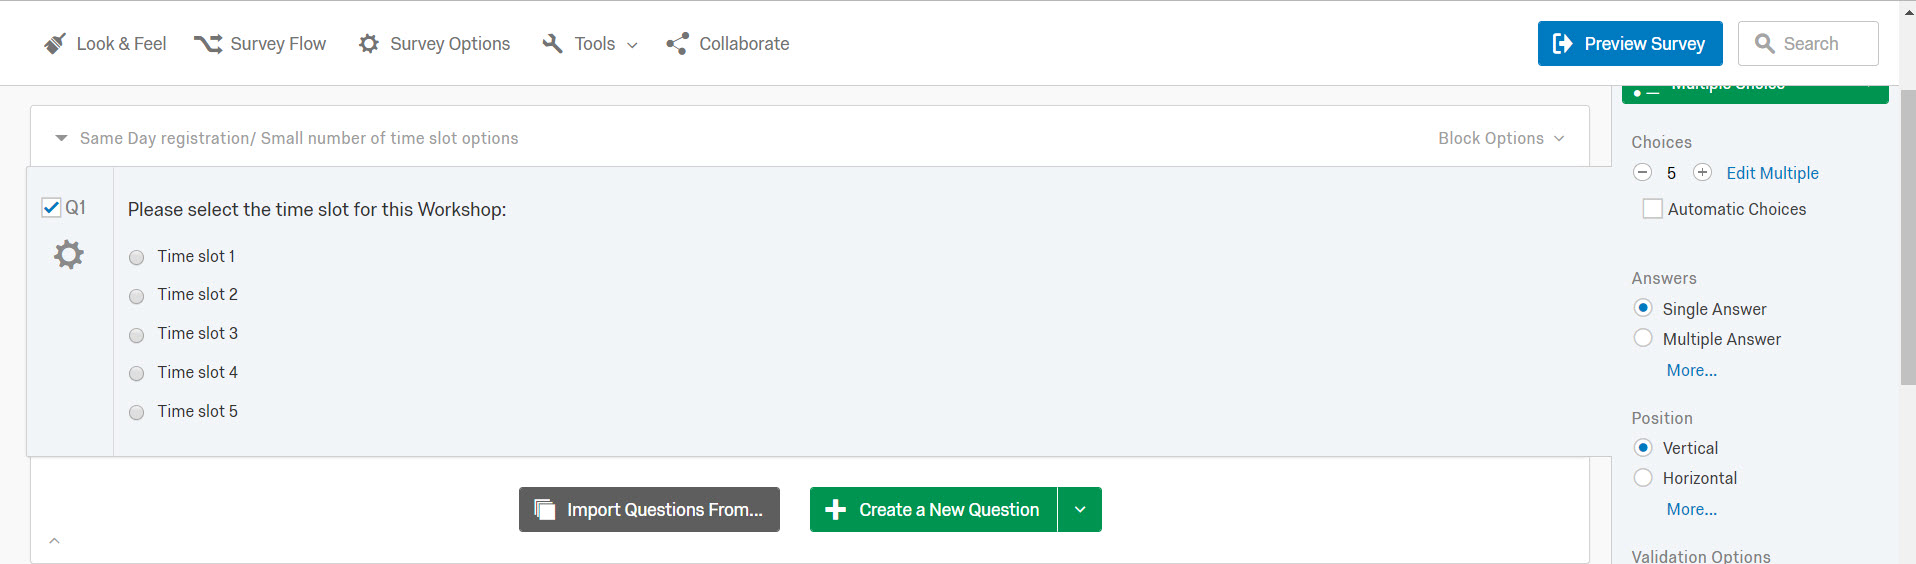 This is recommended for small number of options (<10)
 - For multiple time slots spanning over a few days, it is best to divide it into two questions about dates and time slots for the particular day respectively. You can change the display settings for the time slot questions depending on the date selected in the previous question.
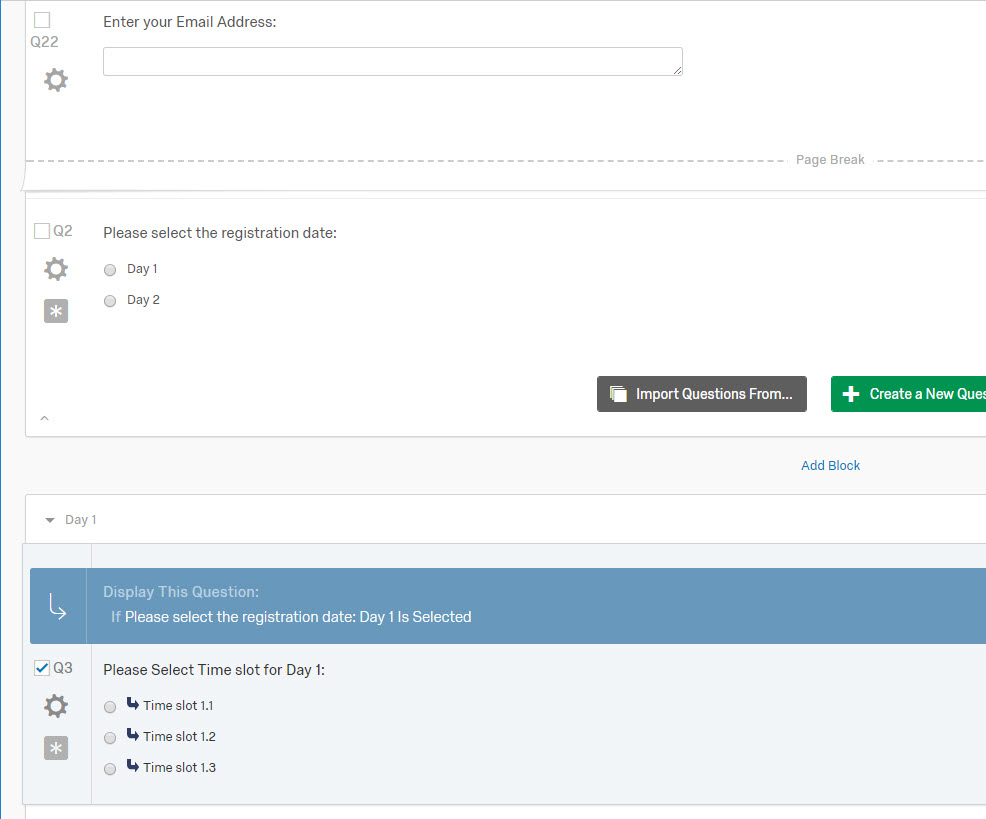 Select this for various time slots spanning over multiple days
- For same-day time slots, or small number of time slots, it is best to add them all under one question.
- Once your time slots are put in, add in the text to be shown when a certain time slot is full as another answer choice. This will be displayed only when all the slots are occupied.
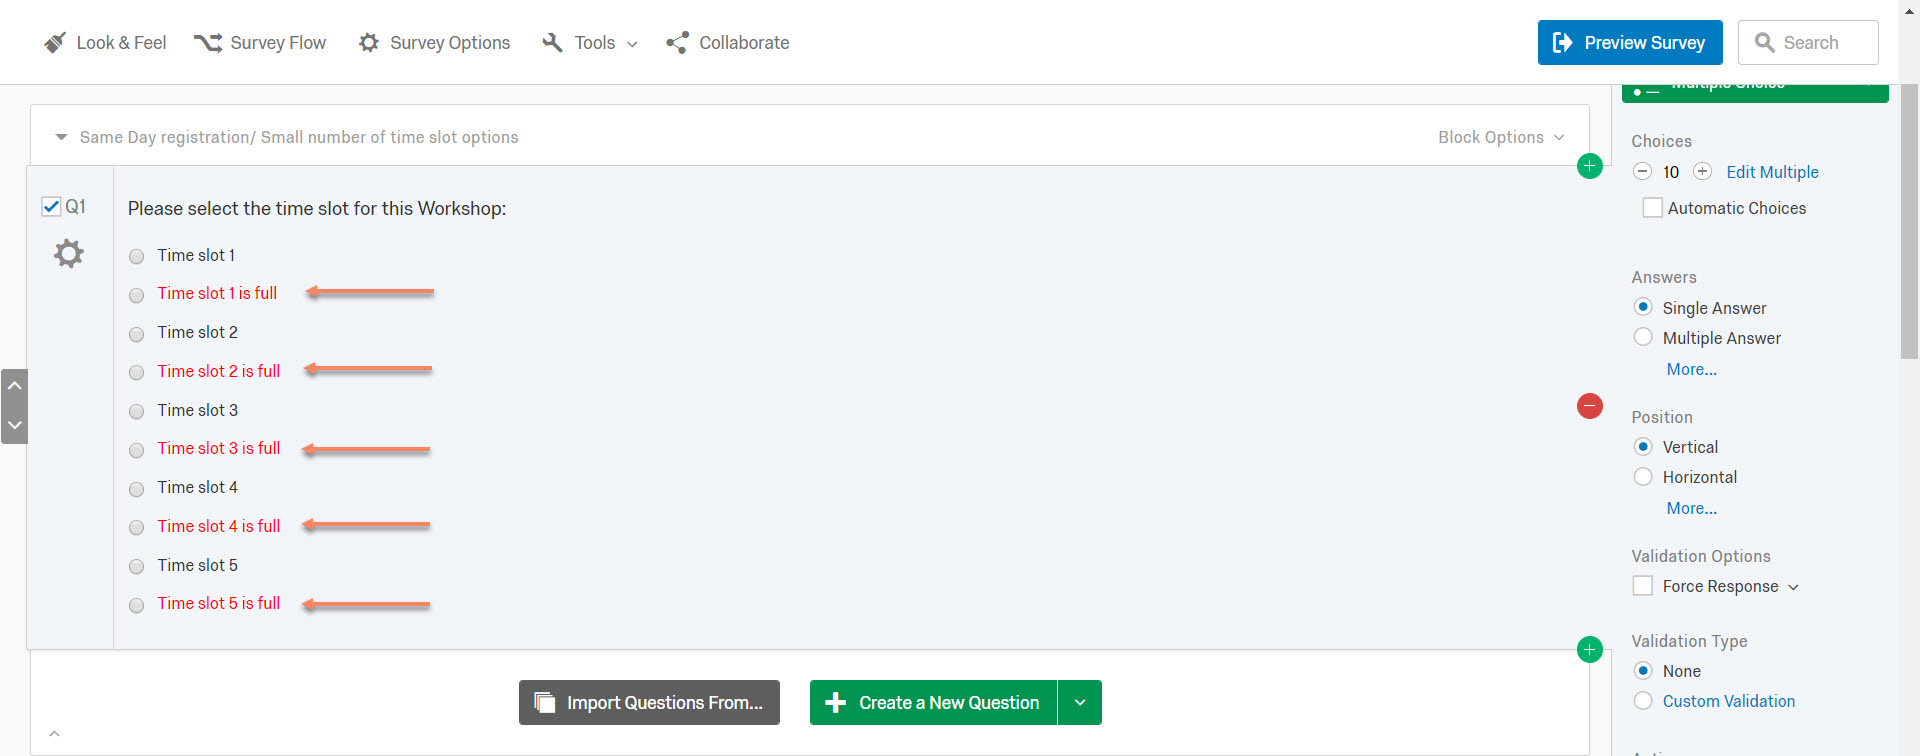 These options will be displayed when the quotas for the time slots are met.
 - Add in another block to display the confirmation message. Select the 'descriptive text' type question. Add in piped text from the question displaying the time slots. This will read the answer choice automatically and display it on the confirmation screen.
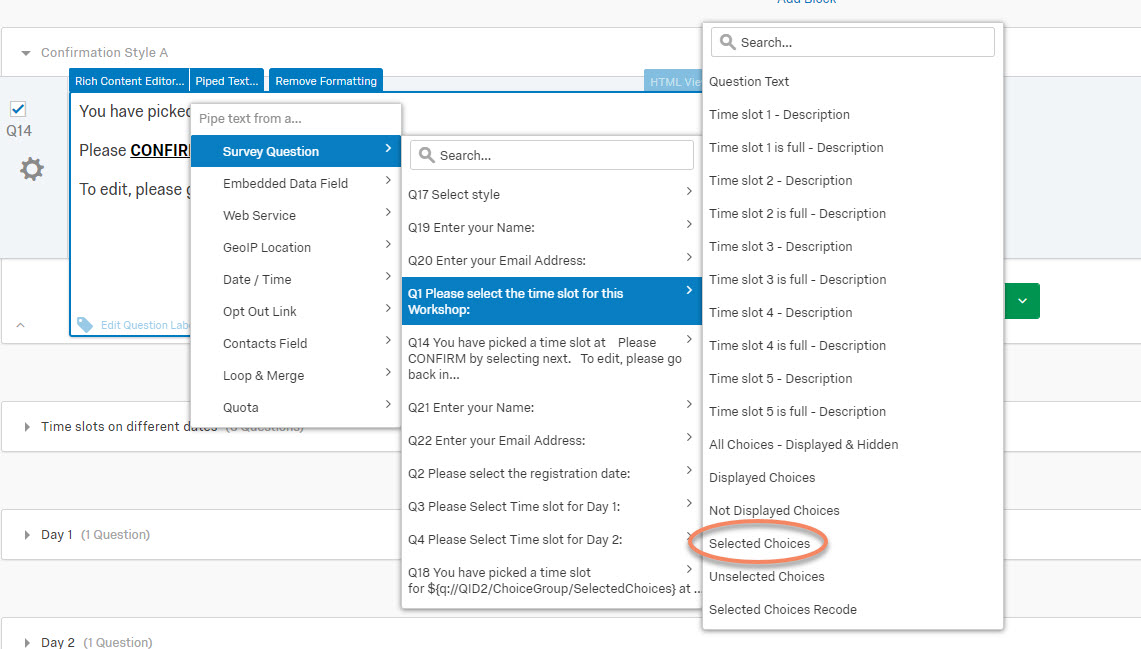 Piped text will show the selected option on the confirmation screen
 A preview of how the piped text will look in the survey


Adding Quotas to keep count
- Once the survey is made, select 'Quotas' under the 'Tools' menu. Select the "Create Multiple Quotas" option from the ribbon on the bottom. You can add quotas individually through "Add new quota" option; however it may take you longer.
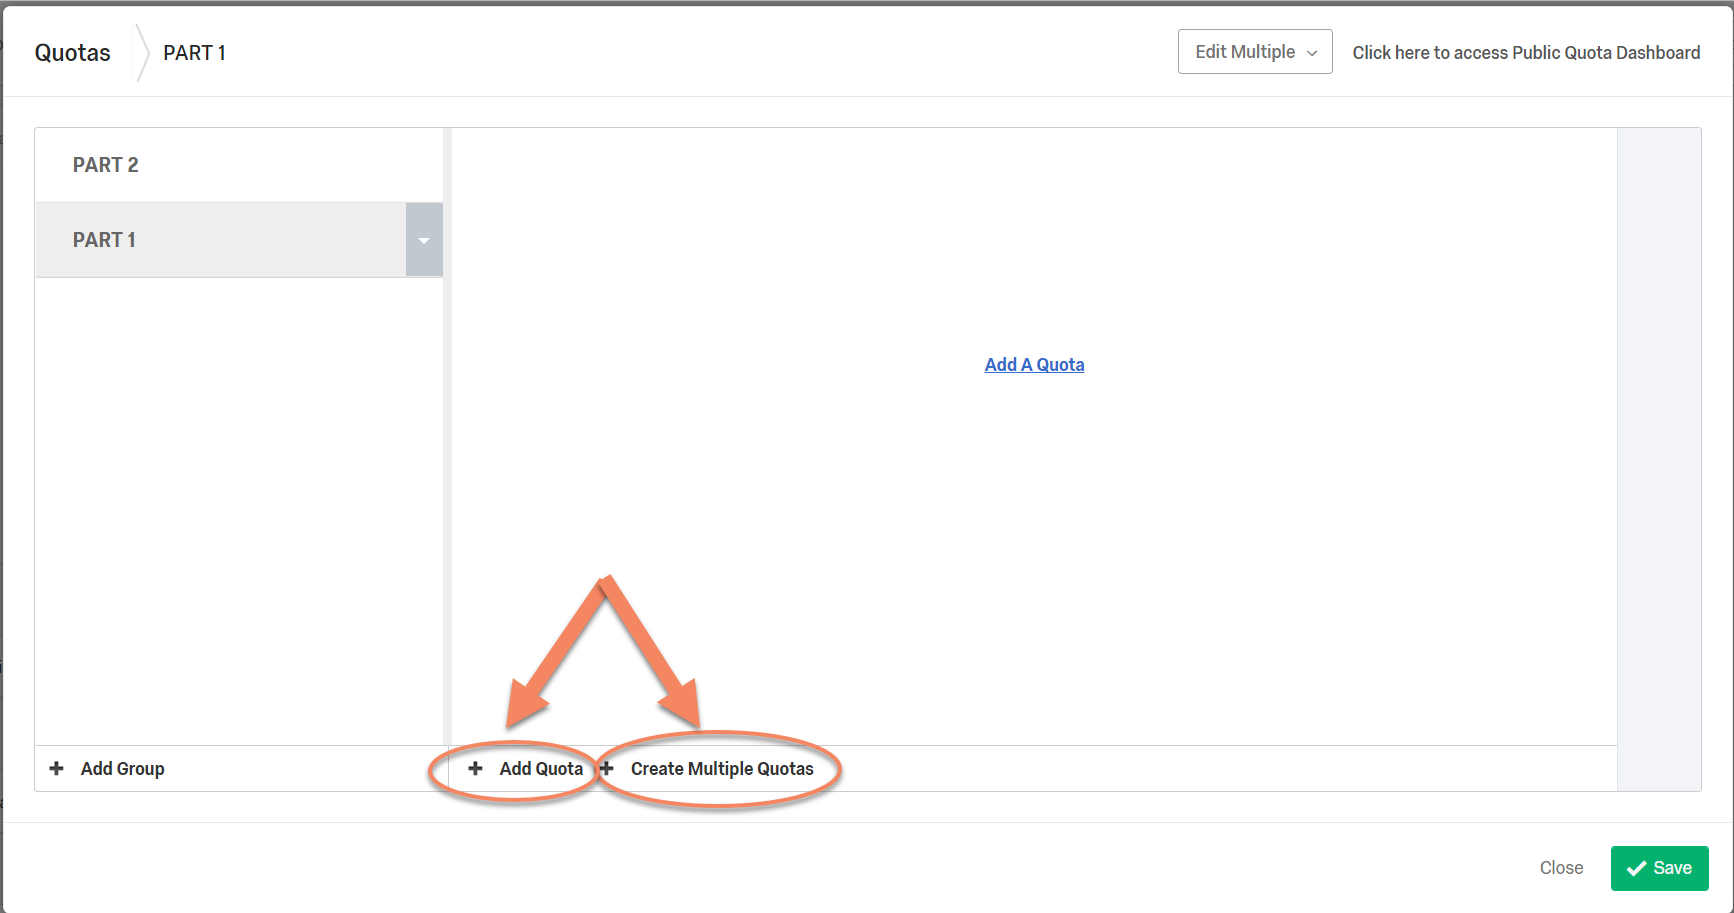 Quotas Dialog box

- After selecting 'Create Multiple Quotas' option, select the question that you want the quotas to be made for. This will be the question with the time slots. Ensure that all the options you want to add to this question are already in place. Any edits to the order of the options later may leave the quotas in disarray.
- In the 'Add Multiple Quotas' dialog box, exclude the answer choices which were added to be displayed when the time slots are full. Select the number of registrations you want to allow per time slot by adjusting the count. Change the action of the quotas to 'None (For Skip Logic or Survey Flow)'. Click on "Create # Quotas", which should reflect the number of time slots you have in the question.
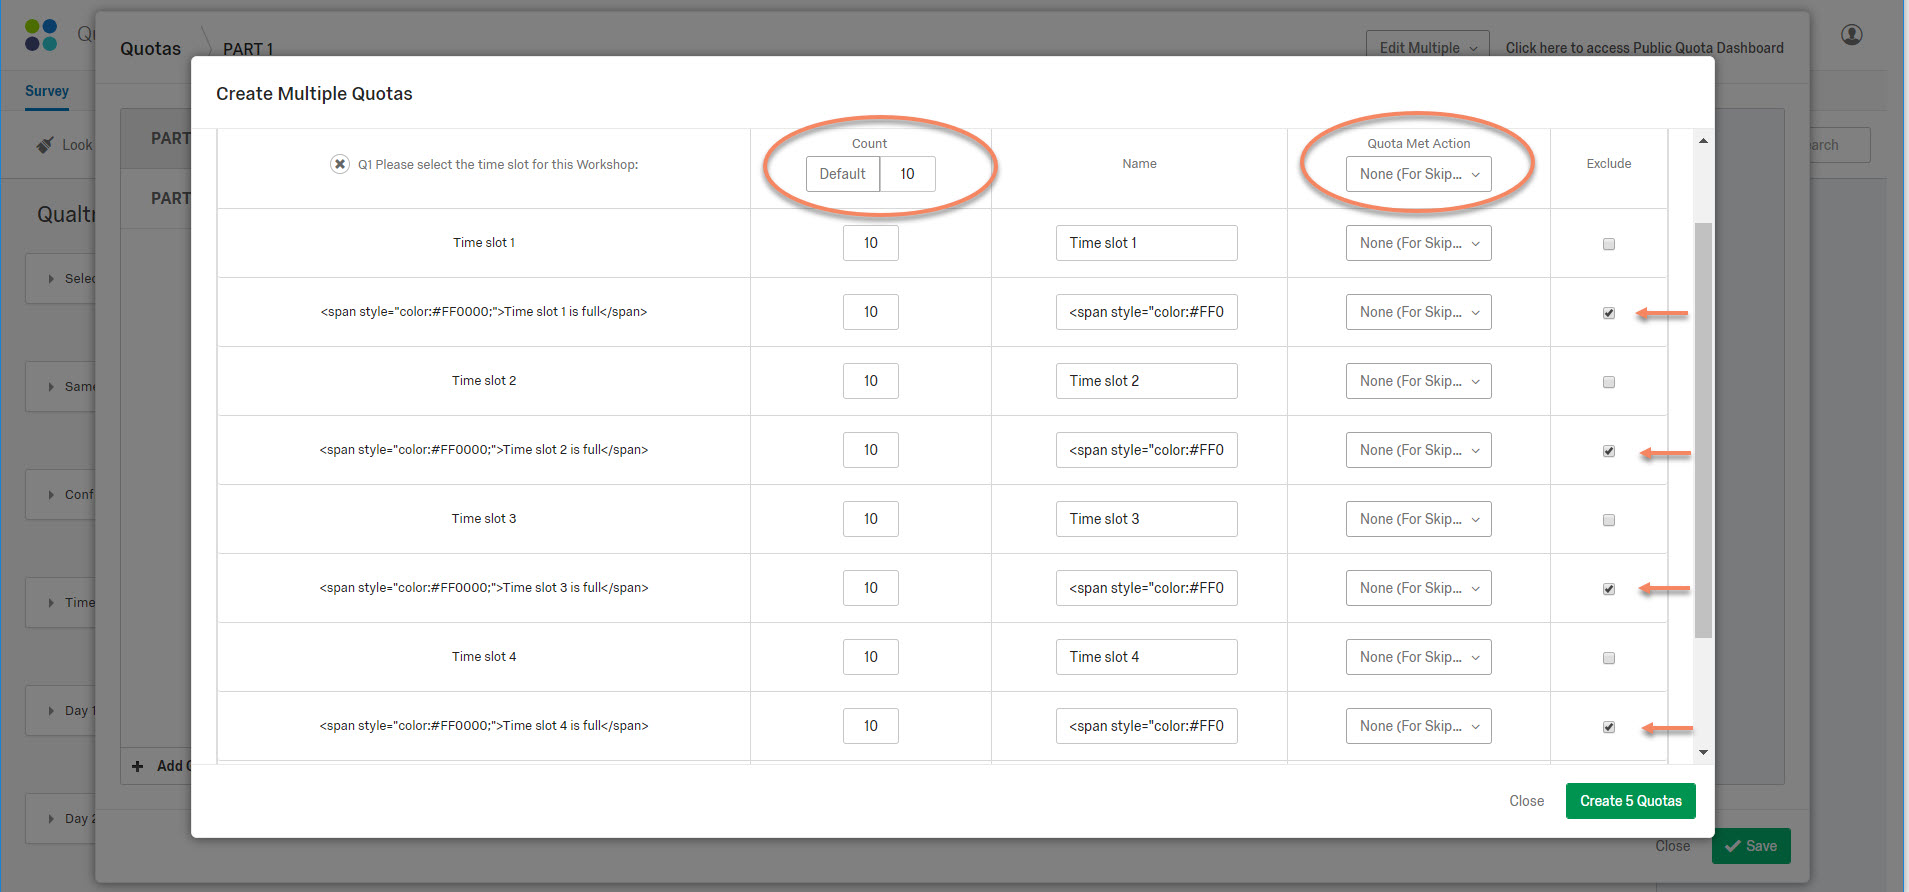 Ensure all the options are selected properly before creating quotas. All quotas are edited individually.

Adding Display Logic and Validation for the questions
- Now that all the quotas are in place, go to the question with the time slots and select the options individually
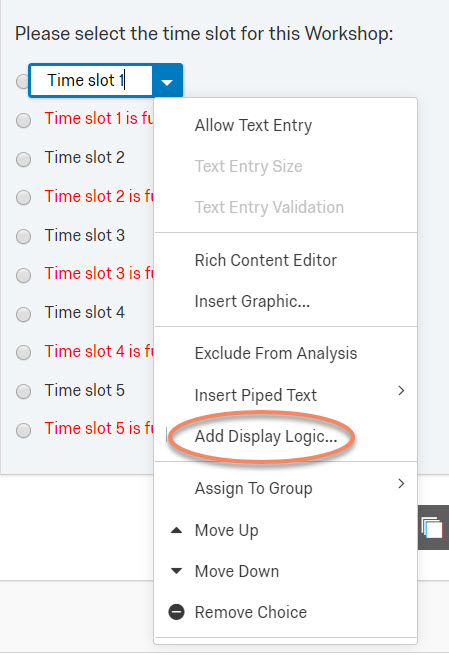 Display Logic for each option can be found in the drop down list
- For the option showing the time slot, select the the display logic such that it will show if the quota for the option is not met.
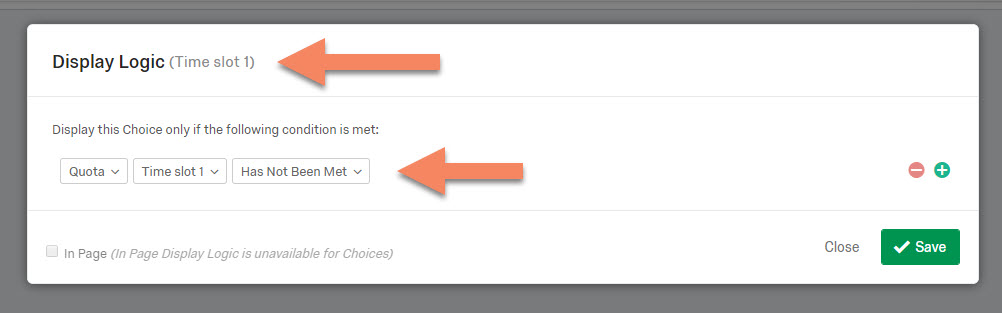 Options with Time slots should be displayed until their quotas are not met
 - For the option showing the message when the quota is met, select the display logic option such that it will display only if the quota is met.
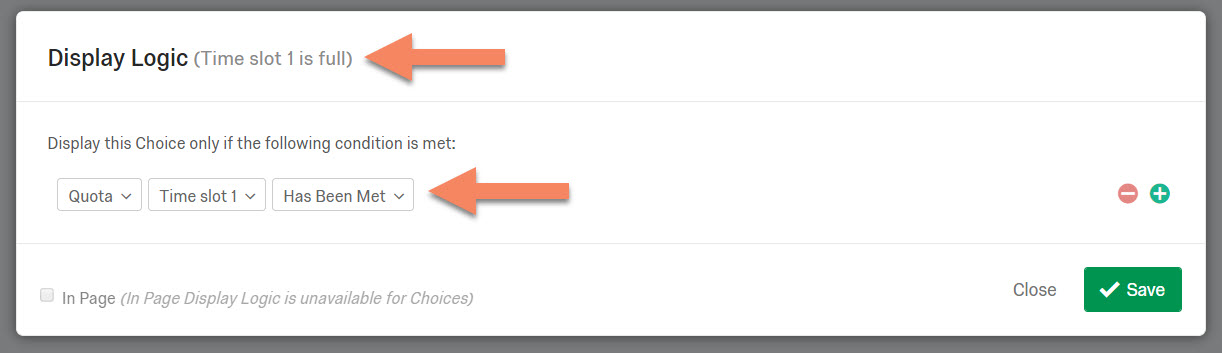 Options with the display message for full slots should not be displayed until their quotas are met.
Options with display logic incorporated will have a small arrow on the left as seen below
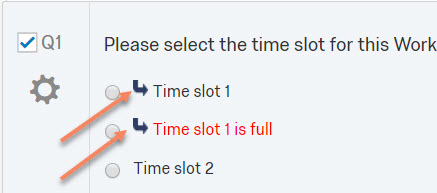 The marked arrows show that the answer option has display logic incorporated.
- For the option showing the time slot, select the the display logic such that it will show if the quota for the option is not met.
- Once all options have the display logic, check the "Force Response" option from the right panel. Next, select custom validation option right under it.
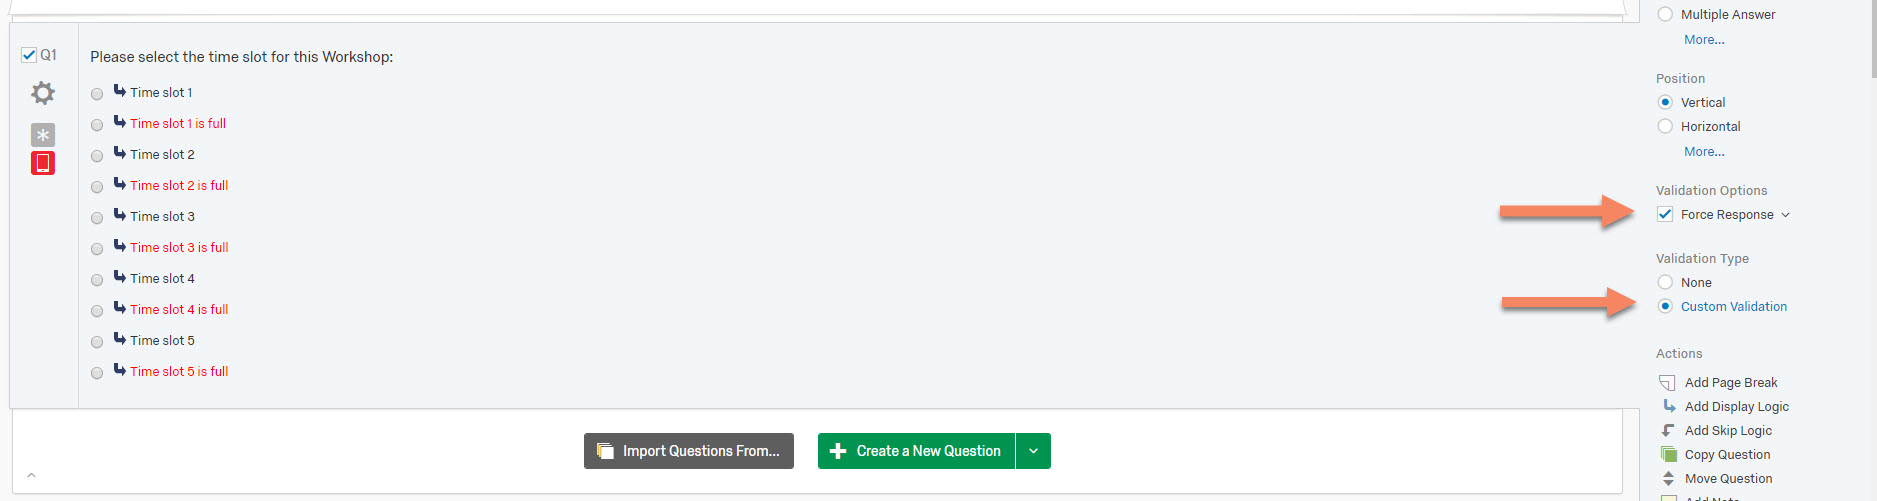 Location of the two validation options
 - In the custom validation dialog box, add the criteria for validation such that it passes only if the time slots are selected and not if the error message is. This will prevent anyone from selecting a full time slot. Add an error message through the options as shown below.
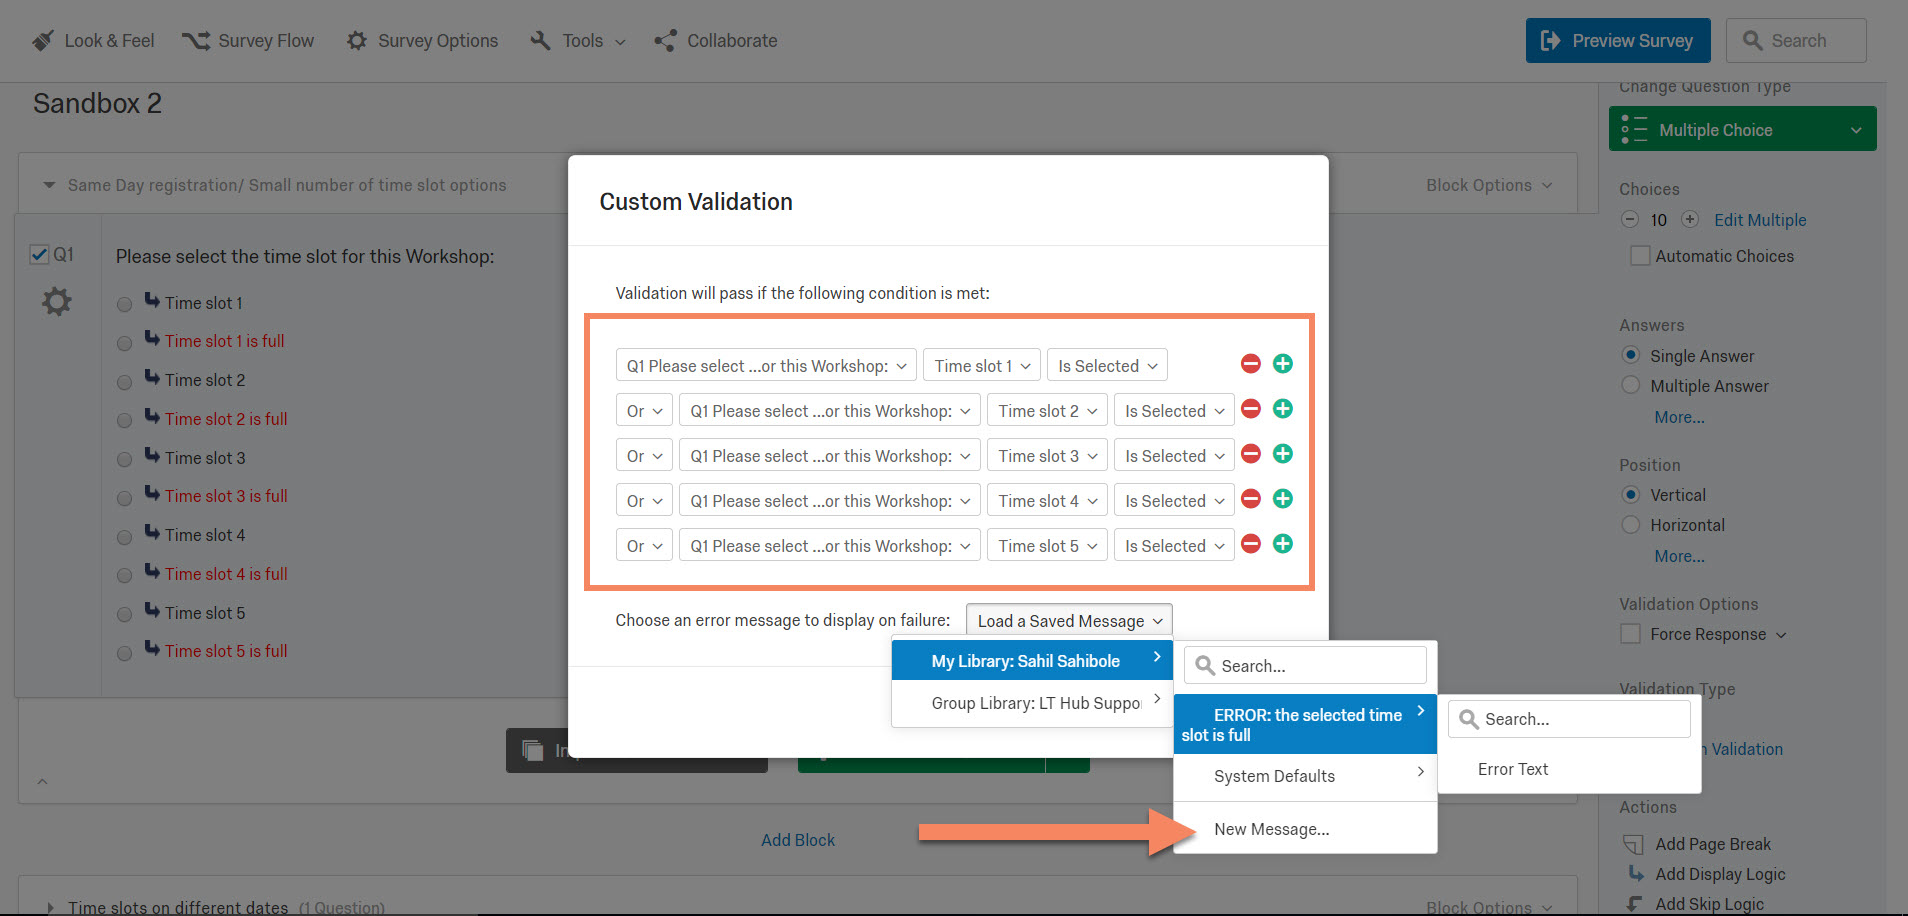 The selected options will prevent a user from proceeding until one of the time slots is selected. Error Messages will have to be edited by entering the Library.
 - Preview the survey to check if it works as intended


A preview of the customized Error Message when a filled slot is selected.