Documentation:Kaltura/Getting Started
Before you begin using Kaltura (UBC Video Share) in Connect you must first activate its modules and tools. In some cases, these may already have been activated. The Getting Started section will show you how to:
- Activate the ‘My Media’ and ‘Shared Media Repository’ Module
- Activate the ‘Course Media Gallery’ Module
- Enable Kaltura (UBC Video Share)Tools
- Add a menu link to the Course Media Gallery
Kaltura (UBC Video Share) in Connect is a powerful tool that allows instructors and students to record, upload and share video. To avail of this toolset it must first be activated and enabled within Connect. Please view the video guide on how to activate the ‘My Media’ and ‘Shared Media Repository’ modules for Kaltura (UBC Video Share) in Connect.
Video Tutorial
'My Media' is your personal video gallery in Connect. It allows you to upload, manage, and share content (based on permissions) within Connect.
The ‘Shared Media Repository’ allows instructors to easily share content with each other and the larger UBC community by making their media public in the searchable Faculty Repository. The repository also allows faculty to use media content for their courses. Adding these modules will provide you with direct access to your video resources from your ‘My Connect’ dashboard.
| Quicksteps |
|
|---|
Step by Step Guide
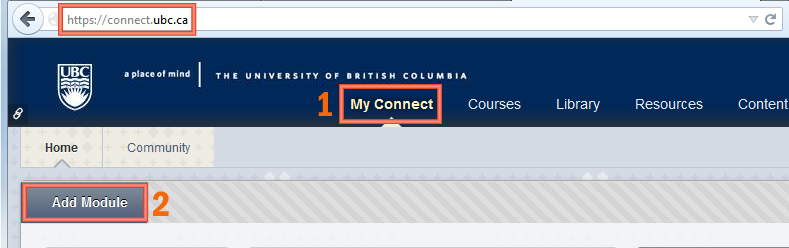
- Login to Connect and select the ‘My Connect’ (1) menu item followed by the ‘Add Module’ (2) button.
- From within the Add Module section, go to the Search area (3) and enter the keyword ‘Media’. A search for ‘Media’ will display the available modules (Figure 2).
- Select the ‘Add’ button beside the ‘My Media’ and ‘Shared Media Repository’ modules (4). Optionally, you can also add the ‘My Media Upload Instructions’ module if it is available to you. Click the ‘Ok’ button (5) to confirm. This will return you to the ‘My Connect’ dashboard (Figure 3).

| Note
DO NOT add the ‘Course Media’ module at this point as you are in ‘My Connect’ and not within a Course. The ‘Course Media’ module will only function from within a course. |
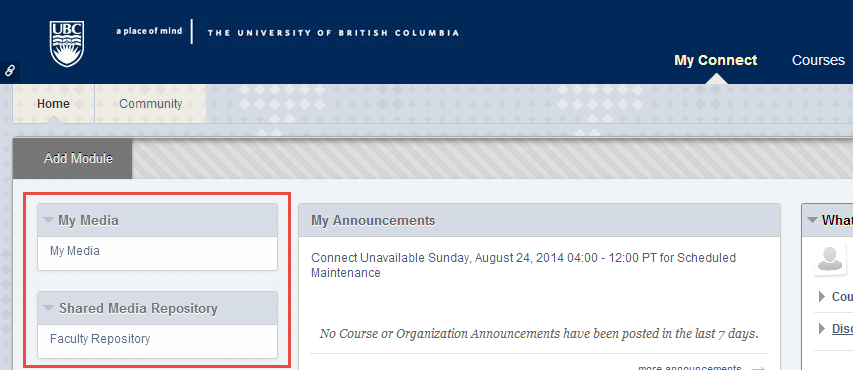
The modules you have just added will now appear on the ‘My Connect’ dashboard (Figure 3).
Activate the Course Media Gallery Module
The Course Media Gallery (or Course Gallery) is a course tool allowing the members of a course to view videos contributed by the instructor and students enrolled in the course. The instructor and the students can contribute videos from their personal library (My Media) to the Course Gallery. The instructor is the only one who can directly publish videos to the Course Gallery: videos contributed by students need to be approved and made visible by the instructor. In order to activate this tool in a course, you must be the instructor.
You may notice different names used to describe the Course Media Gallery.
- Course Media module – when added, displays a module block on the course homepage called ‘Course Media’ (Figure 7). This functions as a window / access point to the Course Gallery.
- Course Gallery – is a course tool to view videos contributed by the instructor and students enrolled in a course. The Course Gallery can be accessed from the Course Media tile or from a link created in the course navigation pane.
See the ‘Add Link to Course Media Gallery’ section below for further information.
| Quicksteps |
|
|---|
Step by Step Guide
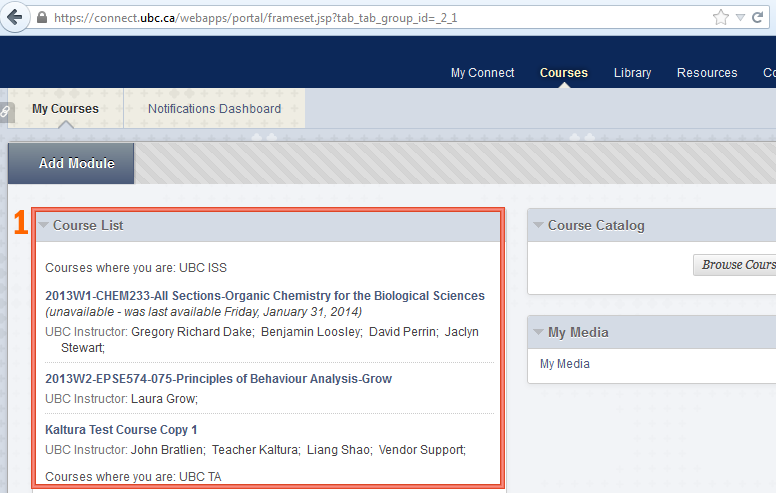
- To begin, select a course from the Course List (1) in Connect (Figure 4). Please note you must have Instructor permissions for this course to add the Course Gallery.
- From the course homepage, select the ‘Add Course Module’ button (2) (Figure 5).
- This will open the Add Module page for the chosen course (Figure 6). Using the Search box (3), enter the keyword ‘Media’ and perform a search. The Search Results for ‘Media’ will display the available modules (Figure 6).
- Select the ‘Add’ button (4) for ‘Course Media’ along with any other modules you wish to access from the course dashboard (Figure 6). Click ‘OK’ (5) to save your choices.
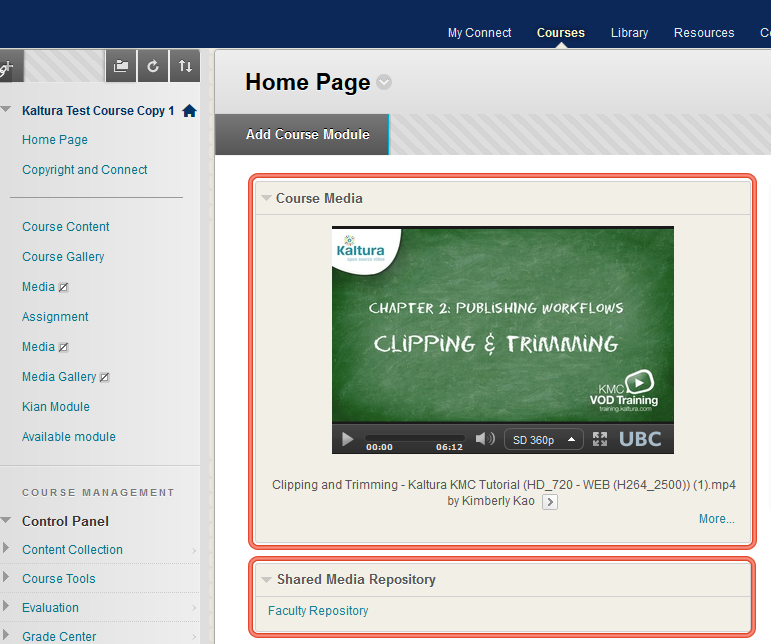
- The Course Media module along with any other modules you selected will be visible to you from the course Homepage (Figure 7). A featured video will be visible in the ‘Course Media’ module only if a video placed in the Course Gallery has been set as a feature video. To set a video as a feature video see ‘Featured Videos’ for more information.


| Note
Please note that you will also have the option of adding the ‘My Media’ and the ‘Shared Media Repository’ modules. Adding these modules will make these available directly from your course dashboard. They will not be accessible or visible to students. |
| Note
Selecting ‘More…’ located in the bottom right corner of the ‘Course Media’ module on the course dashboard will take you to the Course Gallery. In the Course Gallery you can upload or record media as well as view video uploaded by the course instructors or students. Videos uploaded by students must first be approved by an instructor before they become visible to everyone in the Course Gallery. |
In Figure 7 you can see both the Course Media and Shared Media Repository modules.