Documentation:Blackboard Collaborate/Voice Authoring/Create a Voice Podcast (How to)
Voice Podcaster is a tool for creating audio recording series for your lectures and or other materials. Students can conveniently subscribe to your podcasts and receive the latest lecture conveniently from their computer, tablet or mobile device (such as cellphones, iPods, etc). An excellent way to use this is for lectures that do not have a video recording, but have voice recordings.
This document will show you how to:
- Add voice files through a recording or pre-recorded file.
- Delete a voice post on the Voice Podcaster application.
- Amend any posts you have on the Voice Podcaster application.
- Export your content
- Subscribe to a Podcast with iTunes
Video
This video gives a brief overview of the functions on Voice Podcaster.
Effective Practices
- Add a description to your podcast episodes to help students quickly locate the content they need.
- For reading-heavy courses, use podcasts to create regular weekly recordings to introduce the current topic for discussion.
- You can select the quality that the audio will be recorded in. Lower quality audio recordings will create smaller file sizes. Helpful for students who have slow Internet connections.
Add content
| You will need to create a Tool Link in a content area. Please refer to Creating a Tool Link (How to). |
Recording live content
- Go into Voice Podcaster via the content item. Give permission to Java and Quicktime should your browser prompt you.
- Select new
 to create a new post, a compose window will appear.
 - Fill in the subject field with the appropriate subject of the recording.
- Fill out the the description box, which is the white space below the audio controls with several sentences describing the content of the recording.
- To record message, use these buttons to record (
 ) , pause (
 ), play (
 ), and stop (
 ). To re-record press the record button again.
- For Audio Options, click small box with stripes.


Upload pre-recorded content
- Select the Import button
 at the top toolbar. A file chooser will appear.
 - Choose the desired file in the file chooser, and click ok to begin uploading.
- After the upload is complete, Voice Podcaster automatically creates a title for the content, based on the file name.
- If you would like to modify the name and the description, follow the steps in Amend file descriptions and names section below.

Keep in mind when importing, a large file can take a very long time to process and upload. |
Amend file descriptions and names
- Enter the Voice Podcaster application from the link on the Content Area page.
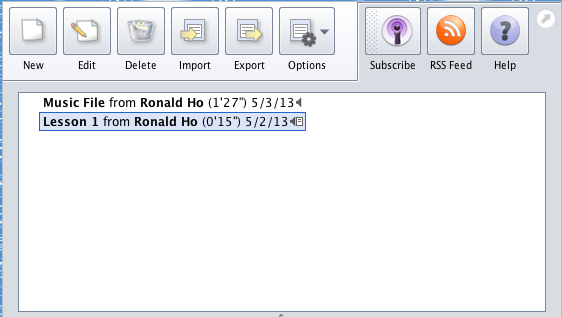
- In the file listing, below the row of buttons at the top, select the appropriate file you wish to amend.
- Click the edit button
 at the top of the screen.
 - Change the appropriate fields, or add to your recording if you wish.
- Click Post to finish.

Delete content
- Enter the Voice Podcaster application from the link on the Content Area page.
- In the file listing, below the row of buttons at the top, select the appropriate file you wish to delete.
- Click the delete button at the top of the screen.
- Confirm your action by selecting yes. Otherwise, select no to cancel and return to the Voice Podcaster application.

Other Functionality
Export
The Export functionality allows you to export your Voice Board files for archival or backup purposes. Voice Board allows you to choose what exactly you want to export, and into what formats you would like to export in.
- Click the Export button
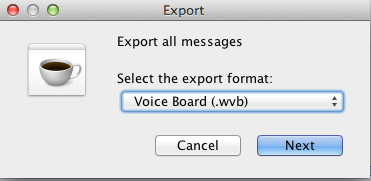
 in the top toolbar. A popup will appear, allowing you to select options for exporting your content.
 - In the drop-down menu (below Select the export format), select which format you would like to export your messages in. If you export in Voice Board (.wvb) format, it will create a file that is compatible with Voice Board or Podcaster only. You may also choose to export it into Speex, MP3, or Wav. Those formats will be downloaded in an archive file, which you have to expand the contents prior to use.
- Click next. A file prompt will appear for you to select where to save the file to your computer.

Options

- Play on click: By selecting this option, the podcasts will not play until you select them.
- Continuous Play: By selecting this option, the podcasts will continuously play until you press Pause or Stop.
Subscribe

Users can subscribe to your Podcasts, which will download into iTunes. This allows users to listen to the podcasts and to obtain new recordings you posted automatically without logging into Connect. This is also a great option should they have mobile devices such as iPhones, iPods or iPads. Simply click on the Subscribe button to get subscribed. Requires iTunes for this functionality.
RSS Feed

Users can subscribe to your podcasts through an RSS Feed instead. This is an alternative to the Subscribe option described above.